Updated on June 23, 2026
Python is one of today’s most popular programming languages, and Django is a free, open-source web development platform for Python. Django is a versatile tool for web development that can be used to build almost any website or app.
In this article, I will explain how to integrate a Dialogflow chatbot into a Django website.
If you don’t have a Dialogflow chatbot, here is a step-by-step tutorial on how to build your chatbot. However, Dialogflow has its limitations. It doesn’t provide the UI we need for chat conversations.
Since we are not in the 1980s now, we need a front end, not a dull dark command line UI for non-tech guys, to offer a chatbot that resonates well and is user-friendly to the user.
So, we are integrating Dialogflow with Kommunicate, where you will get a pre-built UI for the chat widget and admin dashboard.

Bonus: How to Add AI Chatbot in Flask and Python website
Check the video below on how you can create a Chatbot in Django:
If you don’t have a Kommunicate account, please sign up here and start your free trial to proceed further.
The article is divided into two parts for easy comprehension.
- Integrating the Dialogflow bot with Kommunicate
- Integrate Kommunicate with Django framework
Enhance support workflows, accelerate resolutions, and boost efficiency with AI-powered email ticketing from KommunicatePart 1: Integrate Dialogflow with Kommunicate
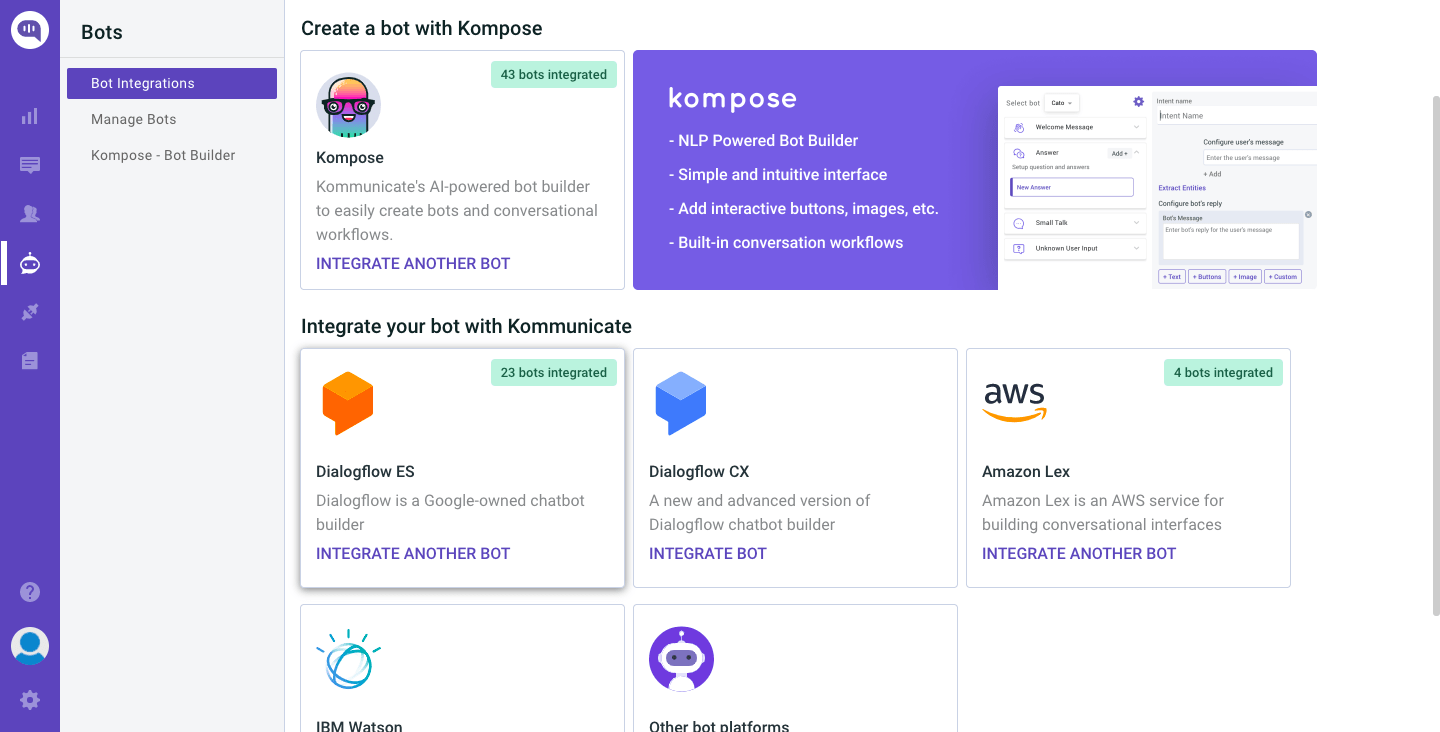
To integrate your Dialogflow bot in Kommunicate, log in to your Kommunicate dashboard and navigate to the bot integrations section. If you do not have an account, you can create one here. Locate the Dialogflow section and click on Integrate Bot.
Now, navigate to your Dialogflow console and download the service account key file. Here are the steps to locate the file:
- Open Dialogflow agent settings by clicking on the settings icon
- Click on the Google Cloud link from the Google Project bar.
- On the Google Cloud page, navigate to the Credentials section by clicking on APIs & services.
- Under the Credentials section, find the Service Account and click Edit for Dialogflow integrations.
- On the bottom of the screen, click the ADD KEY button and Create a Key option to download a JSON key.
- Now upload the Key file to the Kommunicate dashboard.
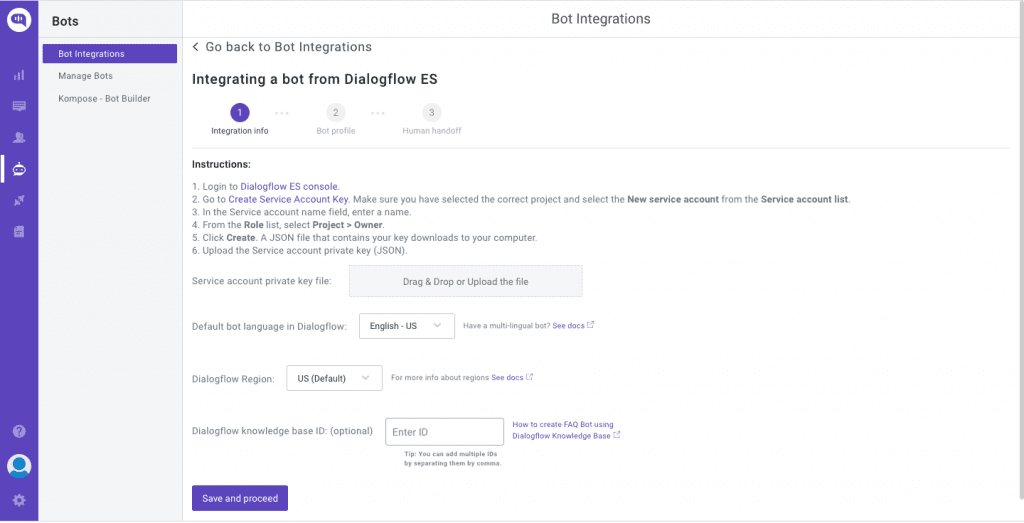
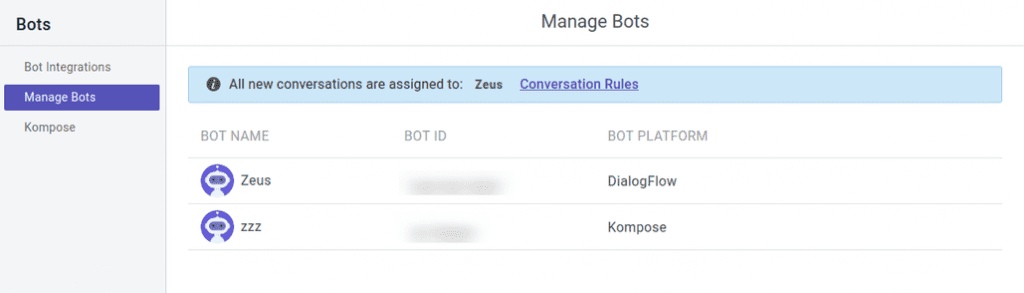
Complete the setup by giving the bot a name and enable/disable the bot to human handoff in the final step, and then you can check and test your newly developed bot in two places:
- Dashboard →Bot Integration → Manage Bots: You can check all your integrated bots here
- Dashboard → Bot Integration: Your Dialogflow icon should be green with the number of bots you have successfully integrated.

Part 2: Integrate Kommunicate with the Django framework
Now that we have our Dialogflow chatbot and its user interface, we can integrate it with the Django web framework. After creating a Django project, there are two possible ways to add the kommunicate script code to the HTML template that you have created.
- Copy the javascript code from the Kommunicate dashboard and paste it just above the closing body tag (</body>) on your HTML page.
<h1>Hello, World!</h1>
<body>
<script type="text/javascript">
    (function(d, m){
        var kommunicateSettings =
            {"appId":"kommunicate-support","popupWidget":true,"automaticChatOpenOnNavigation":true};
        var s = document.createElement("script"); s.type = "text/javascript"; s.async = true;
        s.src = "https://widget.kommunicate.io/v2/kommunicate.app";
        var h = document.getElementsByTagName("head")[0]; h.appendChild(s);
        window.kommunicate = m; m._globals = kommunicateSettings;
    })(document, window.kommunicate || {});
/* NOTE: Use webserver to view HTML files as the real-time update will not work if you directly open the HTML file in the browser. */
</script>
</body>
2. Define the STATIC_URL in the settings.py file as given below and load the file directly in the template
STATIC_URL = '/static/'
Load static files in the templates by using the below expression
1 {% load static %}In your project, first create a “static” directory and store the files within it. Create the js file in the static directory and add the Kommunicate script to the js file you generated.
Your HTML template should look something like this
<!DOCTYPE html>
<html lang="en">
<head>
    <meta charset="UTF-8">
    <title>Index</title>
     {% load static %}
    <script src="{% static '/JS/script.js' %}" type="text/javascript"></script>
</head>
<body>
    <h1>Hello, World!</h1>
</body>
</html>
Your Script.js file should look something like this
(Note: replace APP-ID with your APP ID mentioned in the install section)
(function(d, m){
    var kommunicateSettings =
        {"appId":"APP-ID","popupWidget":true,"automaticChatOpenOnNavigation":true};
    var s = document.createElement("script"); s.type = "text/javascript"; s.async = true;
    s.src = "https://widget.kommunicate.io/v2/kommunicate.app";
    var h = document.getElementsByTagName("head")[0]; h.appendChild(s);
    window.kommunicate = m; m._globals = kommunicateSettings;
})(document, window.kommunicate || {});
Use the following command to start your website with the newly installed Dialogflow bot.
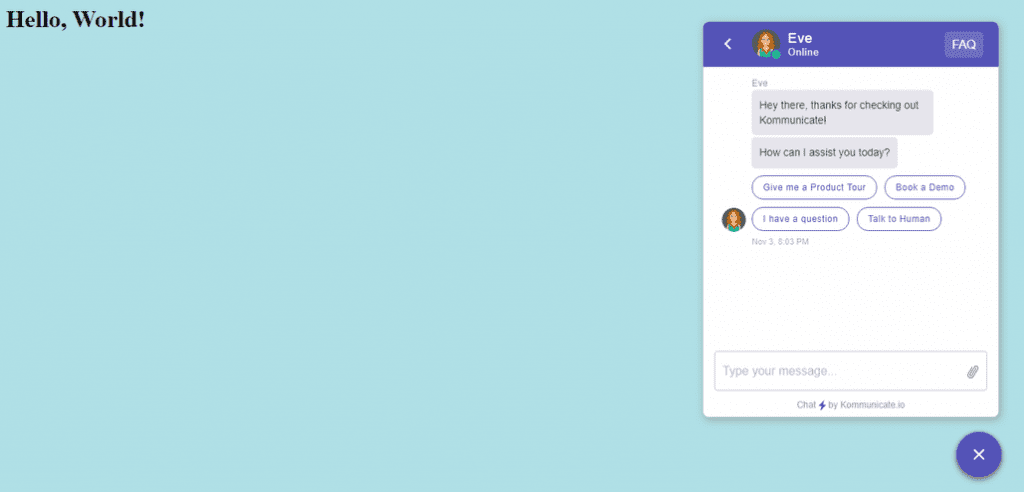
1 python manage.py runserverVoila! You have now integrated a Dialogflow bot into your Django website. This is how the chat widget looks on a website:
Suggested Read: Integrate Dialogflow with NodeJS
Suggested Read: Add Chatbot to Your Express jS Framework
At Kommunicate, we envision a world-beating customer support solution to empower the new era of customer support. We would love to have you on board for a first-hand experience with Kommunicate. You can sign up here and start delighting your customers right away.


