Updated on March 6, 2025
In today’s world, you need to keep your customers happy, with quick resolution of issues and lesser resolution times. If you don’t, you can rest assured that your competitors will.
It is here that tools like Freshdesk come into the picture. In this blog post, we are going to tell you what exactly Freshdesk is, and how you can integrate your favorite chatbot builder, Kommunicate, with it.
What is Freshdesk?
Freshdesk is everyone’s favorite cloud-based customer support software offered by Freshworks, and is part of its Customer Relationship Management (CRM) Suite.
Freshdesk offers some pretty interesting features, including a ticketing system where you can manage all your customer inquiries, aka tickets, through different channels like email, chat, phone, social media etc.
Freshdesk also offers a self service portal, where customers can find answers to FAQs, troubleshoot issues and access relevant resources. There are also a bunch of collaboration tools that help teams work effectively on resolving customer issues.
Now that we know what Freshdesk is, let us now see why you need to integrate Kommunicate with Freshdesk.

Benefits of integrating a chatbot with Freshdesk
The two major areas of impact that integrating a chatbot with Freshdesk will have are:
- Reduce agent workload: Answering FAQs, collecting initial information, routing inquiries, all are repetitive tasks that can be automated with the right AI-powered email ticketing solutions.
- Improved First contact resolution: Chatbots can troubleshoot simple issues, which will reduce the need to further escalate or follow up. This will improve the First Contact Resolution (FCR) Rate.
- Data collection: Chatbots collect valuable data from customers, giving you knowledge as to how customers will behave, what their common issues are, etc. This will help you improve your website services.
- Reduced wait times: Chatbots significantly reduce wait times by quickly addressing basic queries and routing more complex issues to agents. This leads to faster resolution.
- Interactions are Personalized: Based on customer information, chatbots can tailor their responses. This enhances the user experience.
- Self- service options: Through self-service features, chatbots can guide users to relevant resources. Again, here there is a reduction on the reliance on live agents.
Now that you know why integrating Freshdesk with a chatbot is important, let us see how we can achieve this using Kommunicate.
Steps to integrate Freshdesk Ticket with Kommunicate
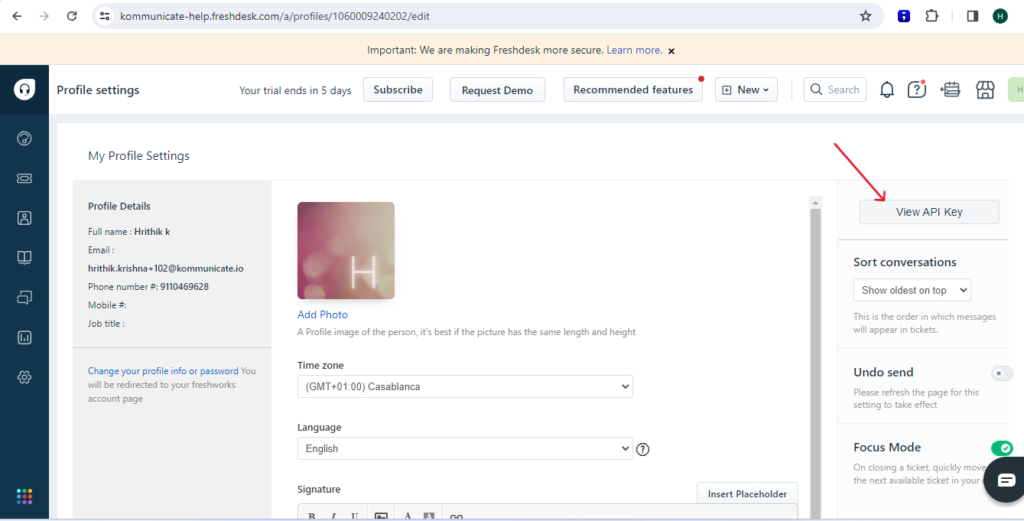
Step 1: Login
Login to your Freshdesk account >> Click on Profile >> Profile settings >> View API Key. Complete the captcha and copy your API key.

Step 2: Create a button
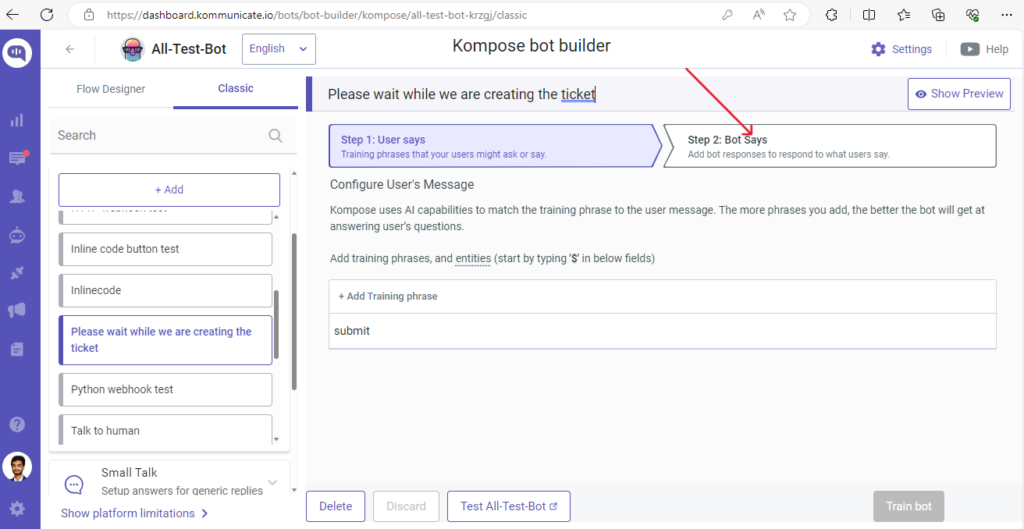
For this example, we have created a button called “Create a support ticket” that displays a form with the fields Email, Subject and Description. When the user fills the form and clicks on Submit an intent with the training phrase Submit is triggered which consists of the inline code to create a Freshdesk ticket.
Login to Kommunicate >> Create a button to display a form >> Create an intent to triggers the Inline code which creates the ticket on Freshdesk.
You can learn how to use the form from here and you can learn how to use the inline code from here.
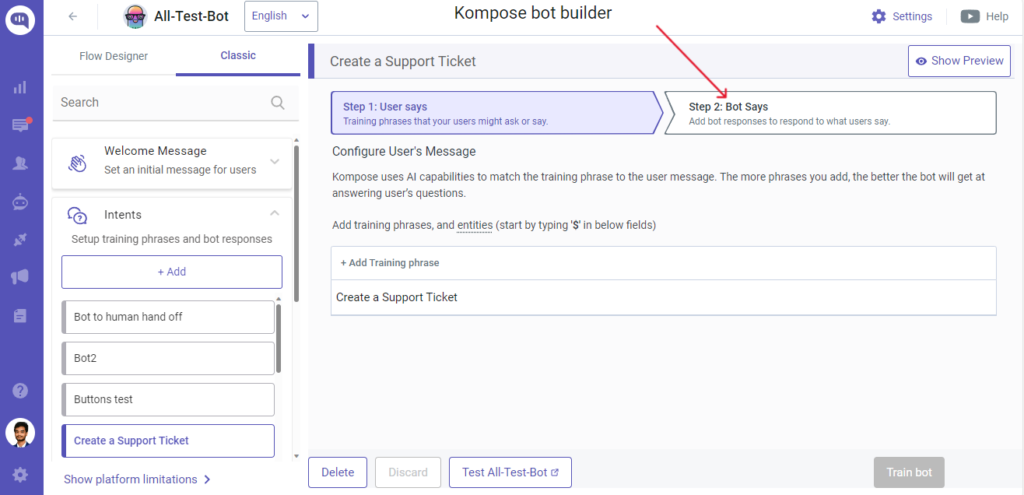
Step 3: Add the form payload
You can follow the below steps to add the form payload. Navigate to the “Bot Says” section as shown below:
Now, click on the “More” dropdown and click on “Custom”
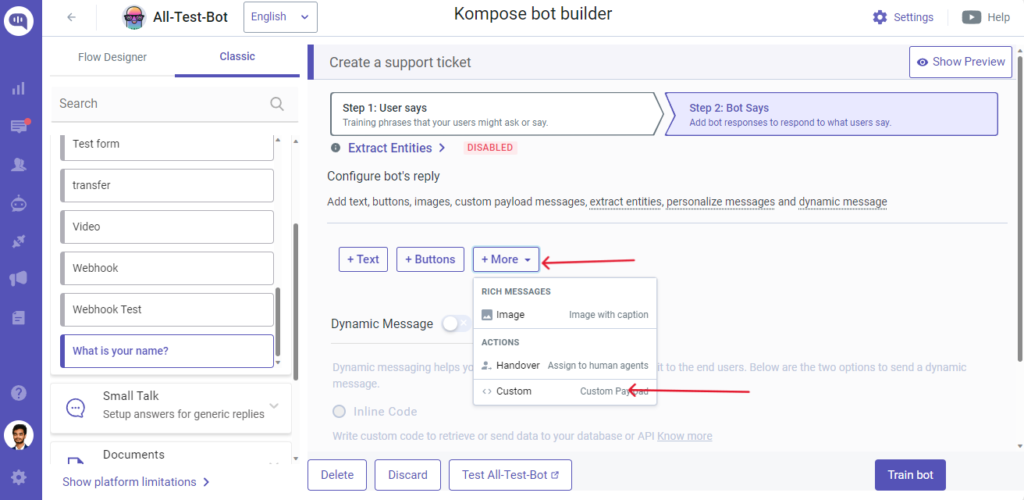
Finally, you get the screen where you can add the Custom Payload.

This is the custom payload we have used for this example.
| { “message”: “Please enter the following details”, “platform”: “kommunicate”, “metadata”: { “contentType”: “300”, “templateId”: “12”, “payload”: [ { “type”: “text”, “data”: { “label”: “Email”, “placeholder”: “Please enter your Email” } }, { “type”: “text”, “data”: { “label”: “Subject”, “placeholder”: “Enter the subject for the ticket” } }, { “type”: “text”, “data”: { “label”: “Description”, “placeholder”: “Briefly explain the issue” } }, { “type”: “submit”, “data”: { “action”: { “message”: “submit”, “postFormDataAsMessage”: “false”, “postBackToBotPlatform”: “false”, “requestType”: “postBackToBotPlatform” }, “type”: “submit”, “name”: “Submit” } } ] } } |
Step 4: Add the inline code
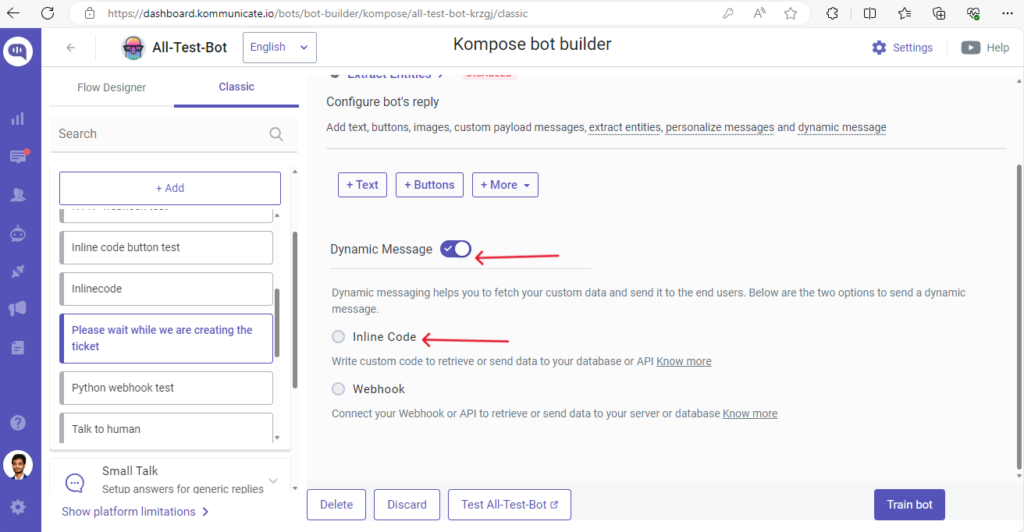
To add the inline code, first click on the “Bot says” tab in Kompose bot builder as shown below.
Toggle the “Dynamic message” section and click on the Inline code option, as shown below.
This is how your inline code looks like:
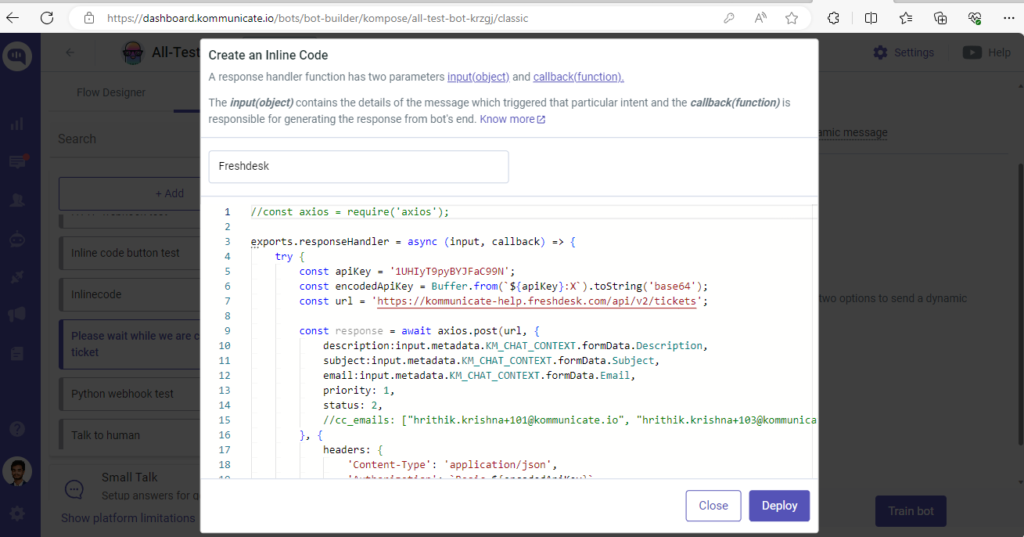
The inline code that we have used in this example is listed below:
| exports.responseHandler = async (input, callback) => { try { const apiKey = ‘Your_Freshdesk_Api_Key’; const encodedApiKey = Buffer.from(`${apiKey}:X`).toString(‘base64’); const url = ‘https://Your_Freshdesk_Domain.freshdesk.com/api/v2/tickets’; const response = await axios.post(url, { description:input.metadata.KM_CHAT_CONTEXT.formData.Description, subject:input.metadata.KM_CHAT_CONTEXT.formData.Subject, email:input.metadata.KM_CHAT_CONTEXT.formData.Email, priority: 1, status: 2, }, { headers: { ‘Content-Type’: ‘application/json’, ‘Authorization’: `Basic ${encodedApiKey}` } }); callback([{ “message”: “Ticket created successfully.” }]); } catch (error) { console.error(‘Error creating ticket:’, error); callback([{ “message”: `Please enter a valid Email Id` }]); } }; |
In the above Inline code replace Your_Freshdesk_Api_Key with your Freshdesk API key retrieved in step 1.
Also, replace Your_Freshdesk_Domain with your Freshdesk domain.
In the following code, the description, subject and email are set to the values entered in the form by the user. If you are using a different form you need to change this code to match your fields.
| description:input.metadata.KM_CHAT_CONTEXT.formData.Description, subject:input.metadata.KM_CHAT_CONTEXT.formData.Subject, email:input.metadata.KM_CHAT_CONTEXT.formData.Email, |
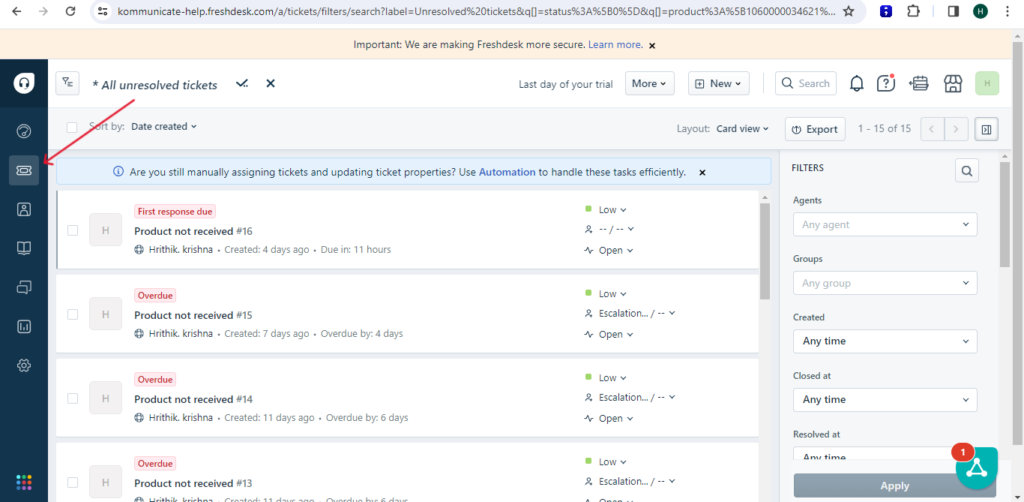
Step 5: Ticket creation on Freshdesk
The tickets are created on Freshdesk under the Tickets section.
And there you have it. You have integrated Freshdesk with your favorite chatbot builder, Kommunicate.
Looking to enhance your email ticketing system with AI automation? Check out this guide on AI-powered email ticketing to streamline customer support and improve efficiency.We have even made a video listing out all the steps. Check it out :
Now go ahead, try out this integration and watch how seamless it is to create Freshdesk tickets.

Adarsh Kumar is the CTO & Co-Founder at Kommunicate. As a seasoned technologist, he brings over 14 years of experience in software development, artificial intelligence, and machine learning to his role. His expertise in building scalable and robust tech solutions has been instrumental in the company’s growth and success.

")


