Updated on January 16, 2025
In today’s digital age, chatbots have become an integral part of customer service. With the rise of social media platforms like Facebook, integrating chatbots with these platforms has become crucial for businesses to provide efficient customer support. One of the most popular chatbot platforms is Amazon Web Services (AWS) Lex, which offers advanced conversational capabilities. In this article, we will discuss how to integrate the AWS Lex V2 chatbot with Facebook using Kommunicate.
Kommunicate is a modern customer support tool that offers a wide range of features. This includes chatbots, live chat, and help desk integration. Kommunicate allows businesses to build powerful chatbots without writing any code. Businesses can thus provide customer support on various platforms, including Facebook.
Integrating AWS Lex V2 chatbot with Facebook using Kommunicate requires a few simple steps:
Step 1: Create an AWS Lex bot
To begin with, you need to create an AWS Lex bot. AWS Lex provides a user-friendly interface that allows you to build and test your chatbot. Configure the bot by adding intents, utterances, and slots.
Intents define the types of requests that your chatbot can handle, while utterances are the phrases that users are likely to use to make those requests. Slots are the variables that the chatbot needs to complete the request.
In case you are interested in learning how to build an AWS Lex chatbot, you can refer to this resource:
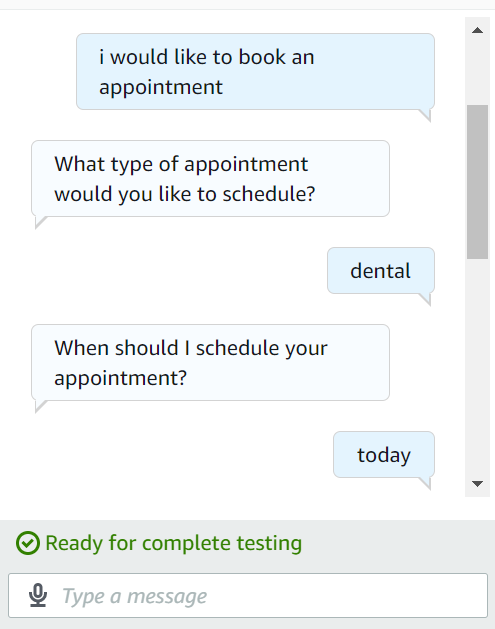
Here we have created an Appointment Booking bot.
Step 2: Create a Facebook Page:
If you don’t already have a Facebook page for your business, create one. This is the page that your chatbot will interact with. Make sure that your Facebook page is published and public so that it can be accessed by your chatbot.
Step 3: Create a Kommunicate Account:
To begin with , create a Kommunicate account by following the registration process that is given on the website. You can use this link to access the signup page.
Step 4: Integrate AWS Lex bot with Kommunicate:
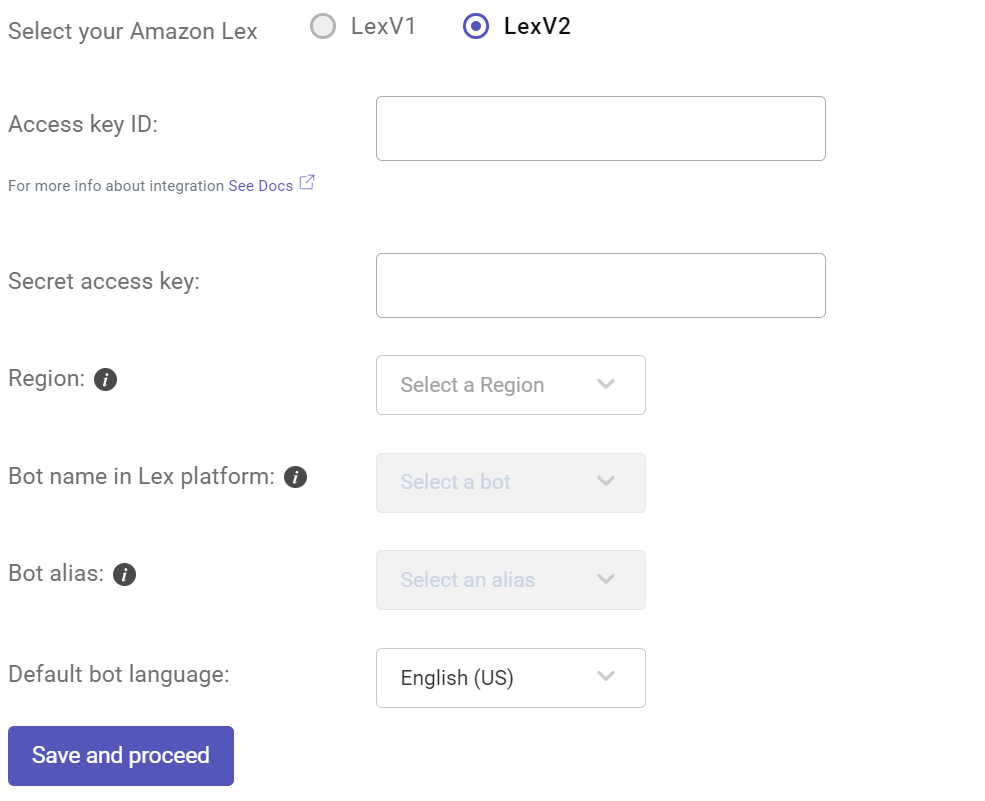
Kommunicate provides a codeless integration with Amazon Lex.
You need the below details to complete the integration. You can get this information from AWS console.
A. Access key ID & Secret access key :
An access key ID and secret access key which you need to sign requests that you make using the AWS SDKs. To get your access key sign into your AWS console as IAM user.
- Open Identity and Access Management (IAM) panel in the same AWS account where Lex bot is present.
- Go to “Access management -> Users”. Create a user by clicking the “Add Users” button. Add a user name eg: “kommunicate-bot”.
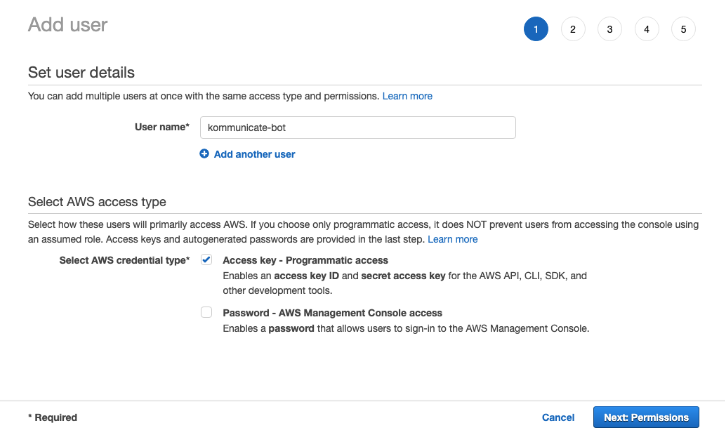
3. Select “AWS credential type” as “Access key – Programmatic access”
4. Click on “Next: Permissions” then expand “Set permissions” panel and click on “Attach existing policies directly”. Select following two permissions: AmazonLexReadOnly & AmazonLexRunBotsOnly
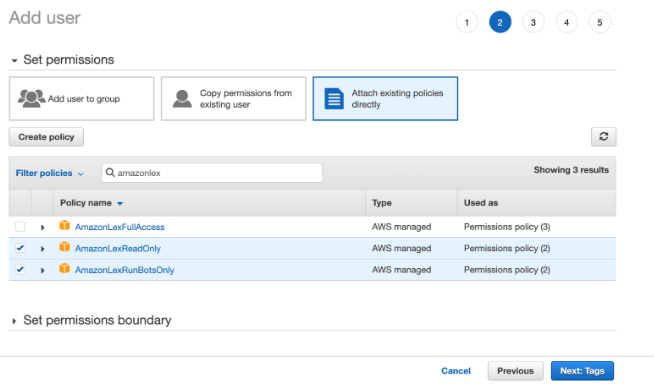
5. Click on “Next: Tags”. Keep it empty and proceed to Next.
6. Here confirm the attached permissions to the user. It should be same as below screenshot and click on “Create user.”
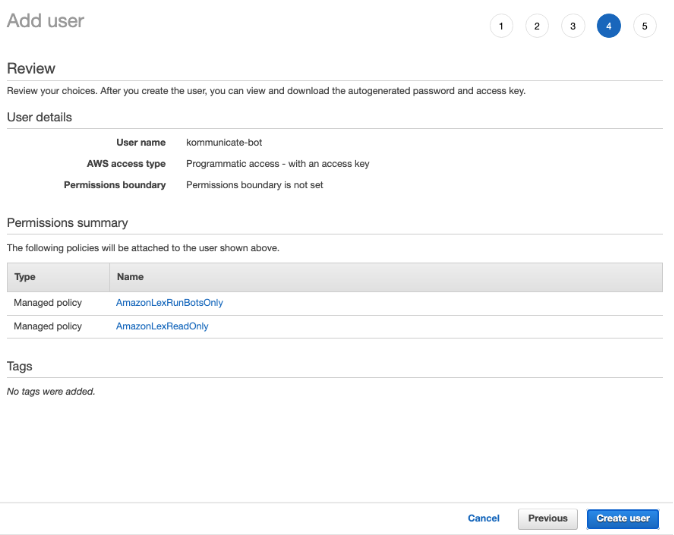
7. Now your user is created, now AWS will give you an option to download Access key id and secret key.
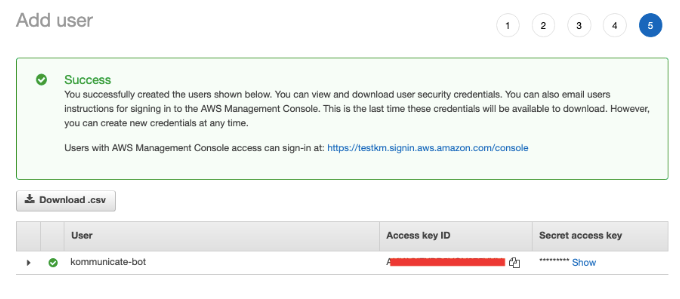
You can use these in Kommunicate bot integration section to integrate the Lex bot.
B. Bot name in Lex platform:
Lex requires a name for your bot when you create it. Once you create the bot, you can also get it from the bot list on Lex home page.
C. Bot alias :
You need to create a bot alias when you publish the bot. It helps you to work with the multiple version of your bot. Update the bot alias in Kommunicate if you want Kommunicate to connect with specific version of the bot.
D. Region :
AWS region where Lex service is running. You can find your region in top-right corner following the user name in AWS console.
Once you have above information follow below steps to integrate the bot with Kommunicate :
- Login to Kommunicate and go to Bot integration section.
- Click the Integrate Bot in Amazon Lex.
- Fill the required detail and click on Save and Proceed. You AWS Lex is successfully integrated with Kommunicate.
Step 5: Integrate Facebook with Kommunicate
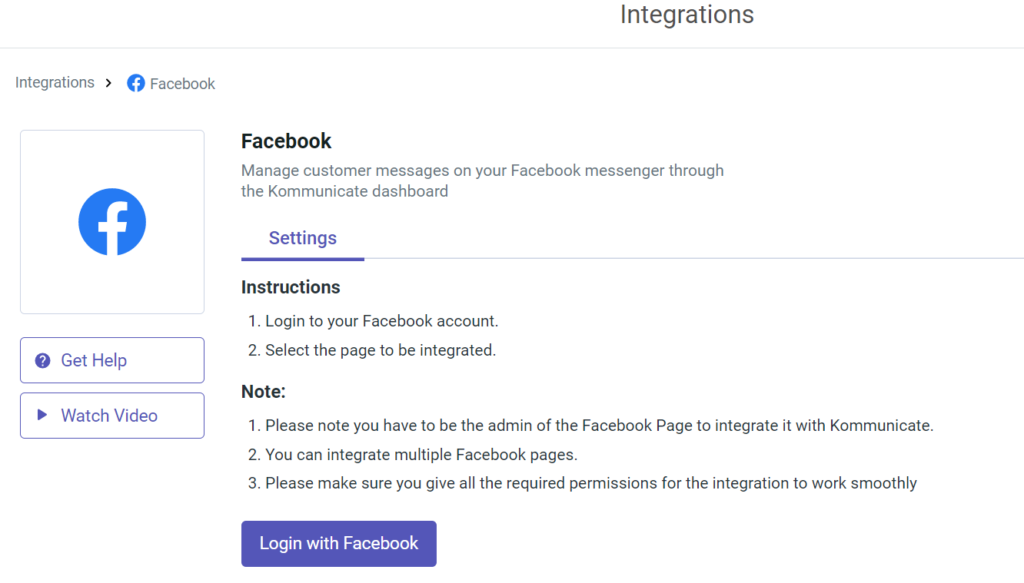
In the Kommunicate dashboard, go to the Integrations tab and select “Facebook” as the channel. Follow the instructions given there to integrate your Facebook page with Kommunicate.
Note:
- Please note you have to be the admin of the Facebook Page to integrate it with Kommunicate.
- You can integrate multiple Facebook pages.
- Please make sure you give all the required permissions for the integration to work smoothly.
Step 6: Assign incoming conversation from Facebook to AWS Lex bots:
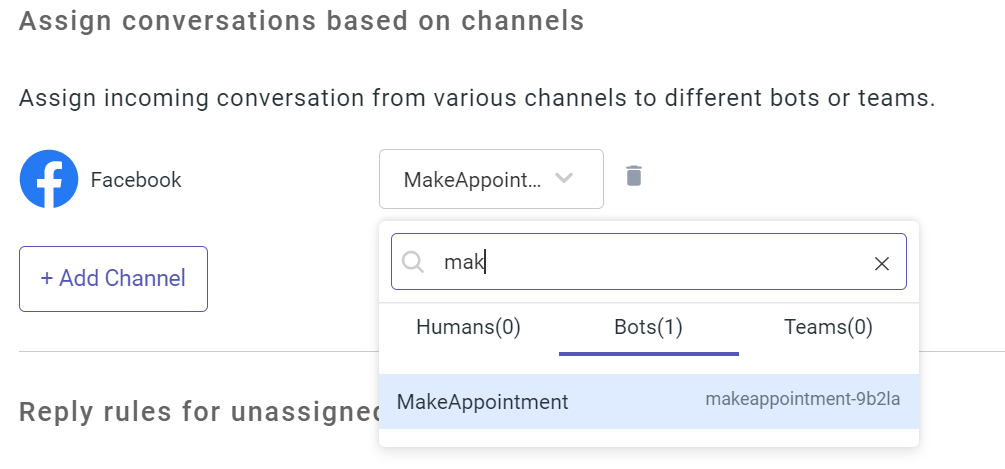
The final step is to assign all incoming conversations from Facebook to your integrated AWS Lex chatbot. To do this, head over to the conversation-rules section in your Kommunicate dashboard and navigate to “Assign conversations based on channels”.
Next, add Facebook by clicking the “Add Channel” button, then choose it from the options provided. From the dropdown menu next to Facebook, select your AWS Lex bot to complete the assignment.
Congratulations! You have successfully integrated your AWS Lex chatbot with Facebook using Kommunicate.
Here’s the Video Tutorial:
Conclusion
Integrating your AWS Lex chatbot with Facebook using Kommunicate can help you engage with your customers effectively. Follow the steps outlined above to integrate your chatbot with Facebook and start reaping the benefits of this powerful integration.
At Kommunicate, we envision a world-beating customer support solution to empower the new era of customer support. We would love to have you on board to have a first-hand experience of Kommunicate. You can signup here and start delighting your customers right away.


