Updated on May 10, 2024
The advent of AI has made voice-enabled chatbots and voice assistants part of our lives. Imagine the likes of Siris and Google Assistants for your phones, Alexa and Google Home for your house. These aforementioned systems are nothing but voice-enabled chatbots.
We have extensively discussed building text based-chatbots and integrating them on your websites. In this post, we will be discussing how to make a voice-enabled chatbot.
Bonus: Do you want to build chatbot without any coding?
Learn more about Chatbot Builder
Step by step guide to making a voice- chatbot
Pre-requisites
We will be using these tools to build the voice chatbot:
- Jovo CLI,
- Jovo Debugger,
- Dialogflow,
- Google Assistant.
Install Jovo
Install Jovo in your system by this command:
$ npm install -g jovo-cli
# Add sudo if you run into permission problems
$ sudo npm install -g jovo-cli
Let’s create a new project
$ jovo new <directory>
We will be using a simple example of a HelloWorld project to start with. Just enter the directory name as “HelloWorld”.
Configuration
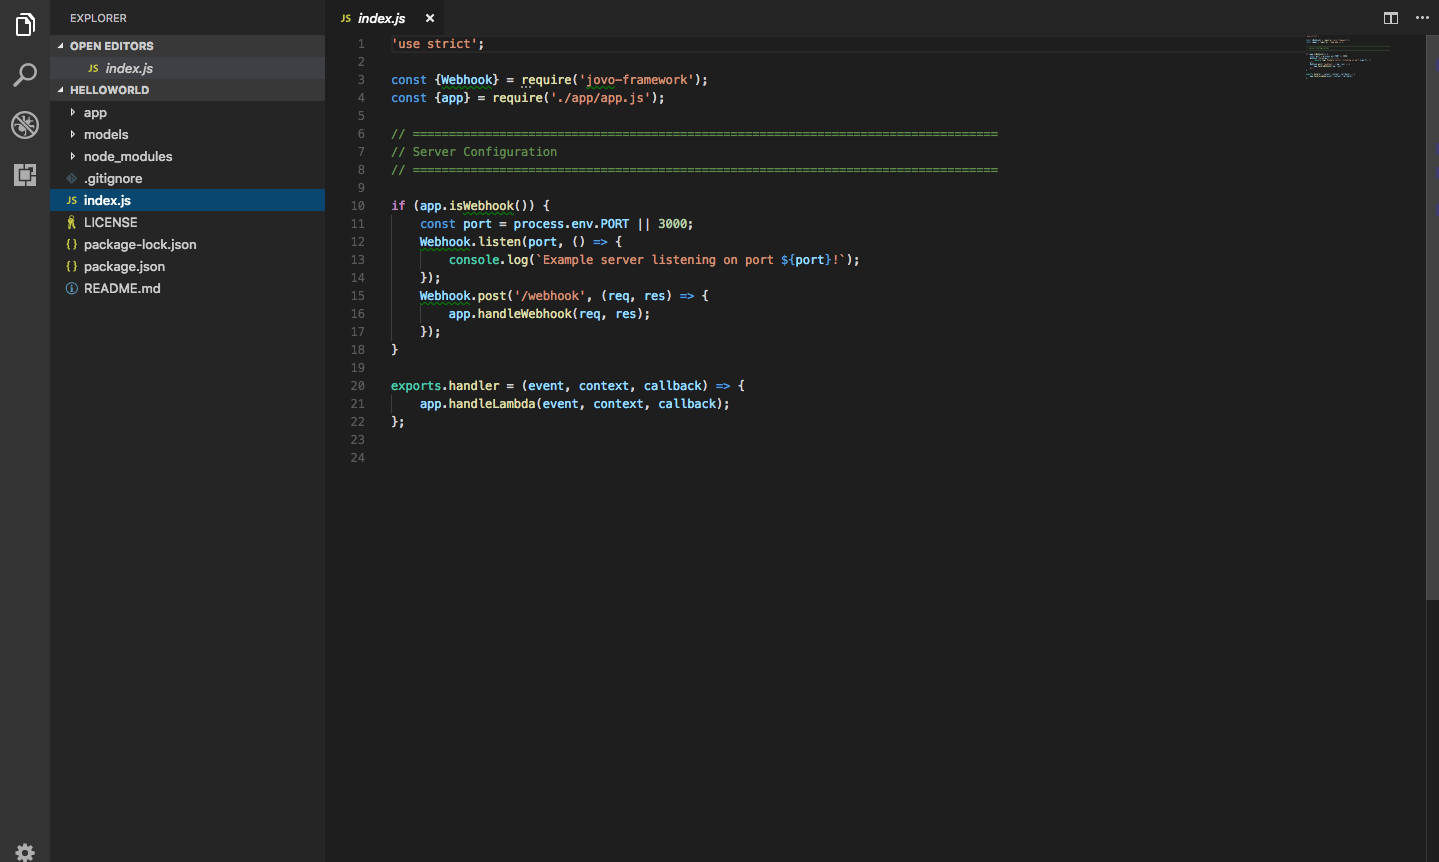
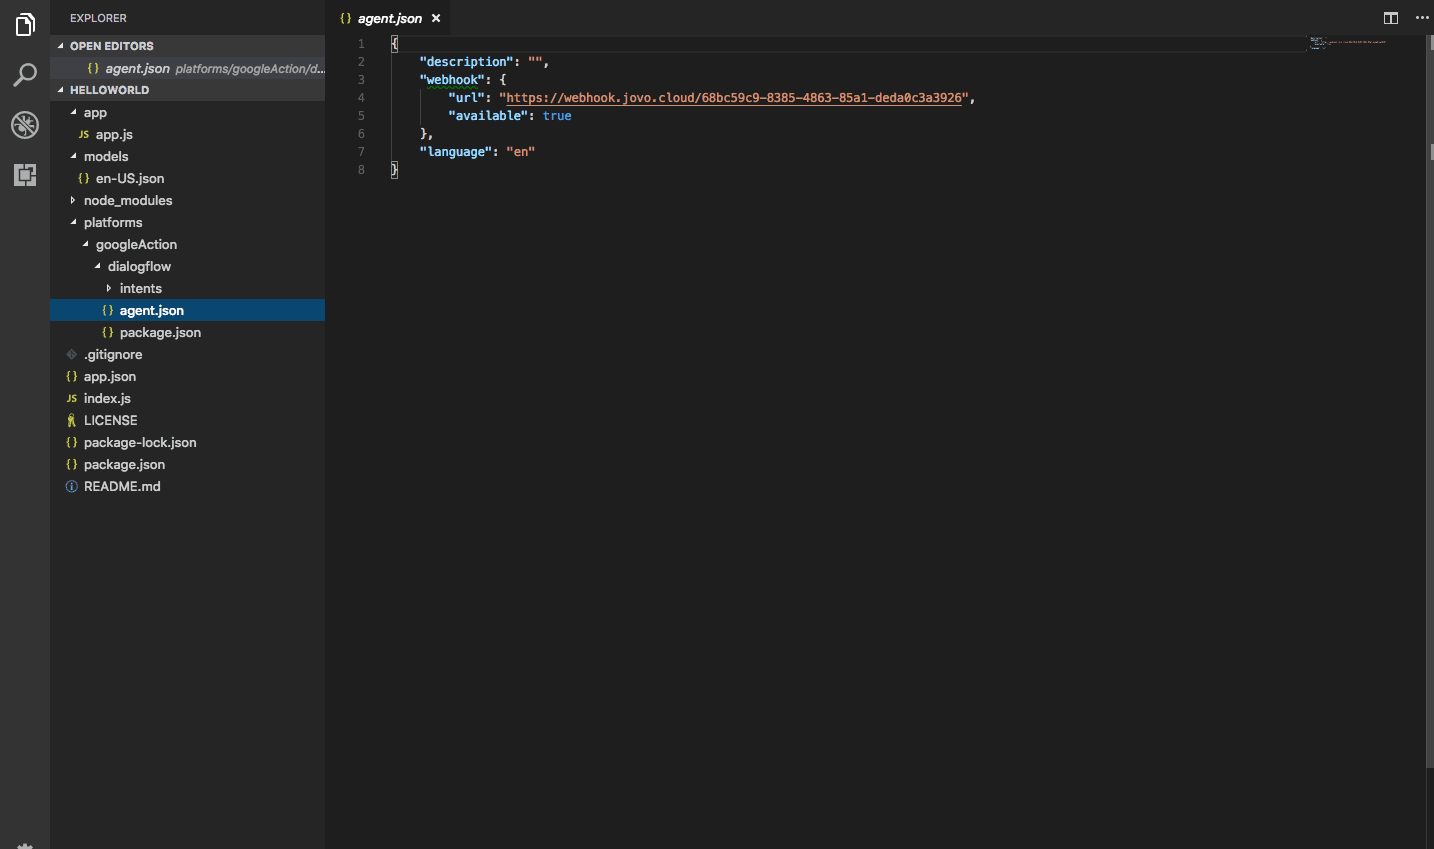
Open your HelloWorld project in Visual Studio code editor. We will be using Webhook for local development. You can check the server configuration in the Index.js file.
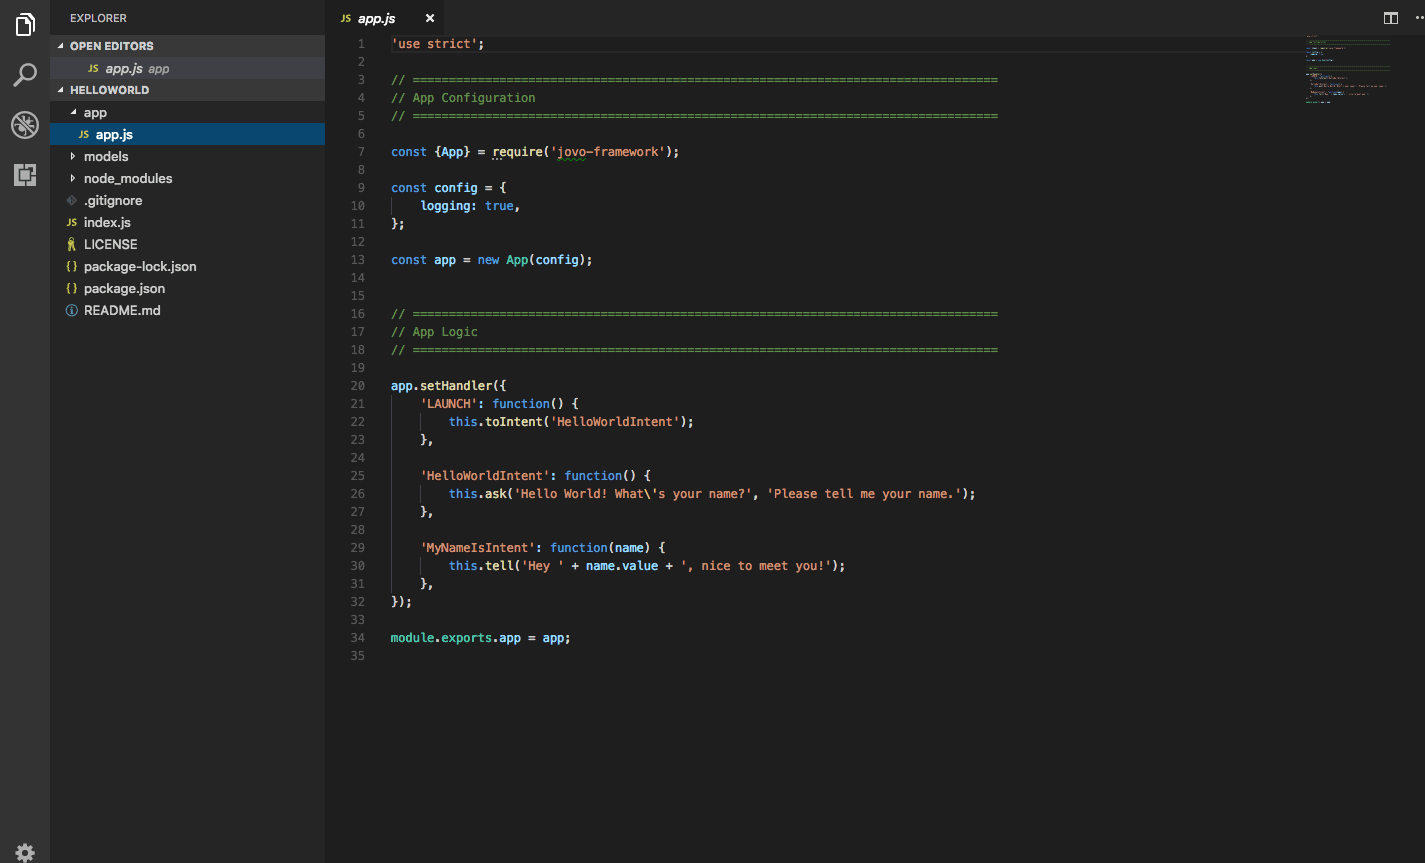
You can understand the app logic, intents, and configuration by scanning through the app.js file.
Intents are your triggers to perform certain actions on the launch, initialization, and replies. You can find some basic intents set up in the handler, “LAUNCH”, “HelloWorldIntent” and “MyNameIsIntent” in the app.js file.
Jovo’s V2 framework project contains the ‘models’ folder and it has an en-US.json file. This file contains the language model. The language model gives the structure to create platform-specific models, which can be used to pass on the data to NLU platforms, such as Dialogflow and Alexa.
It contains generic elements such as intent, input types et cetera, and a few platform-specific elements. You can find more information here.
Creating Dialogflow agent
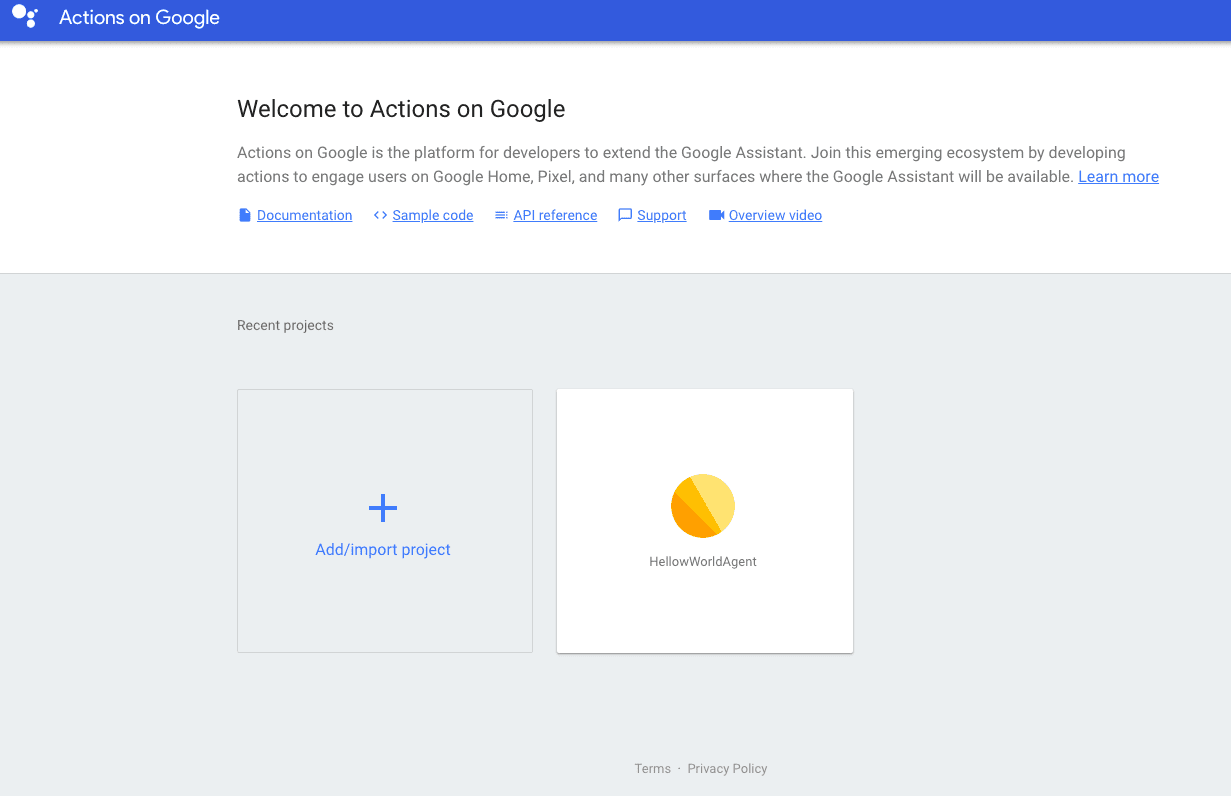
Go to dialogflow.com and click “Go to console” on the upper right.
Now sign in with your Google account. To simplify things, make sure to use the same account that’s registered with your Actions on Google-enabled devices such as Google Home (if possible) for more seamless testing.
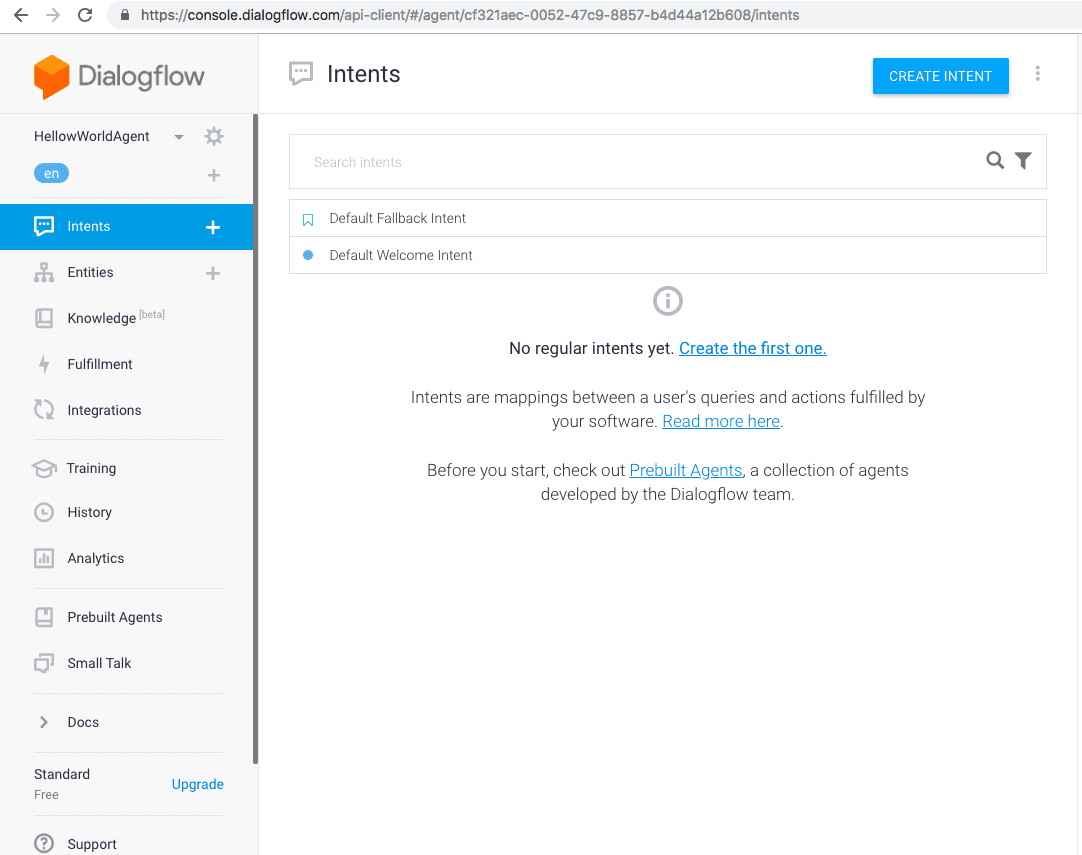
Once you are in the Console and create a new agent by clicking the ”Create Agent ” button.
In Dialogflow, an agent is your NLU module which converts inputs into actionable data. You can name your agent “HelloWorldAgent” and click on “Create button”.
“HellowWorldAgent” agent will be created with two intents, namely “Default Fallback Intent” and “Default Welcome Intent”. These are two basic intent for welcoming and fallback action.
The “Default Welcome Intent” will later be mapped to the Jovo “LAUNCH” intent.
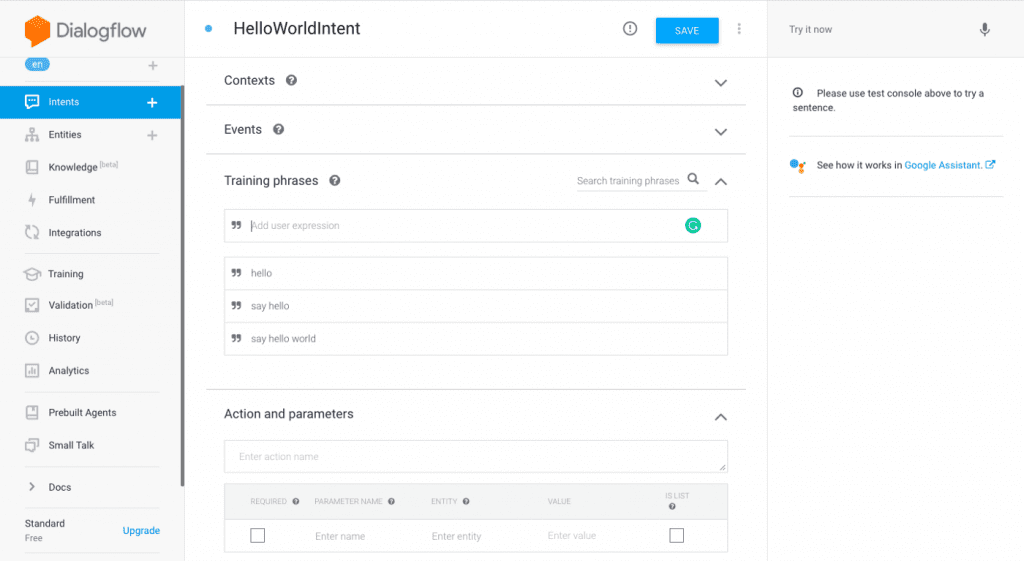
Create an Interaction Model
Let’s create another intent and name it “HelloWorldIntent” and add the following example phrases to the “Training Phrases” tab:
- Hello
- Say hello
- Say hello world
Save the intent and create another one named “MyNameIsIntent”. With this one, we are also going to add example phrases of what the user could say to “Training Phrases” and also add an entity called “name” in the “Action and parameters”.
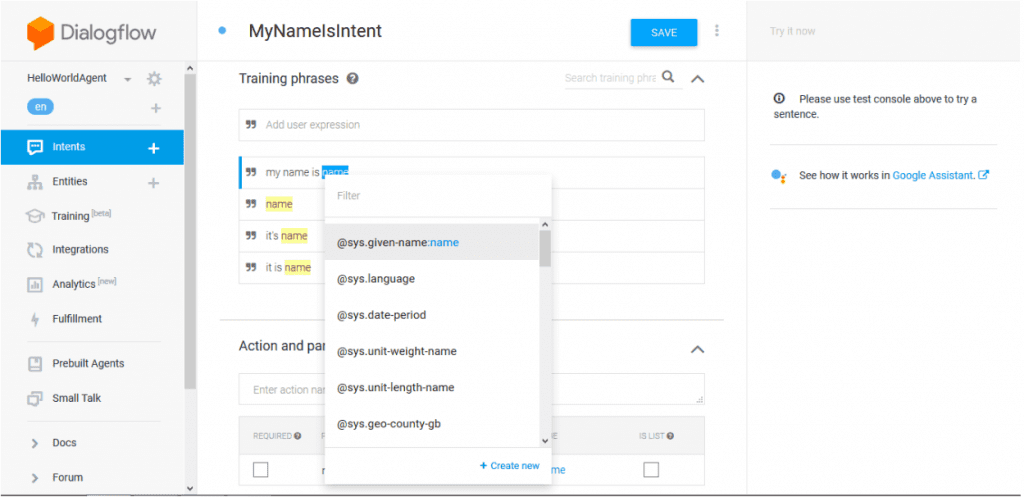
Now we have to map the entity we created to the “Training Phrases” section by selecting the word “name”, which is a placeholder for the actual name, and choosing “@sys.given-name:name”.
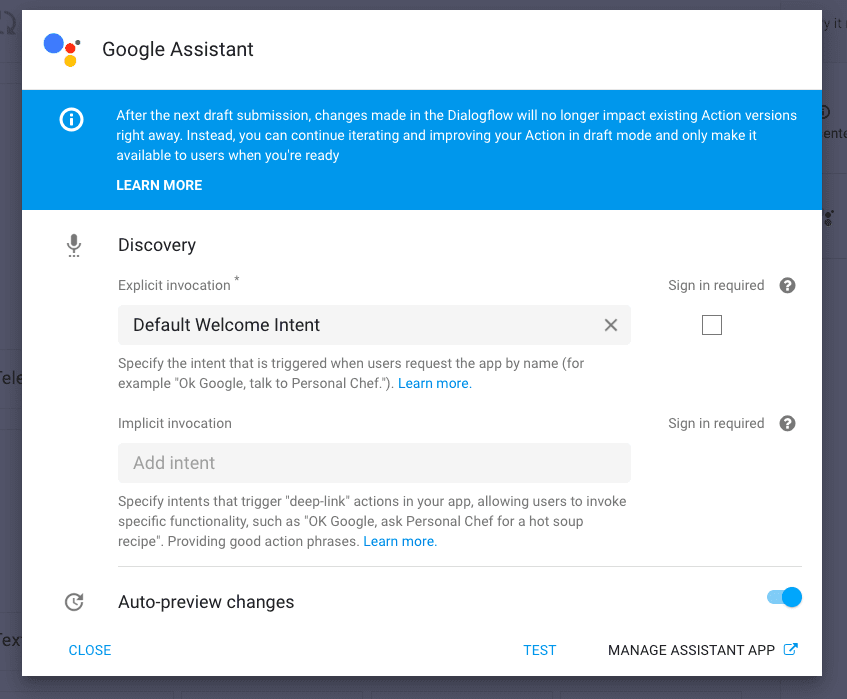
Connect your Agent to a Google Action
Next, we need to integrate with Google Assistant to exchange voice messages with the newly created voice chatbot. Go to Integrations > Google Assistant > Integration Settings and click “Manage Assistant App”.
Run Local Server
Make sure to go into the project directory first.
$ jovo run
This will start the express server. We now need to create a connection to the voice platforms.
Example server listening on port 3000!
This is your webhook URL: https://webhook.jovo.cloud/[your-id
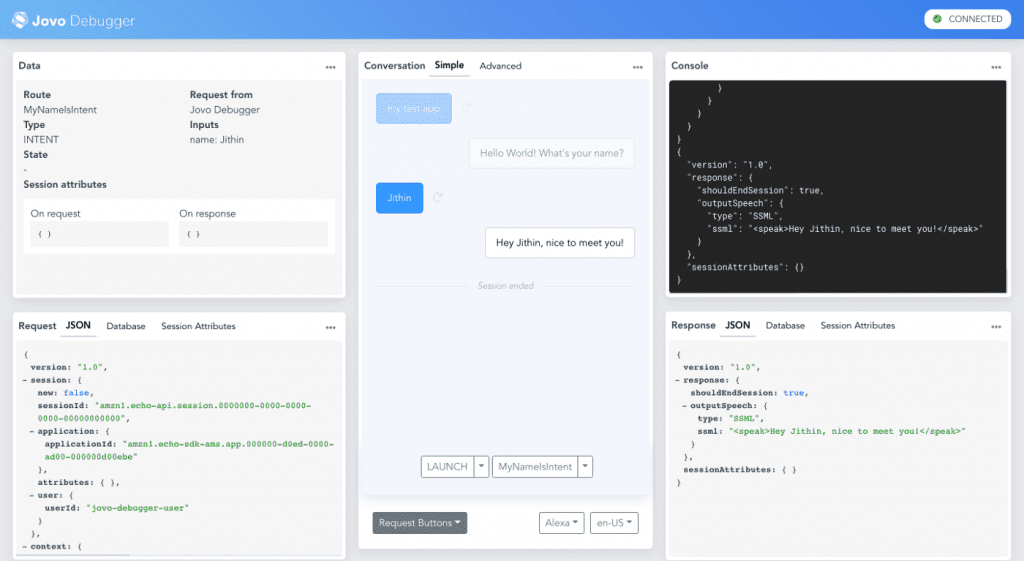
Jovo Debugger
Copy and paste the webhook URL into a browser to open Jovo Debugger.
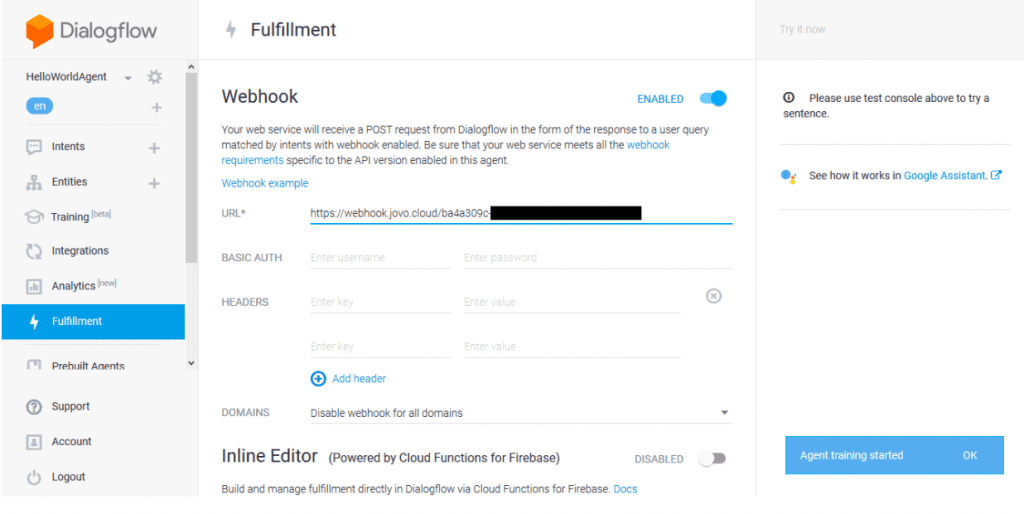
Connect to Dialogflow
From Dialogflow console, choose the Fulfillment option form the left navigation menu. Enable the Webhook and paste your Jovo Webhook endpoint to the URL field and press the save button at the bottom of the page:
We are almost finished. Enable webhook fulfillment for every intent we use in our model.
Go to HelloWorldIntent first and enable “Enable webhook call for this intent”.
Do the same for the MyNameIsIntent and also take a look at the “Default Welcome Intent” for the same.
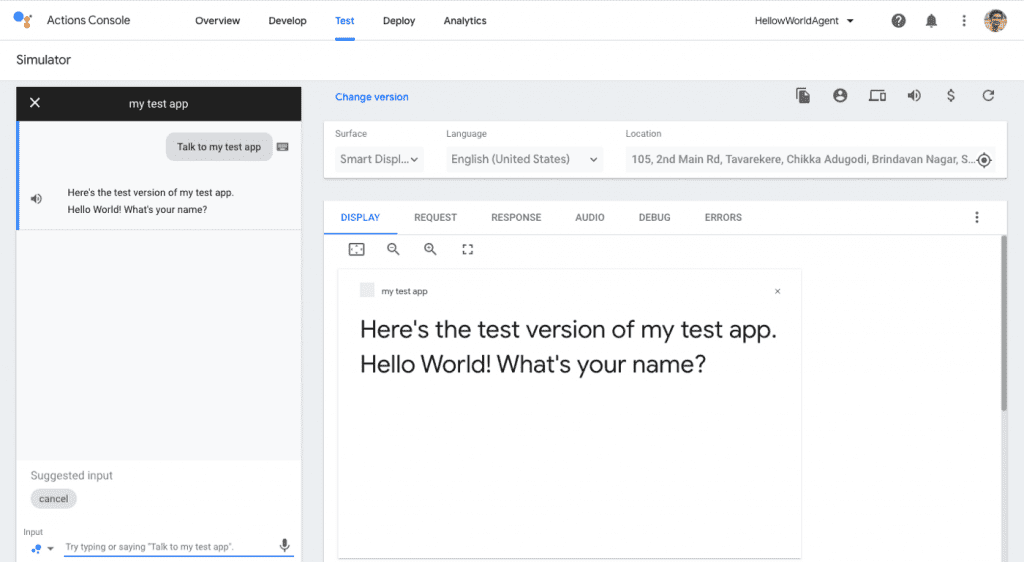
Test your voice-enabled chatbot from Google Assistant
To test your Google Action you have to use the Actions on Google Simulator. For that go to the “Integrations” tab and select Google Assistant then press “Test” and, on the success screen, “Continue”.
In the Simulator, you can now test your Action.
Click on Talk to my test app or just click on the input field and press enter. The bot will start with:
“Here’s the test version of my test app.
Hello World! What’s your name?”
Just respond using the mic button to input your answer. The sample conversation goes like:
Google: “Here’s the test version of my test app. Hello World! What’s your name?”
You: “Jithin”
Google: “Hey Jithin, nice to meet you!”

That is it. Your voice chatbot is ready. Now you can create customized intents and responses to create a more versatile voice chatbot.
At Kommunicate, we are envisioning a world-beating customer support solution to empower the new era of customer support. We would love to have you on board to have a first-hand experience of Kommunicate. You can signup here and start delighting your customers right away.


