Updated on March 20, 2024
User engagement has become a key part of today’s digital landscape, with a large section of businesses striving to capture and retain the attention of their audience. This is a Herculean task, as attention spans keep diminishing by the day. Enterprises now know the importance of delivering very compelling website experiences that strike the right chord with users.
This article includes:
- Benefits of integrating chatbot to AngularJS websites
- Create a chatbot in Kompose and setup the answers
- Add the chatbot to your Angular Js Website

One of the ways to enhance this website experience is chatbots, which are increasingly playing a vital role in providing instant responses, customized and personalized support, and the ability to interact with the website itself. The interactive nature of chatbots means humans tend to engage more with the website, urging them to explore your business further.
One of the best ways to build these enterprise chatbots is the Angular JS framework. If you are an Angular JS developer and are looking to add a chatbot to your enterprise website, then you have come to the right place.
Before we do a deep dive into the actual process of building the chatbot, let us look at a few benefits of integrating chatbots into enterprise AngularJS websites.
Benefits of integrating chatbot to AngularJS websites
- AngularJS MVC architecture: AngularJS’s model-view-controller (MVC) architecture means you can create highly responsive and dynamic chatbot experiences. It allows for smooth conversation flow and real-time updates.
- Seamless integration: The modular architecture of AngularJS, with two-way binding makes it super easy to integrate chatbots into enterprise websites.
- Real-time updates: With AngularJS’s real-time data binding capabilities, chatbots can deliver instant responses and updates to user queries without the need for page refreshes. This in turn enhances the responsiveness and interactivity of the chatbot, giving users immediate assistance and reduced waiting times.
Apart from these, AngularJS offers some unique advantages such as efficient development and built-in testing facilities, making the testing of chatbot functionalities within enterprise websites that much easier.
Do you want to learn more about to add chatbots to different website development platforms? Check out these:
- How to Create a Chatbot for your Business in 2024 [No Coding]
- How To Add A Chatbot To Your Tilda Website
- How to Add a Chatbot in Webflow with No Code
Want to build your own robust Enterprise chatbot on your AngularJS website?
Let’s jump right into it.
Phase 1: Create a chatbot in Kompose and setup the answers
Step 1: Setup an account in Kommunicate
If you do not have an account in Kommunicate, you can create one here for free.
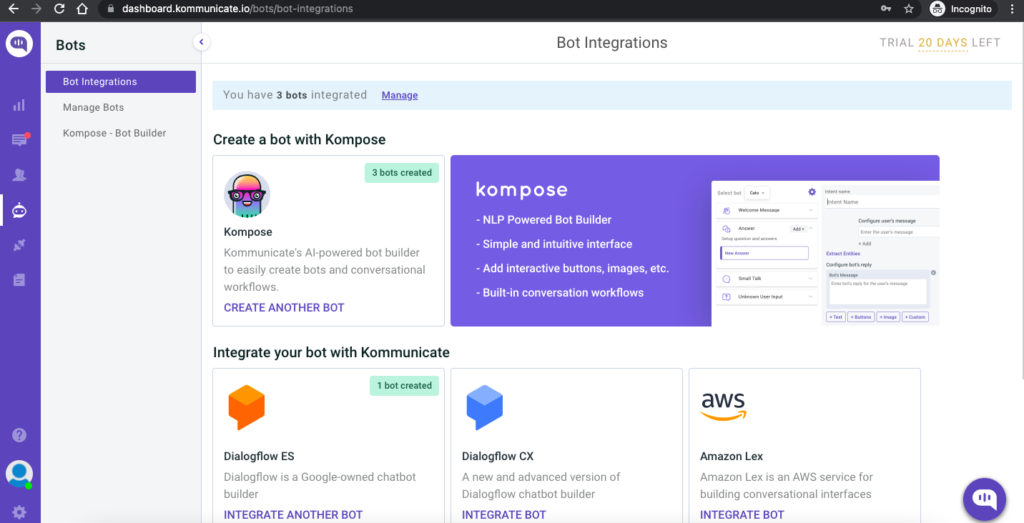
Next, log in to your Kommunicate dashboard and navigate to the Bot Integration section. Locate the Kompose section and click on Integrate Bot.
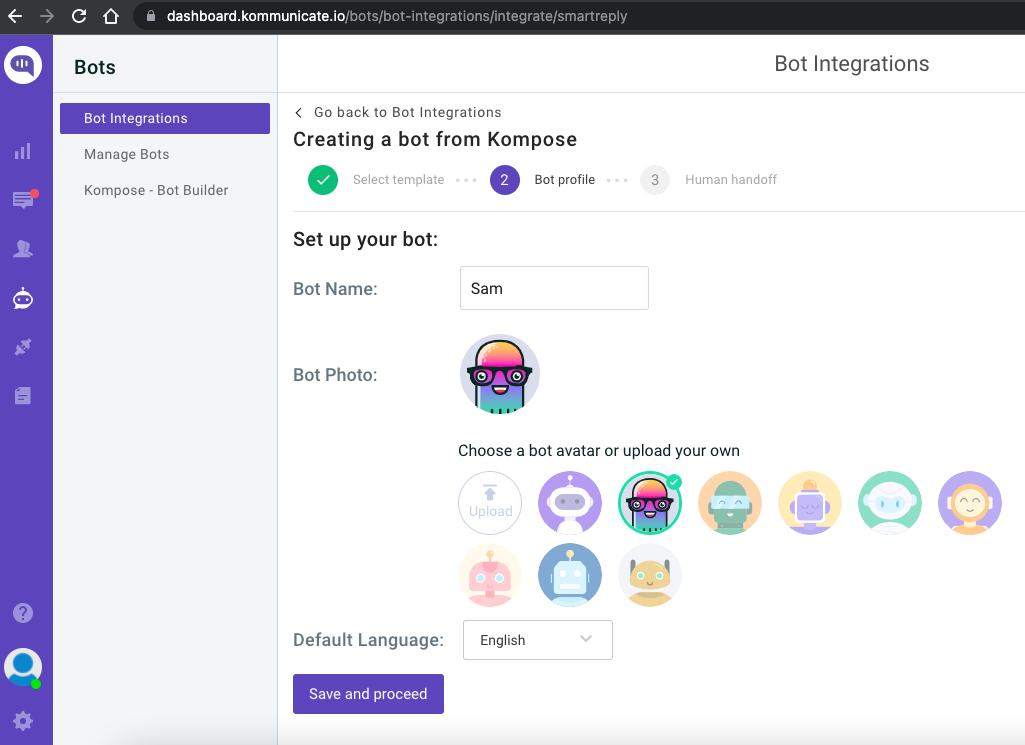
If you want to build a bot from scratch, select a blank template and go to the Set up your bot section. Select the name of your Bot, your bot’s Avatar, and your bot’s default language and click “Save and Proceed”.
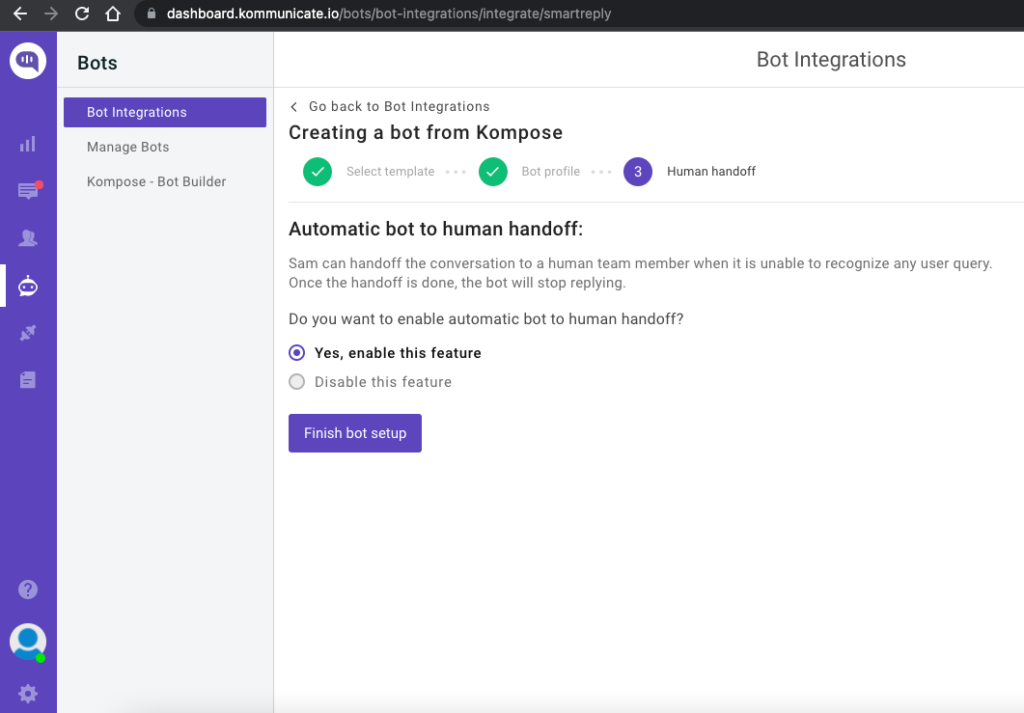
You are now done creating your bot and all you have to worry about now is to “Enable bot to human transfer” when the bot encounters a query it does not understand. Enable this feature and click “Finish Bot Setup.”
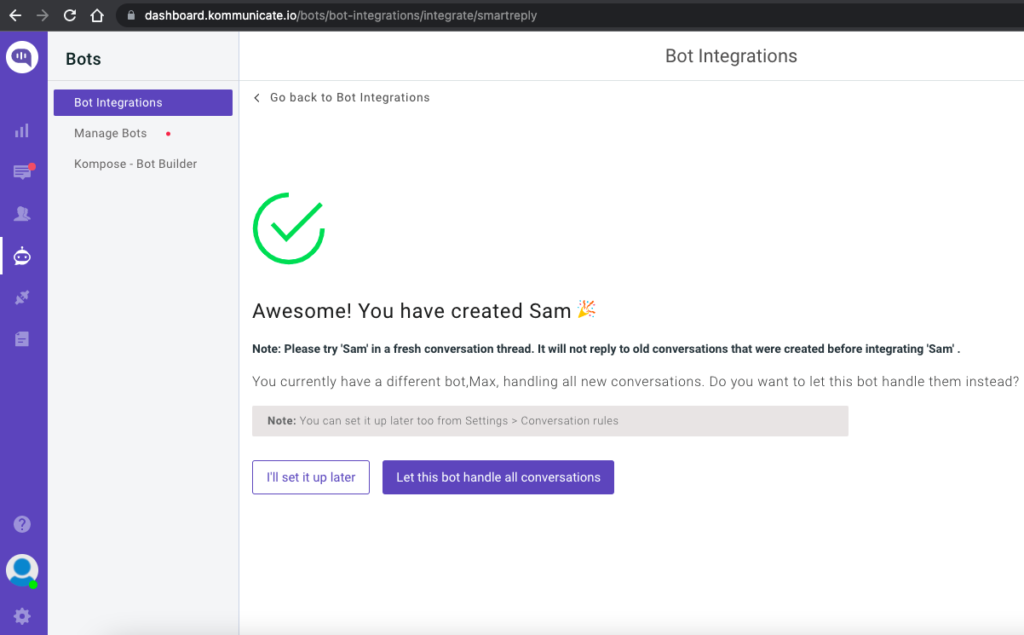
From the next page, you can choose if this bot will handle all the incoming conversations. Click on “Let this bot handle all the conversations” and you are good to go.
Newly created bot here: Dashboard →Bot Integration → Manage Bots.
Step 2: Create welcome messages & answers for your chatbot
Go to the ‘Kompose – Bot Builder’ section and select the bot you created.
First, set the welcome message for your chatbot. The welcome message is the first message that the chatbot sends to the user who initiates a chat.
Click the “Welcome Message” section. In the “Enter Welcome message – Bot’s Message” box, provide the message your chatbot should be shown to the users when they open the chat and then save the welcome intent.
After creating the welcome message, the next step is to feed answers/intents. These answers/intents can be the common questions about your product and service.
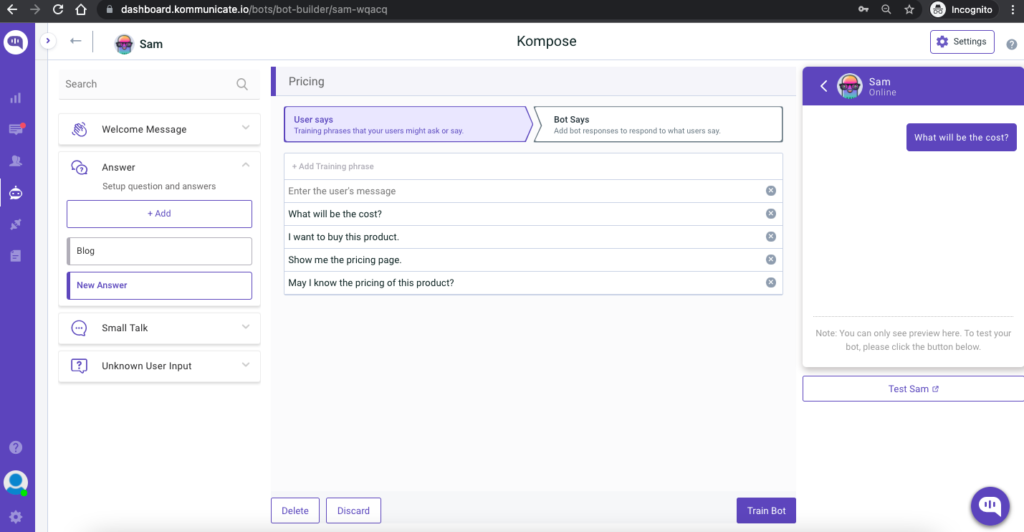
The answers section is where you’ve to add all the user’s messages and the chatbot responses.
Go to the “Answer” section, click +Add, then give an ‘Intent name’
In the Configure user’s message section – you need to mention the phrases that you expect from the users that will trigger.
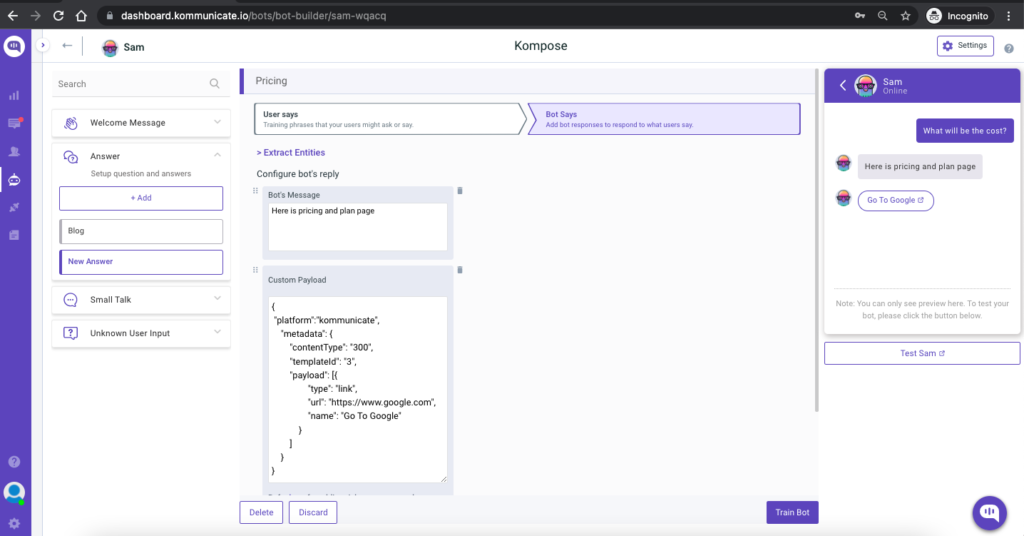
Configure bot’s reply section – you need to mention the responses (Text or as Rich messages) the chatbot will deliver to the users for the particular message. You can add any number of answers and follow-up responses for the chatbot. Here, I have used custom payload by selecting the “Custom” option in the “More” option.
Once you have configured the responses, you need to click on “Train Bot” which is at the button right and to the left of the preview screen. Once successfully trained, a toast “Anser training completed” will come at the top right corner.
Phase 2: Add the chatbot to your Angular Js Website
Follow the given steps.
Step: 1 Install the Angular CLI globally
To install the CLI using npm, open a terminal/command prompt and enter the following command:
npm install -g @angular/cli
Now, create a new workspace and initial app project. Run the CLI command ng new and provide the name my-app, as shown here:
ng new my-app
The initial app project contains a simple Welcome app, which is ready to run. Angular includes a server so that you can easily build and serve your app locally.
Now, navigate to the workspace folder (my-app).
Launch the server by using the CLI command ng serve, with the –open option.
cd my-app
2ng serve --open
Step 2: Add Kompose bot
Now you have successfully launched the Angular site, the next step is to add Kompose chatbot to your angular website.
Open the Angular project directory on your computer and add the following Kommunicate script in your app.component.ts file.
   (function(d, m){
        var kommunicateSettings = {"appId":"Kommunicate APP ID","popupWidget":true,"automaticChatOpenOnNavigation":true};
        var s = document.createElement("script"); s.type = "text/javascript"; s.async = true;
        s.src = "https://widget.kommunicate.io/v2/kommunicate.app";
        var h = document.getElementsByTagName("head")[0]; h.appendChild(s);
        (window as any).kommunicate = m; m._globals = kommunicateSettings;
    })(document, (window as any).kommunicate || {});
Replace your Kommunicate APP ID in the above script.
The app.component.ts file should look like this;
import { Component } from '@angular/core';
@Component({
  selector: 'app-root',
  templateUrl: './app.component.html',
  styleUrls: ['./app.component.css']
})
export class AppComponent {
  title = 'my-app';
ngOnInit() {
    (function(d, m){
        var kommunicateSettings = {"appId":"Your App ID","popupWidget":true,"automaticChatOpenOnNavigation":true};
        var s = document.createElement("script"); s.type = "text/javascript"; s.async = true;
        s.src = "https://widget.kommunicate.io/v2/kommunicate.app";
        var h = document.getElementsByTagName("head")[0]; h.appendChild(s);
        (window as any).kommunicate = m; m._globals = kommunicateSettings;
    })(document, (window as any).kommunicate || {});
  }
}
Save the file and run the following command in the command prompt to run the code:
ng serve --open
As soon as you run the above command, the angular website will open in the browser with the Kompose chat widget.
Select the Kompose chatbot in the RULES section of the Kommunicate dashboard to handle the incoming conversations.
There you go!! You have successfully built a chatbot for your AngularJS website. Keep watching this space to learn more about building bots for various platforms.
Here is the quick video


