Updated on May 19, 2025

Automating customer service at startups is difficult. You don’t have the same access to human resources as enterprises, and your tech stack will differ from most established players.
We’ve experienced this problem first-hand at Kommunicate, and we thought that building an integration that lets you try out the latest AI models for customer service at any stage would be fun. We will explore creating an insurance chatbot for AllState insurance with Kommunicate and Claude 3.5 Sonnet and then integrate it with Agile CRM.
This article will cover:
Creating an Insurance Chatbot with Kommunicate and Claude 3.5 Sonnet
Pre-Requisites
Before we start building our AI agent for customer service in insurance, you must have
- A Kommunicate account
- Access to the website for your insurance solution
Let’s Build a Customer Service AI Agent for AllState Insurance with Kommunicate
1. Go to the Kommunicate Dashboard
- Go to dashboard.kommunicate.io
- Click on the Bot Icon on the left-hand side.
2. Choose Bot Integrations

- You’ll see the Manage Bots page if you have already created an AI agent with Kommunicate.
- In that case, click the Bot Integrations tab in the left-hand menu.
3. Choose the AI Model of your Choice
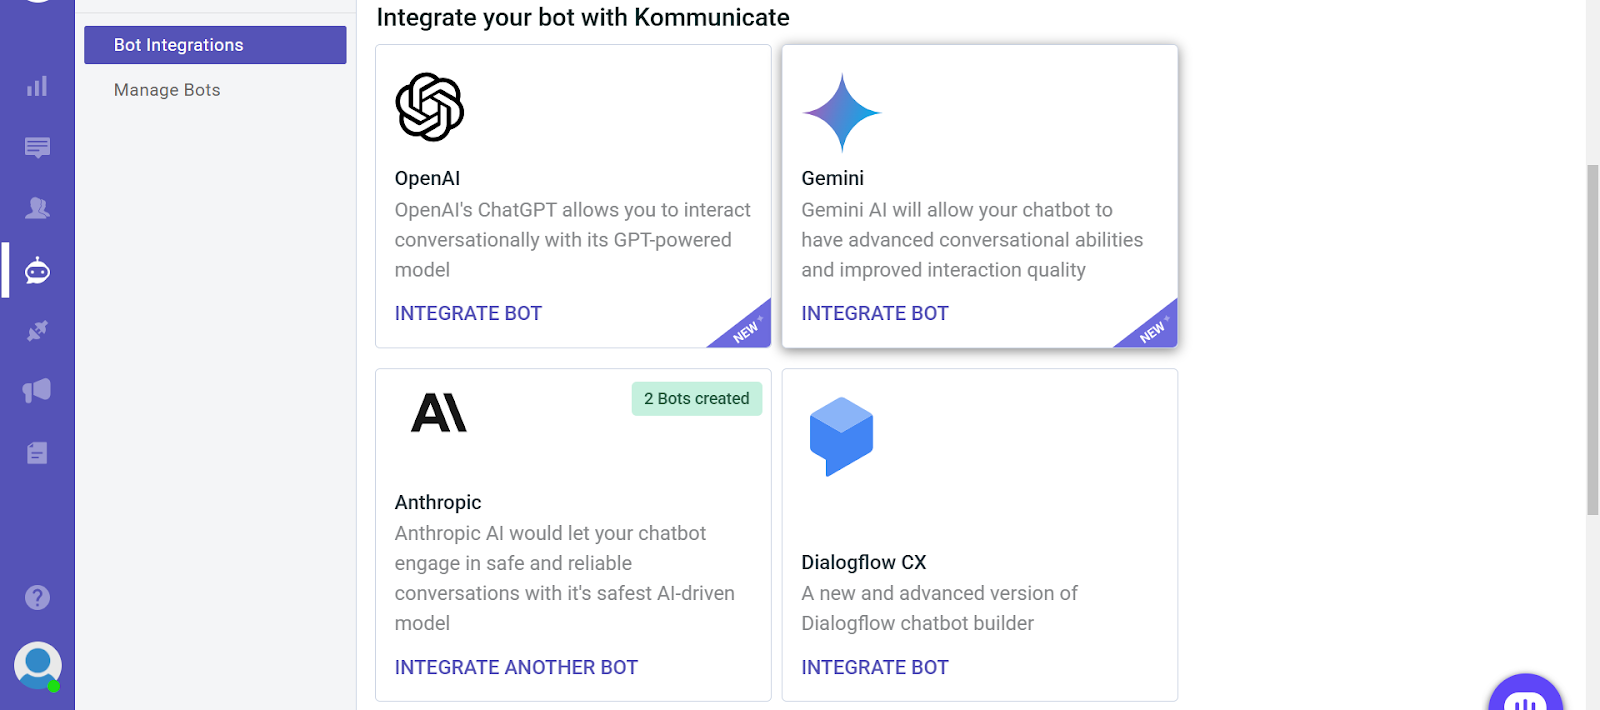
- Choose the AI you want to train your customer service agent with. We have Open AI, Gemini, and Anthropic LLMs available.
- You can choose from Open AI, Gemini, and Anthropic. In this case, we’re selecting an Anthropic model, i.e., Claude 3.5 Sonnet.

4. Choose Your AI Model and Set Parameters
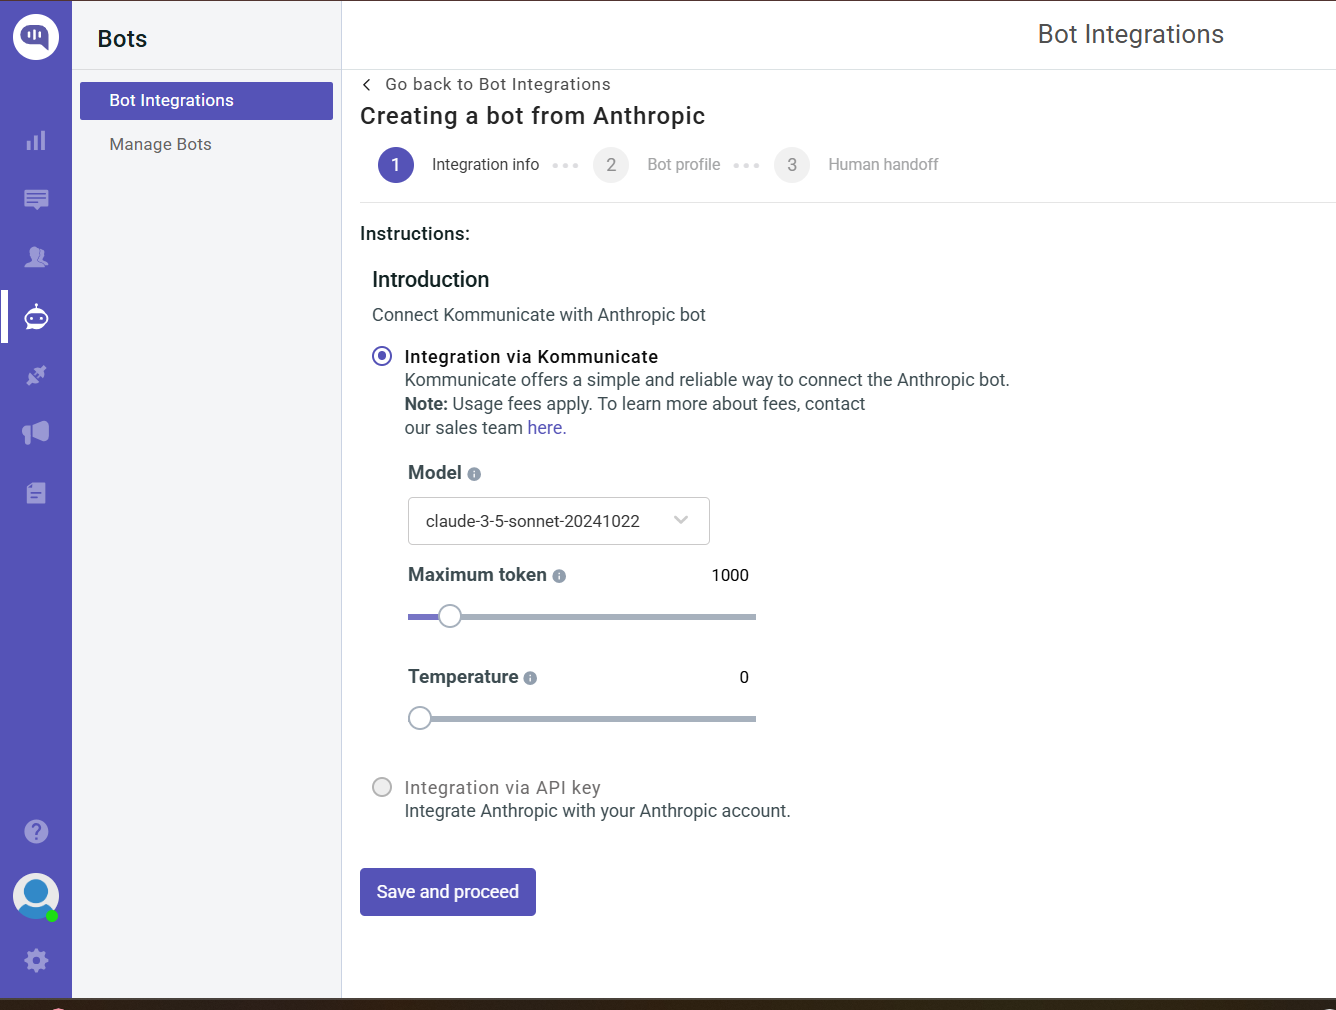
- You can create a model with the Claude Sonnet or Claude Haiku models. For this customer service chatbot, we will select the Claude Sonnet model.
- Now, select the Maximum Token. This helps you determine how long the AI’s answer can be. 1000 is a standard output number, so we are keeping this number unchanged.
If you’re working in an industry where the answers are information-dense, you can increase the number of tokens. However, you might incur additional AI costs. - Select the Temperature. This is a metric that controls the creativity of your AI chatbot. We will select 0 because we don’t want creative answers in a search and recommendation chatbot.
- Once you’ve selected your model, maximum tokens, and temperature, click Save and Proceed, and you will be taken to the next page.
5. Select the Look for Your Insurance Customer Service AI Agent
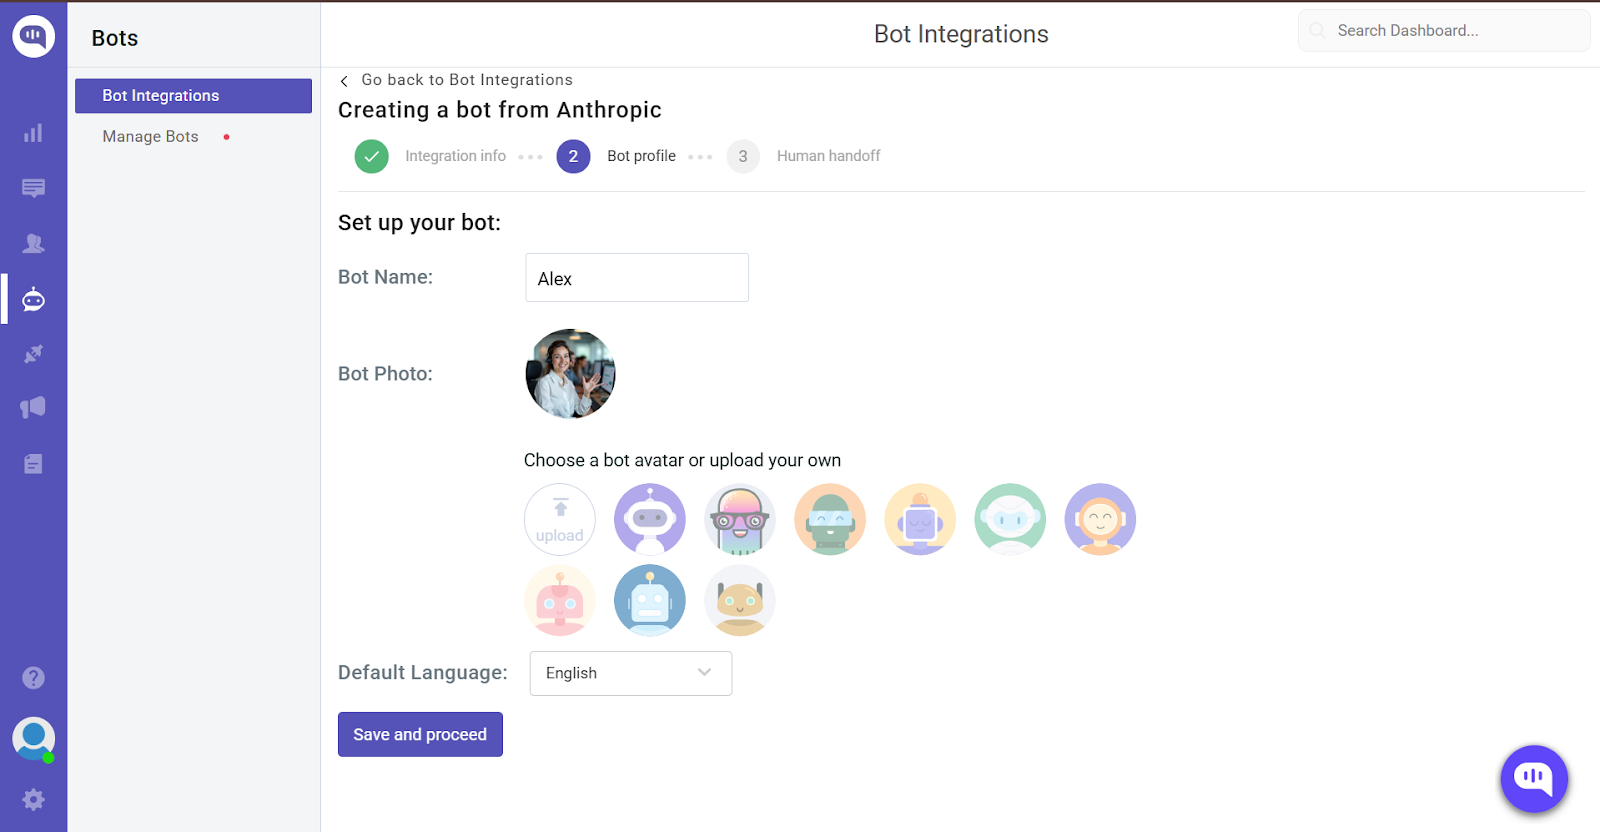
- First, set a name for your chatbot. For this demo, we will call our bot Alex.
- Then, select the avatar that will be the profile picture of your AI customer service agent. We’re choosing a custom avatar from our brand.
- Click on Save and Proceed to continue.
6. Enable Human + AI Workflow (Optional)
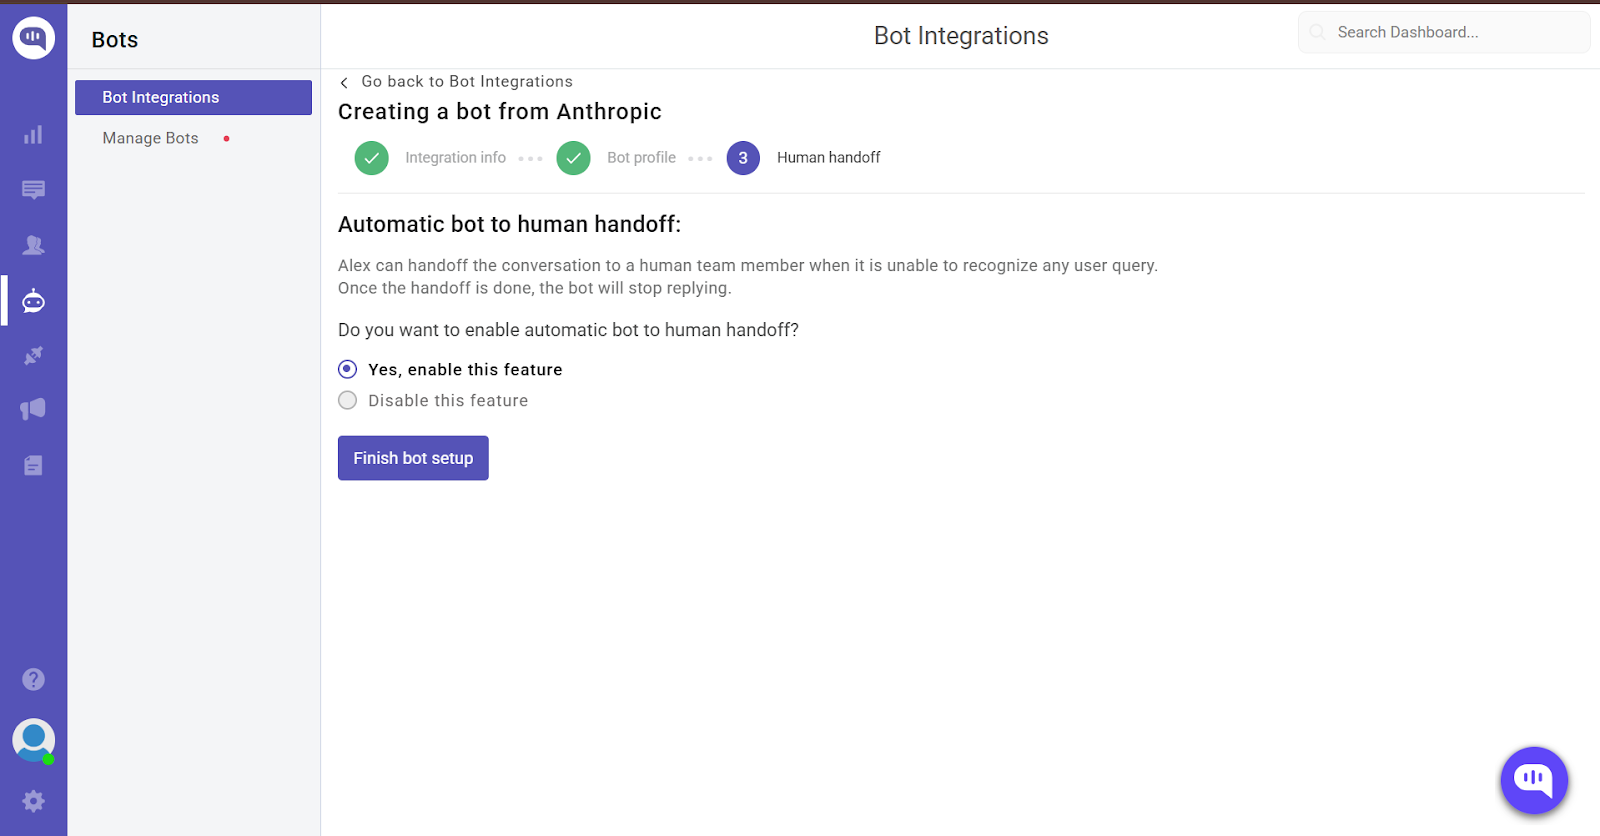
- We have a human handoff feature where the bot can push the chat to a particular human agent when the questions are too complex.
- Click on Yes, enable this feature for the bot, and click on Finish bot setup.
7. Your Customer Service AI Agent for Insurance Is Ready
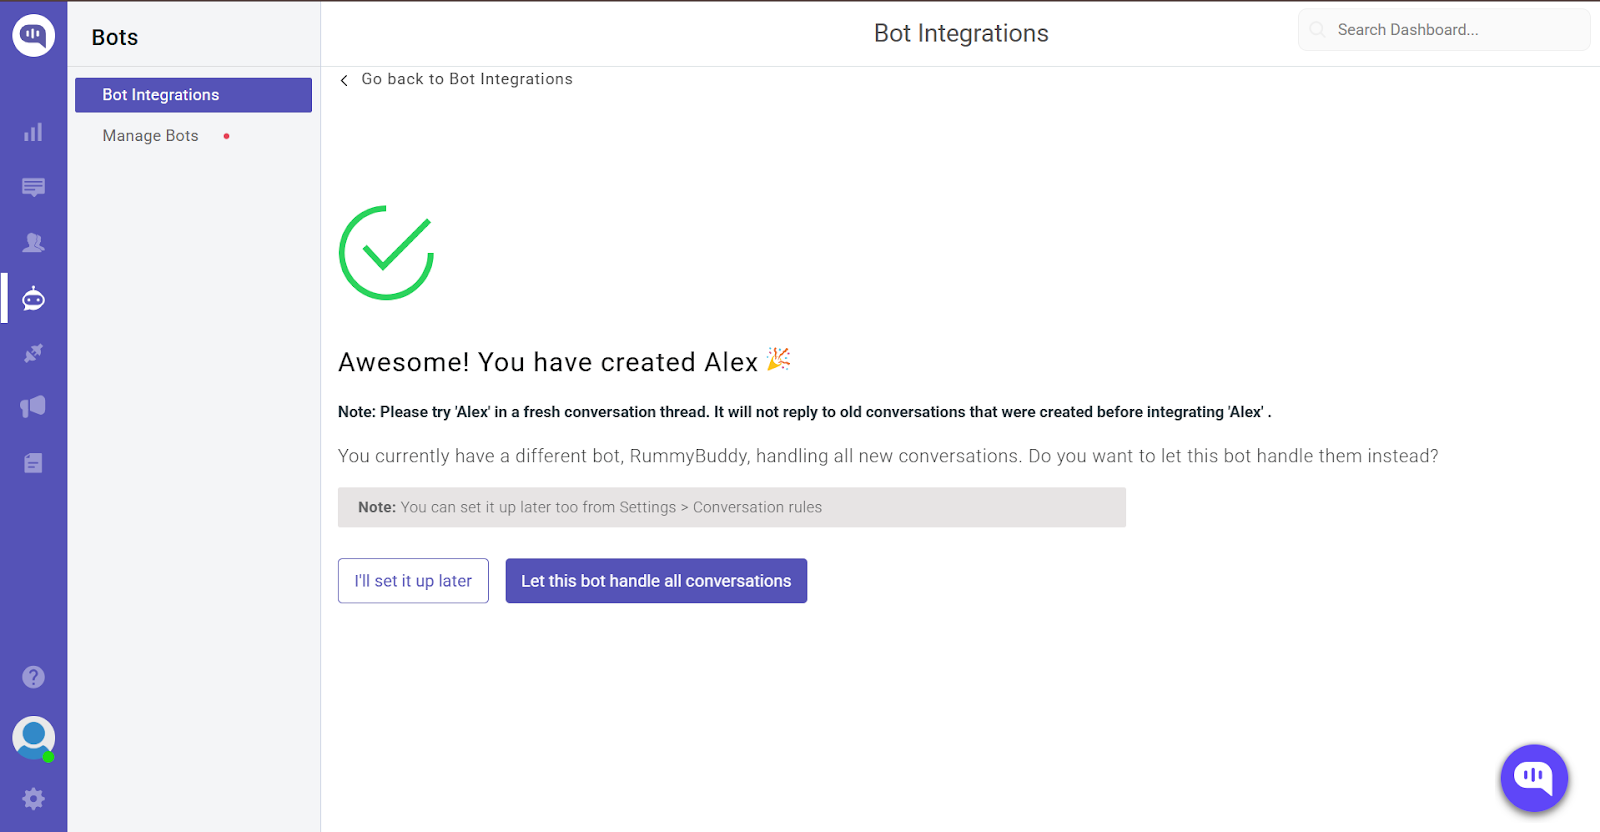
- Your chatbot has been created!
- Click on “I’ll set it up later,” and let’s start training our AI agent, Alex.
8. Set Up a Welcome Message

- Write a message to greet your customers whenever they interact with the agent.
- We will also add quick links so customers can navigate the relevant page.
- Click on the Train bot to finalize this change.
9. Define Some Responses
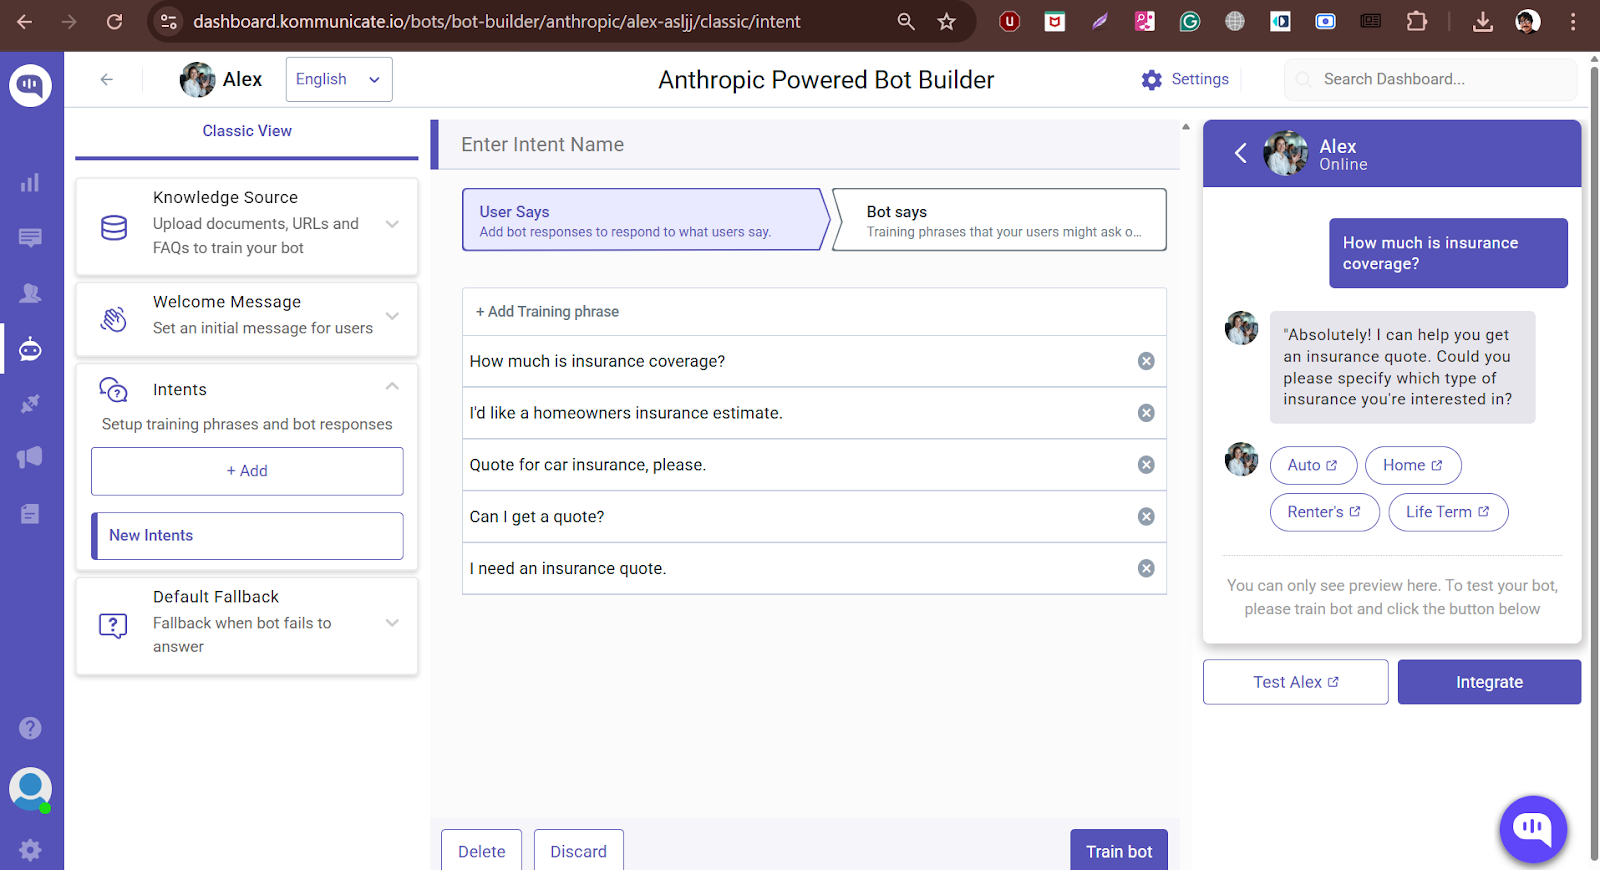
Our AI agent will get all the relevant information from the website, but it’s still good practice to program some responses so that your customers get a better user experience.
- Click on the Intents button on the left side of the previous screen.
- Here, you can train your agent to give specific responses to some questions. For example, we train the bot to answer when someone exits a conversation.
- Next, we will set up the answer.
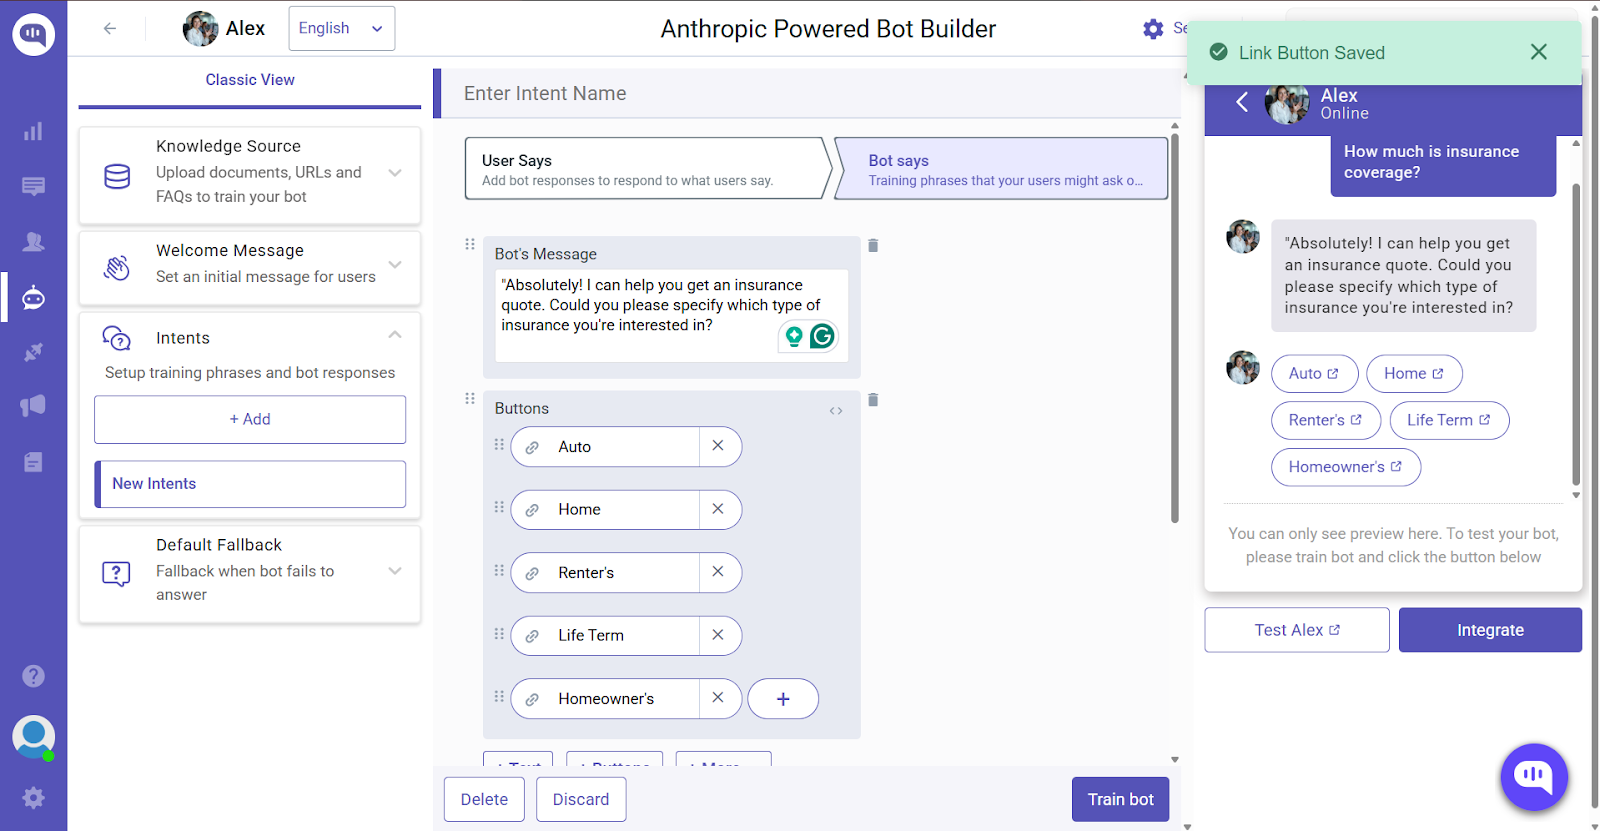
- In the Bot Says section, you can set up your answer. We will use some Buttons to take them to the specific insurance quotes pages.
10. Let’s teach our Agent About AllState Insurance
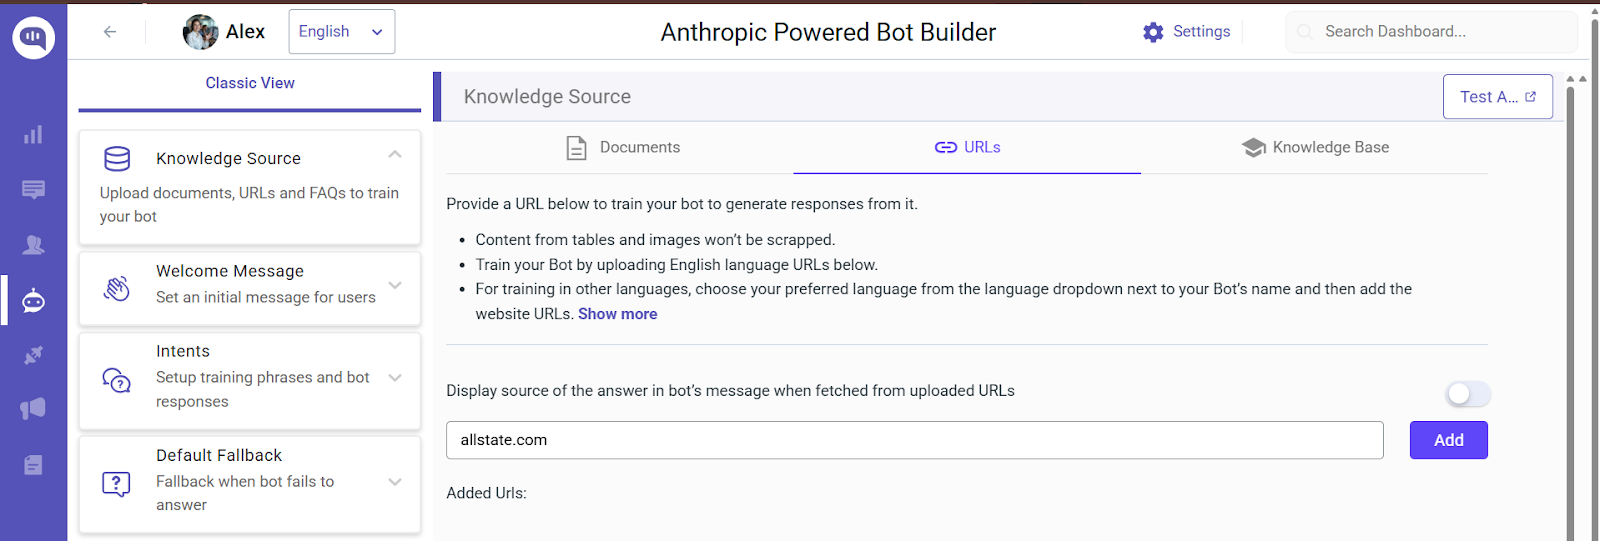
- We are training the bot on the Allstate website.
- This will open the site’s sitemap so that you can pick and choose which URLs the bot will be trained on.
11. Creating a Fallback Option
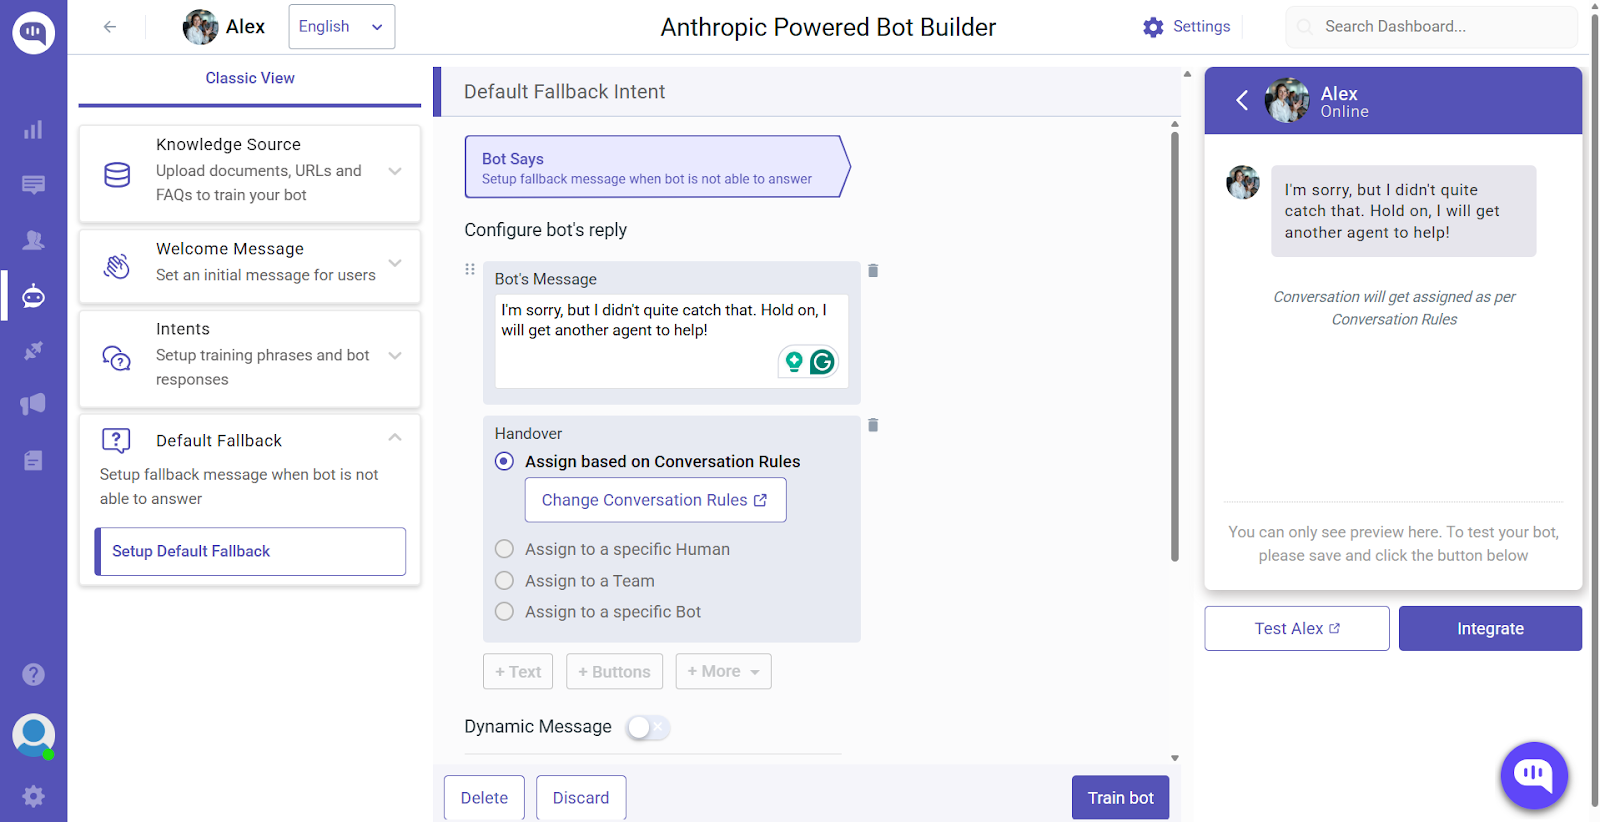
- The bot might sometimes fail to answer a question despite our documents and trained answers.
- In this case, we will transfer the query to a human agent and send an intimation to the customer when that happens. We do this by Assigning based on Conversation Rules.
12. Test Your Chatbot
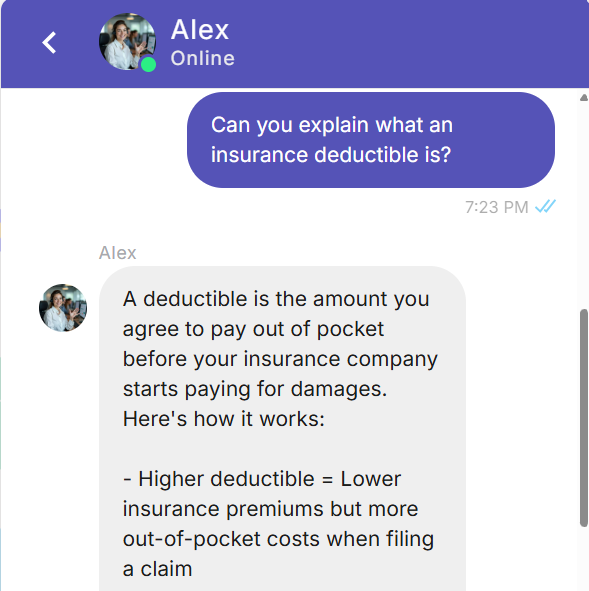
- Here, you can see that the chatbot has learned about insurance deductibles and other factors from the uploaded URLs.

Integrating the Alex Agent with AgileCRM
1. Go to the AgileCRM Integration
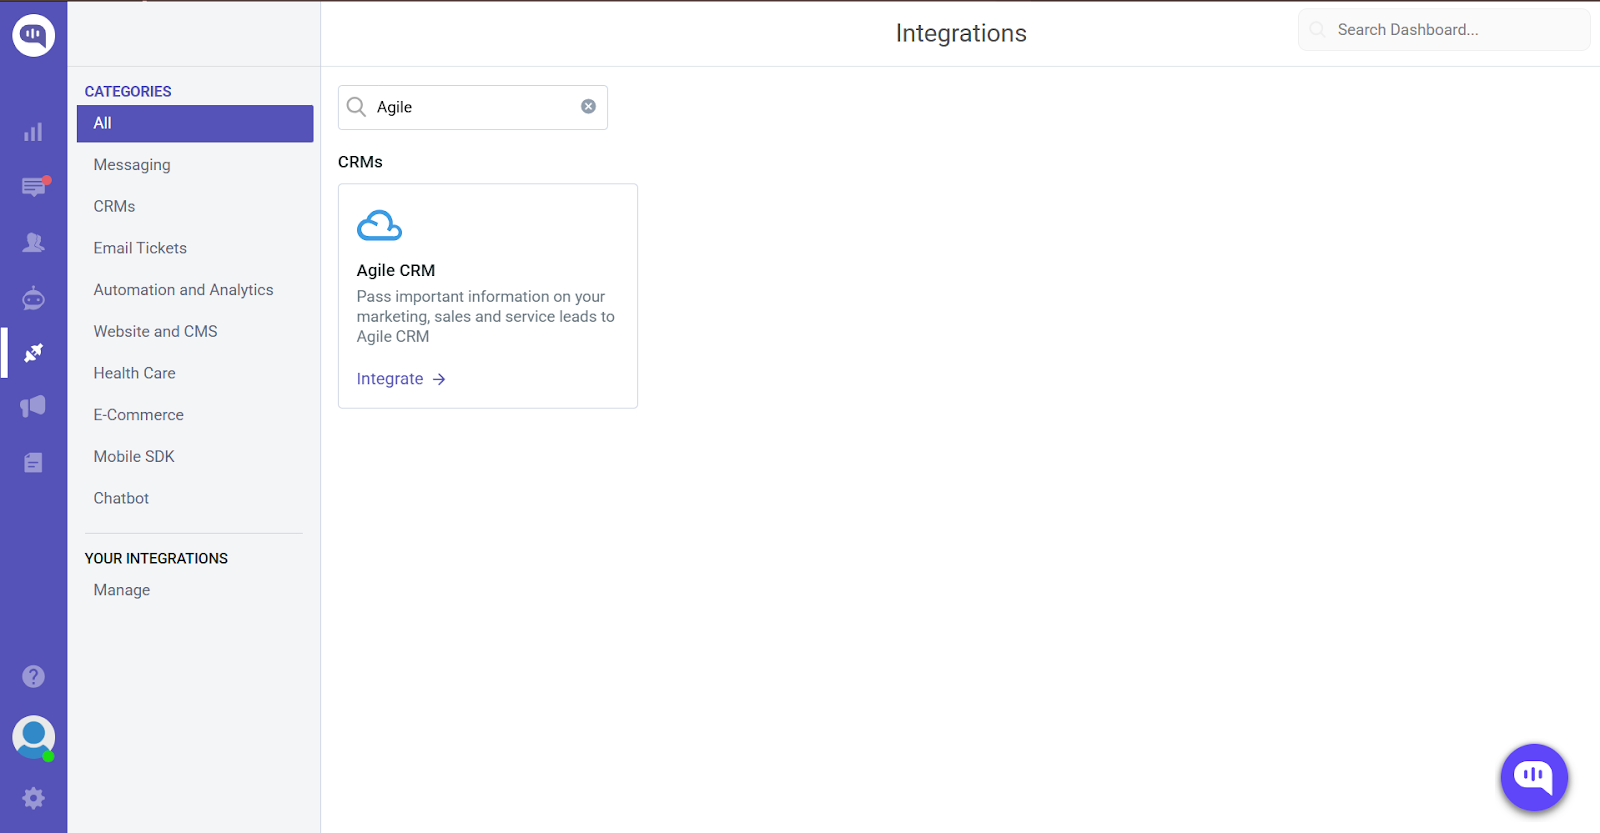
- Click on the Integrations icon on the left-hand side
- Search for Agile CRM
- Click on Integrate
2. Enter Your Details
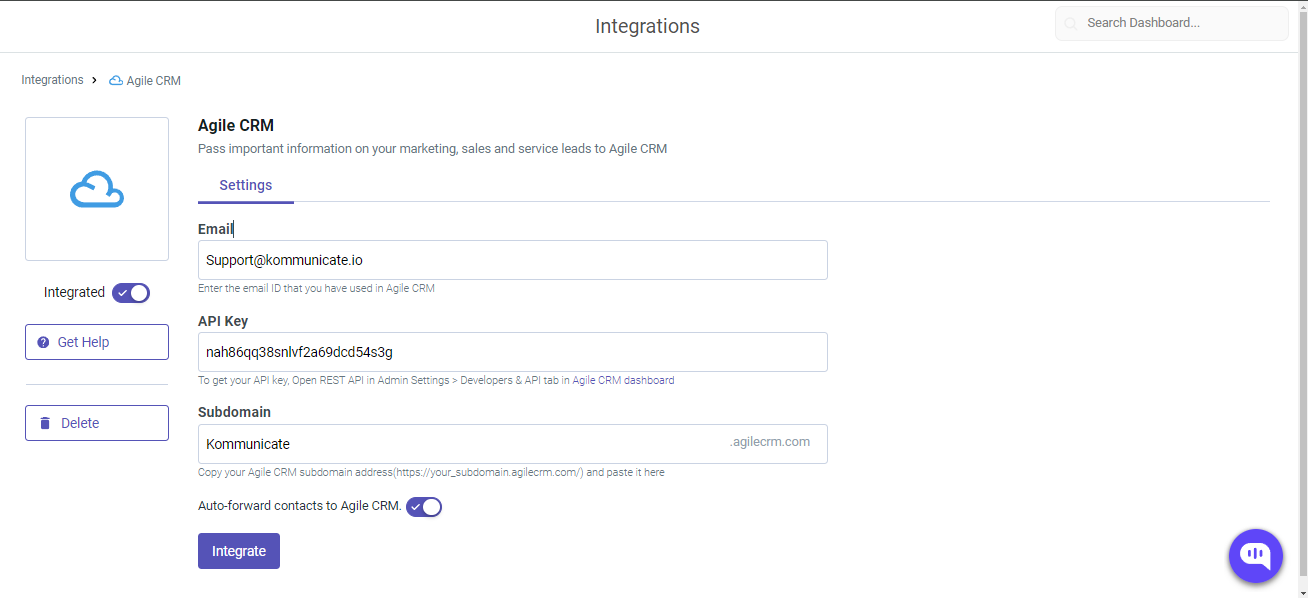
- This will open the integration window for Agile CRM.
- Add all of the details from your Agile CRM profile.
3. Test Your Integration
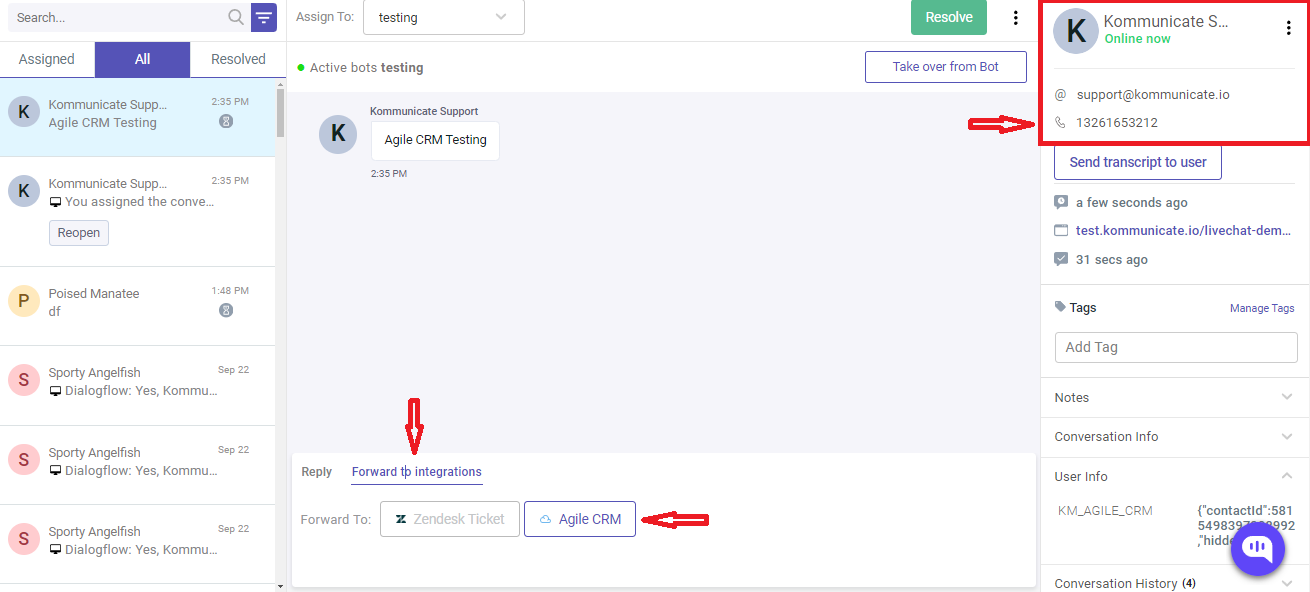
Start a chat on your Kommunicate widget, then:
- Go to the Conversation section
- Open the particular test chat
- Click “Forward to Integrations” above the typing area
- Select “Agile CRM” (manual forwarding option)
4. Verify Your Integration

- Visit Agile CRM’s Contacts section to confirm synchronized customer contact details.
Conclusion
Startups that provide insurance must face an uphill climb when they perform customer support. Providing the best customer service experience is essential in a people-centric business like insurance.
That’s why we have integrated with Agile CRM to help you with the contact details of visitors on your website who consult your AI agent for help. Setting up this customer service agent using Kommunicate and Agile CRM takes less than 10 minutes. Your AI agent will already have all the information from your website and can scale readily without any problem.
Want to improve your insurance business with an AI customer service agent? Talk to Us!

Adarsh Kumar is the CTO & Co-Founder at Kommunicate. As a seasoned technologist, he brings over 14 years of experience in software development, artificial intelligence, and machine learning to his role. His expertise in building scalable and robust tech solutions has been instrumental in the company’s growth and success.


