Updated on May 28, 2026
Taking your business online is one of the most important tasks you can do, and there are E-commerce platforms out there like Shopify that make this task simple. Using Shopify, you can be up and running with your own E-commerce store in a matter of minutes.
Shopify lets you build beautiful, responsive, and professional-looking online stores without you actually having to know a lot about website development. And once you do have an online store, how do you ensure that you stay in touch with your customers 24 hours a day, 7 days a week? In one word: chatbots.
Adding a chatbot to your Shopify store can work wonders for your business, and, in this blog, we will teach you how you can go about adding a Dialogflow chatbot to your Shopify website.
Prerequisites:
- Shopify account that has access to third-party app integration, the first plan-Basic plan has access.
- Kommunicate account where you have already integrated the Dialogflow chatbot. If you have not integrated your chatbot yet, please refer to this video. Also, you can check out this tutorial for creating a Dialogflow chatbot.
Chatbot Integration using Dialogflow CX
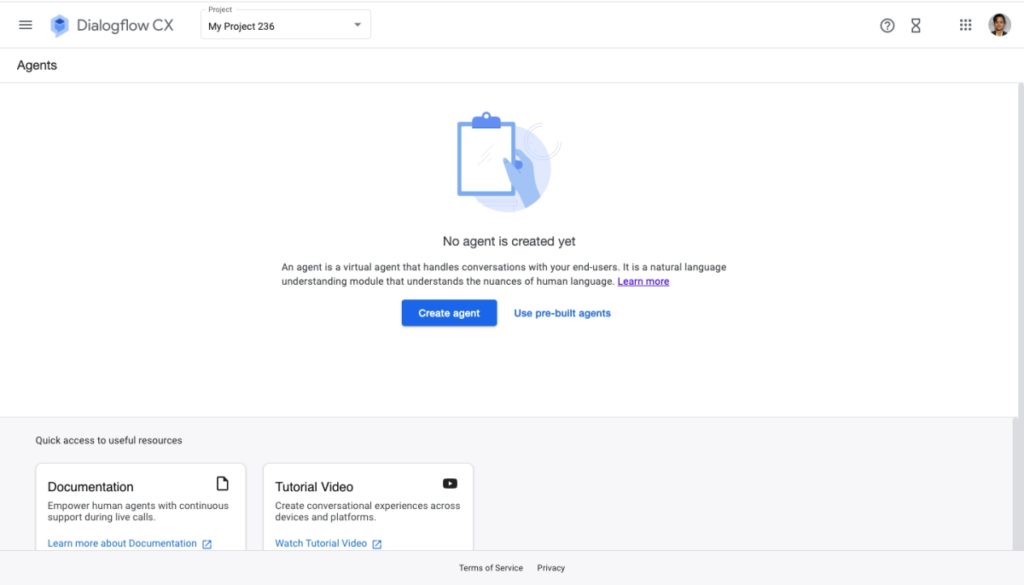
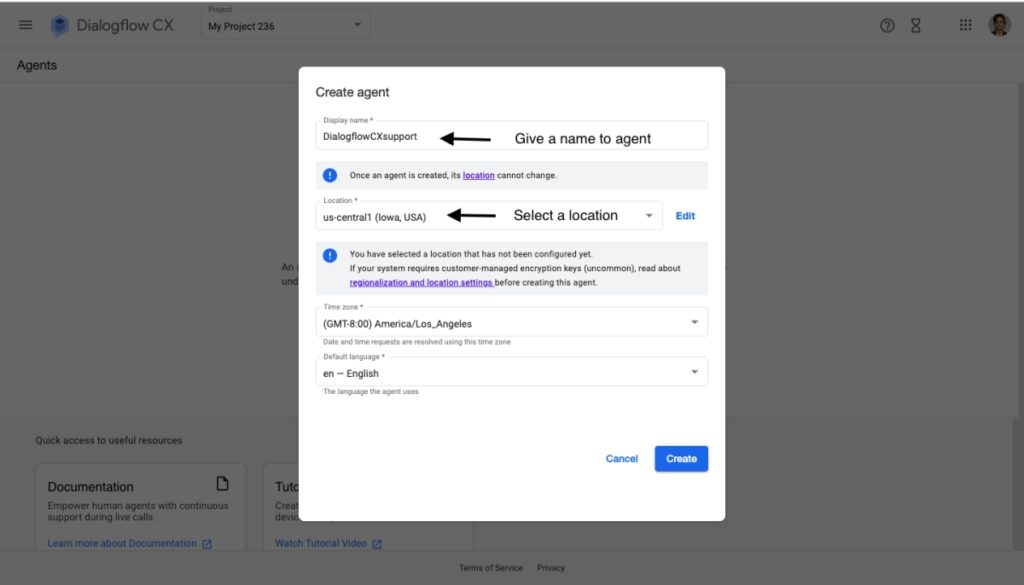
- Before Dialogflow CX integration with Kommunicate, first make sure you have created a project and Dialogflow CX Agent from the Dialogflow CX console.
- Then you have to enable the Dialogflow API for your project and create a service account key. Please refer to the links below.
Create an agent
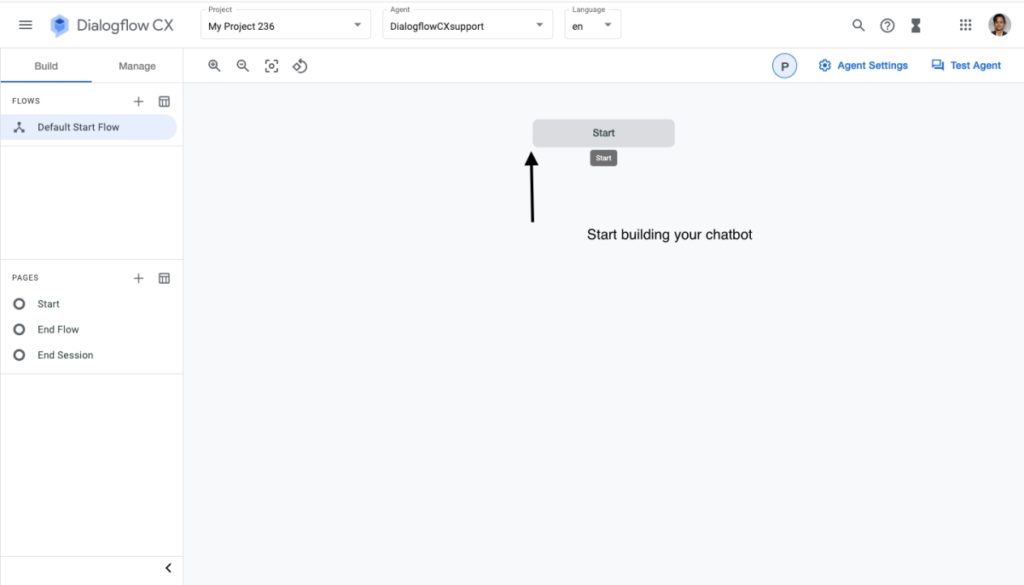
Build your Dialogflow CX chatbot
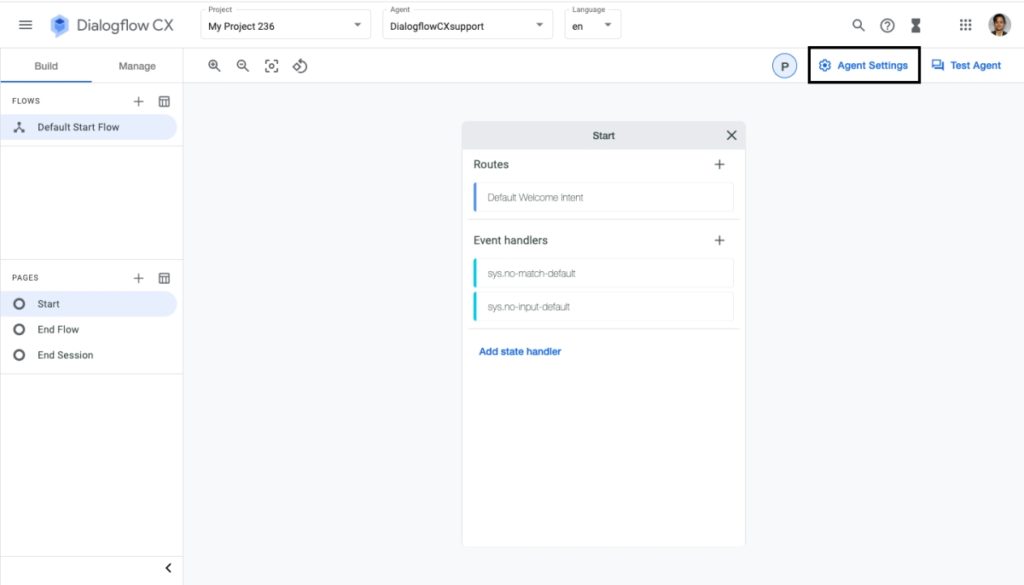
Build your Dialogflow CX chatbot as per your requirements. Once the chatbot building is completed, tap on the Agent Settings option to create a service account.
Create a Service Account
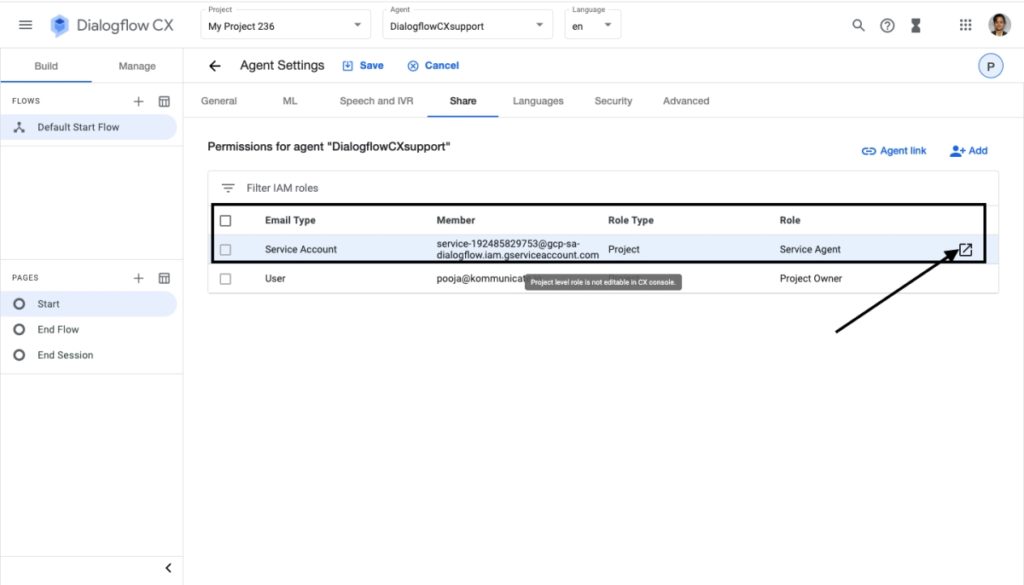
In the following step, you will be giving the ROLE to the service account, select Owner/Editor as a ROLE.

Once ROLE assignment is done, proceed to create a JSON key for Integration.
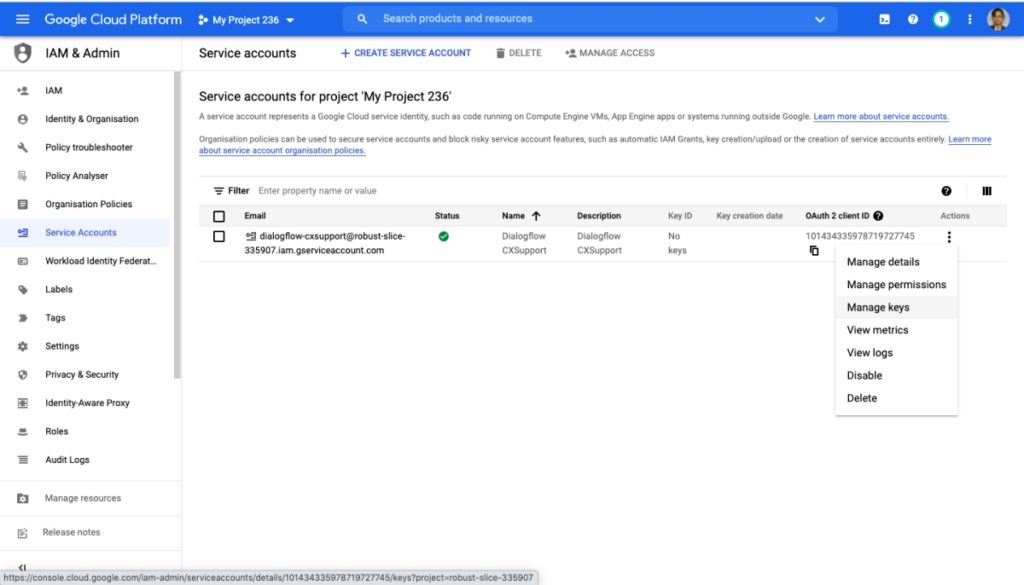
Create a JSON Key
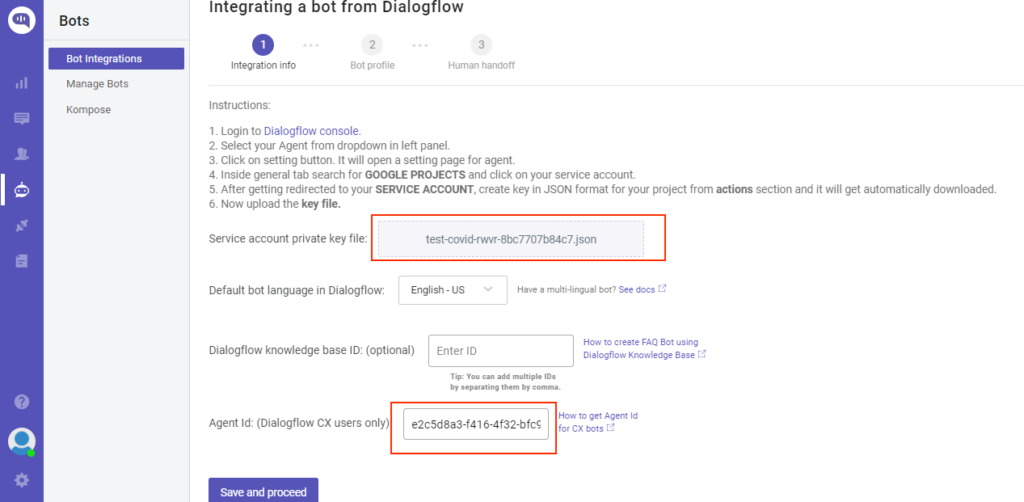
Click on Manage Keys and Add a JSON key.
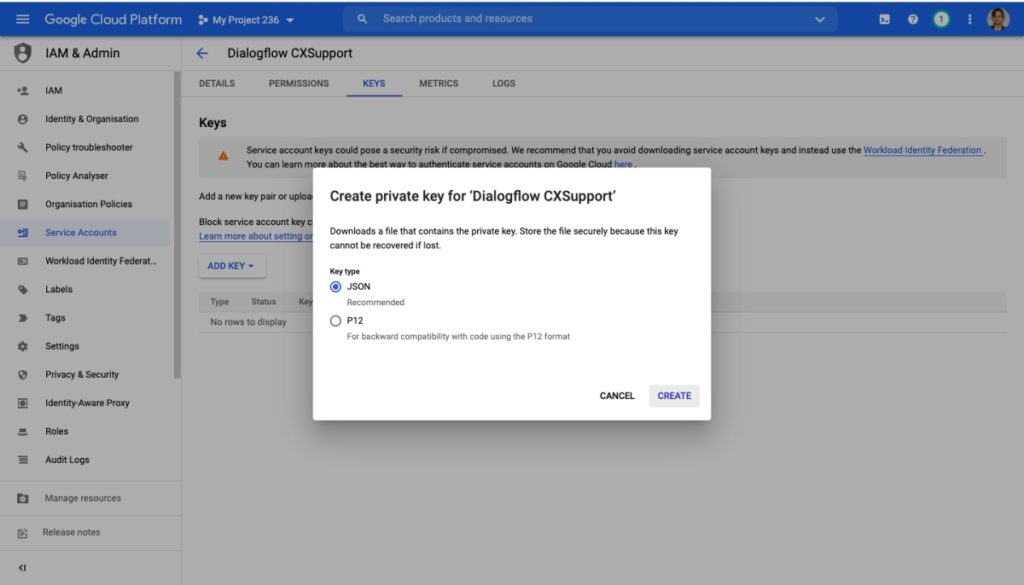
Once you click on CREATE, a JSON file download will start. Upload the service account key file in Kommunicate dashboard along with the AGENT ID.
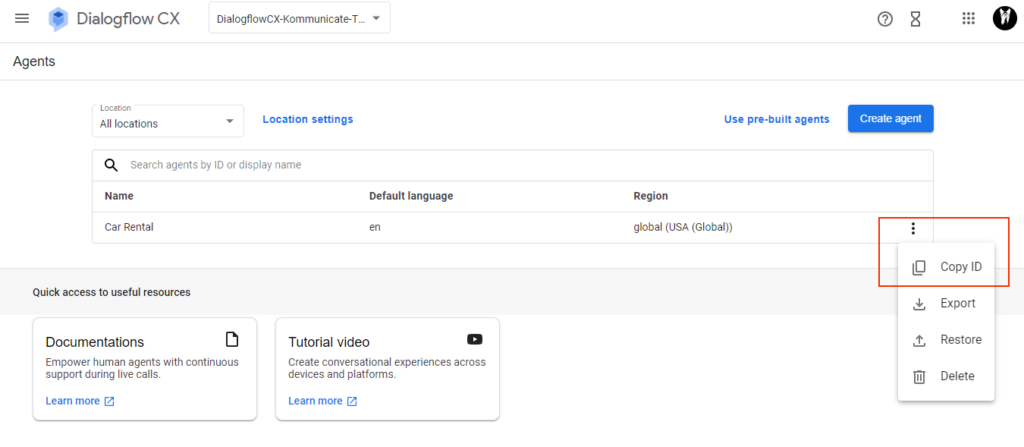
To get the Agent Id:
Go to Dialogflow CX console >> Select the Project >> In the Agent you have created ‘Copy ID’
It will be in the following format, projects/test-covid-rwvr/locations/global/agents/e2c5d8a3-f416-4f32-bfc9-d986d540abd here the Agent Id is e2c5d8a3-f416-4f32-bfc9-d986d540abdb
Copy the Agent Id.
Enter the Agent Id in Kommunicate Dashboard and then “Save and proceed.”
On successful integration, the bot will be given an ID(botId) and will be listed under the Manage Bots section. The botId will be used to identify the bot in the Kommunicate system.
You can use a similar method for Chatbot integration with Dialogflow ES too.
Now that you know how to integrate a Dialogflow Chatbot, it is time to add the Kommunicate chatbot onto your Shopify website.
Integrate Kommunicate Chatbot onto your Shopify website:
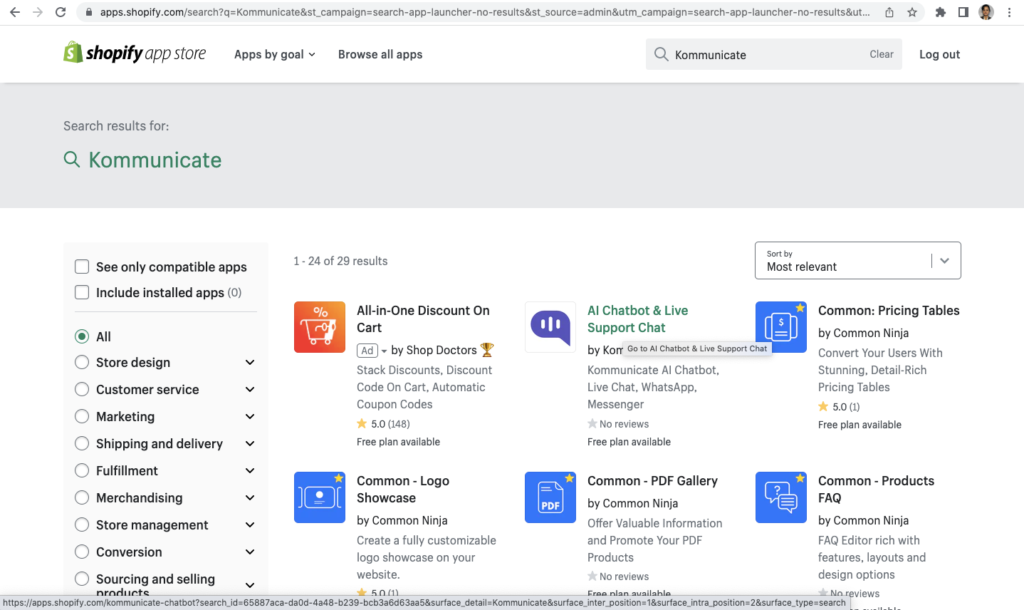
Step 1: Log into your Shopify account and click on the Apps tab. Search for the Kommunicate app in the search text bar.
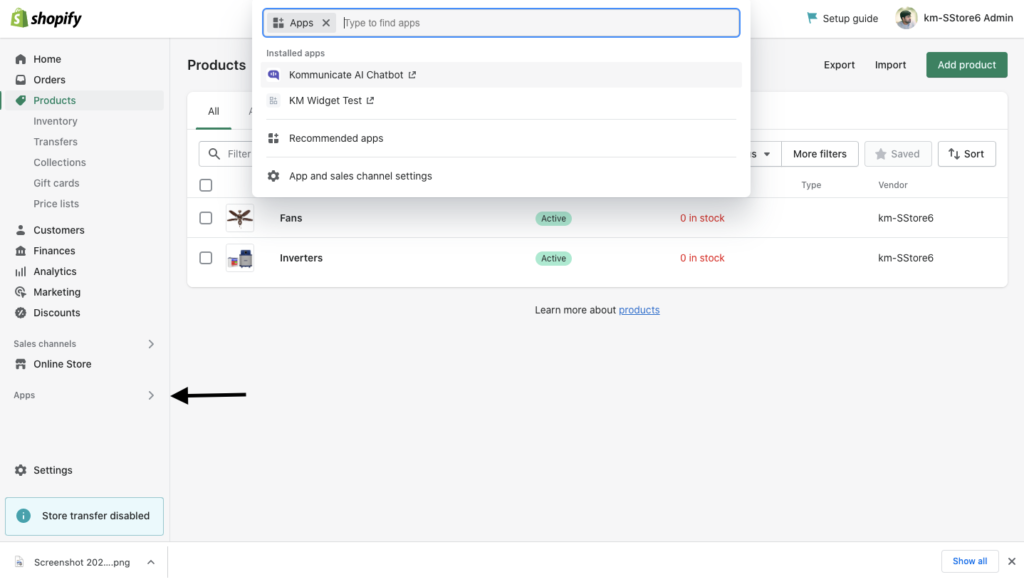
Step 2: After searching, you will see the Kommunicate app listed, click on it >> Add app.
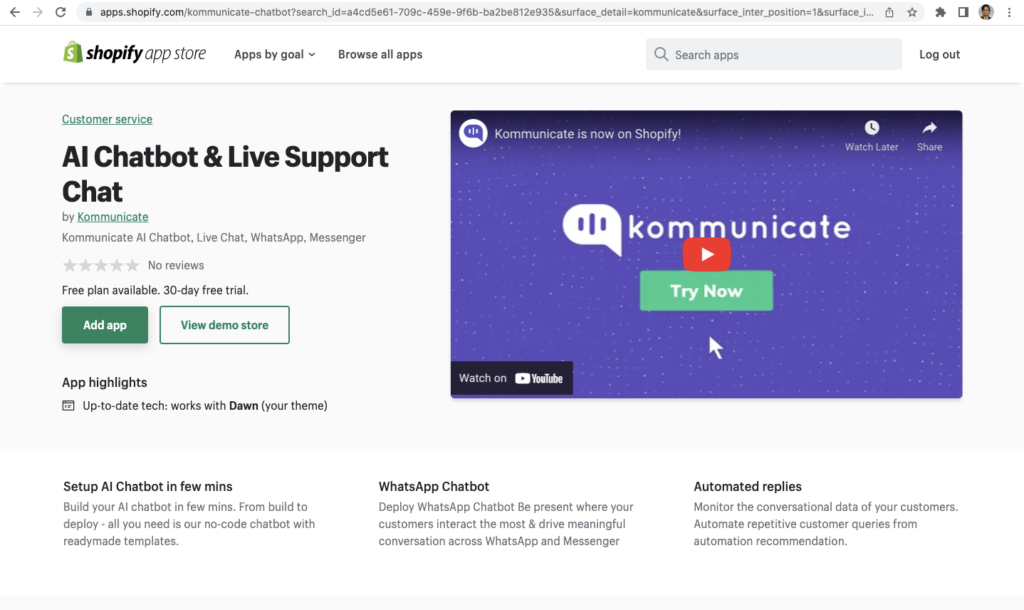
Step 3: Click on the Install App button available in the top right corner.
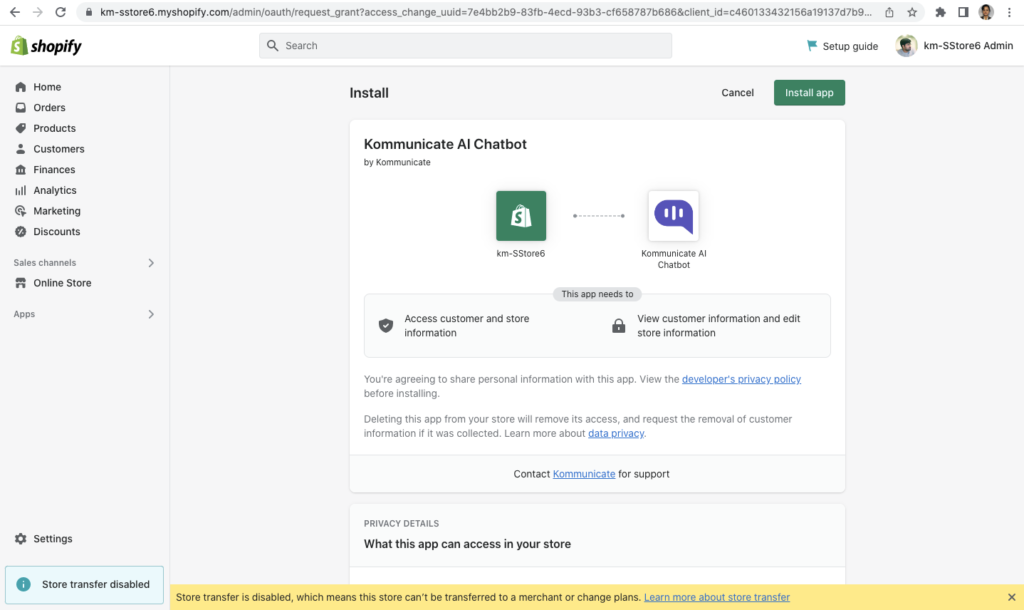
After clicking on the Install App, it will redirect you to the Kommunicate dashboard. Log into the Kommunicate account to finish the integration.
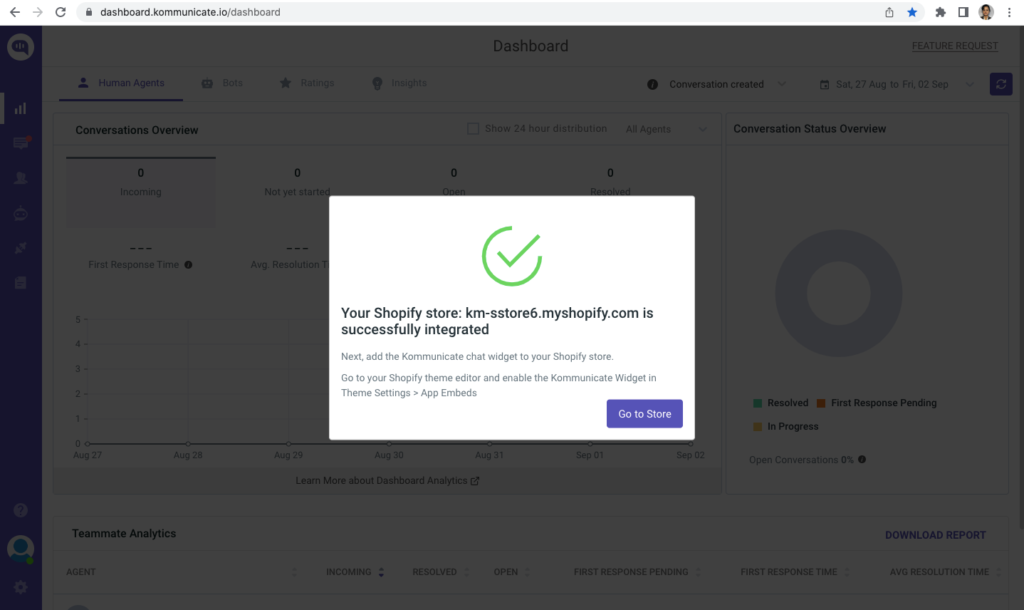
Step 4: Once you finish the integration, click on Go to Store and check the Kommunicate widget and Save the changes.
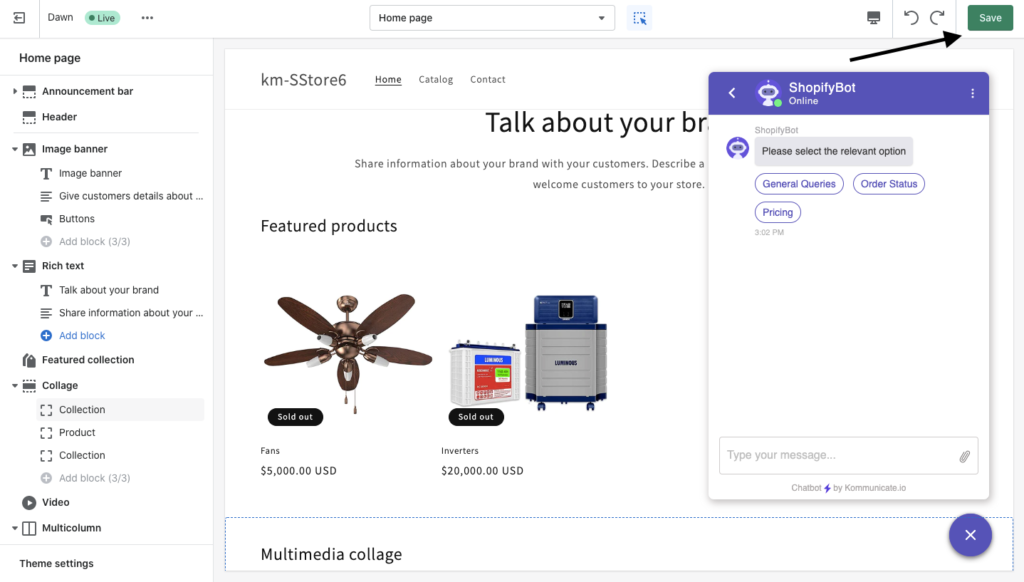
Now that the chatbot installation is complete, visit your store to check your chat widget.
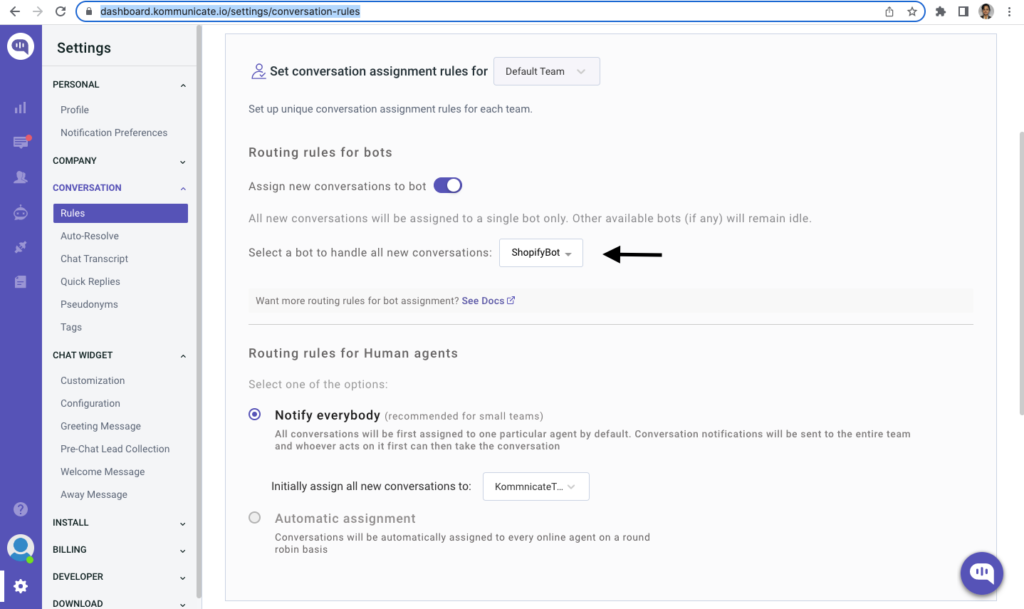
Do not forget to select your Dialogflow bot in the RULES section of the Kommunicate dashboard, so that you can enable the the same chatbot on your Shopify store.
At Kommunicate, we are envisioning a world-beating customer support solution to empower the new era of customer support. We would love to have you onboard to have a first-hand experience of Kommunicate. You can signup here and start delighting your customers right away.


