Updated on May 28, 2026

What is Dialogflow CX?
Google Dialogflow recently introduced Dialogflow CX (Customer Experience) – a powerful tool for creating advanced virtual agents. Dialogflow CX provides a new way of designing virtual agents, taking a state machine approach to agent design. This gives a clear and explicit control over a conversation, a better end-user experience, and a better development workflow. In this blog, we will see how to integrate Dialogflow CX chatbot with your website. We will be using the Kommunicate powered chat plugin to add to a website that integrates well with Dialogflow CX.

Step by Step Guide to Integrate Dialogflow CX Bot With Your Website
Bonus: Here’s a video to guide you on integrating a Dialogflow CX bot with your website.
Step 1: Set up Dialogflow CX & Kommunicate
Login to your Kommunicate dashboard and navigate to the Bot Integration section.
If you do not have an account, you can create one here for free.
Locate the Dialogflow CX section and click on Integrate Bot.
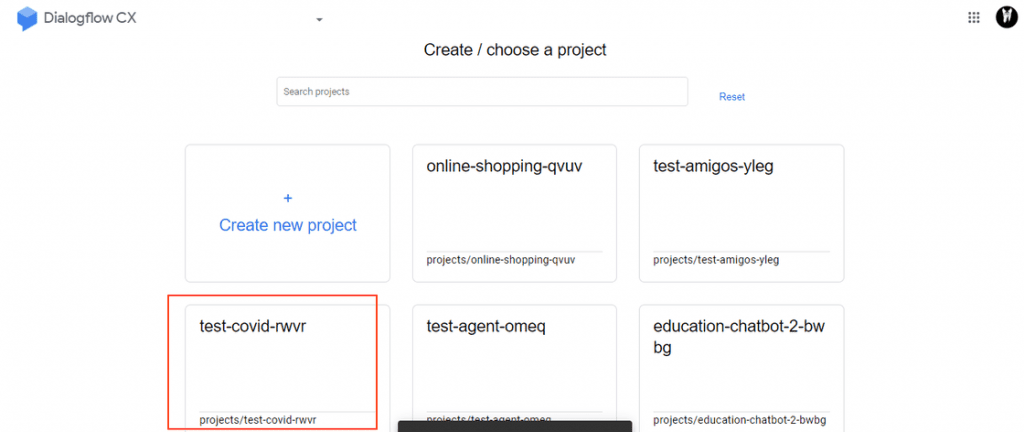
Step 2: Select the project from Dialogflow CX
Now, open to your Dialogflow CX console and create a new project or select an already existing project.
For example, in the below example – we are using the project ‘test-covid-rwvr’.
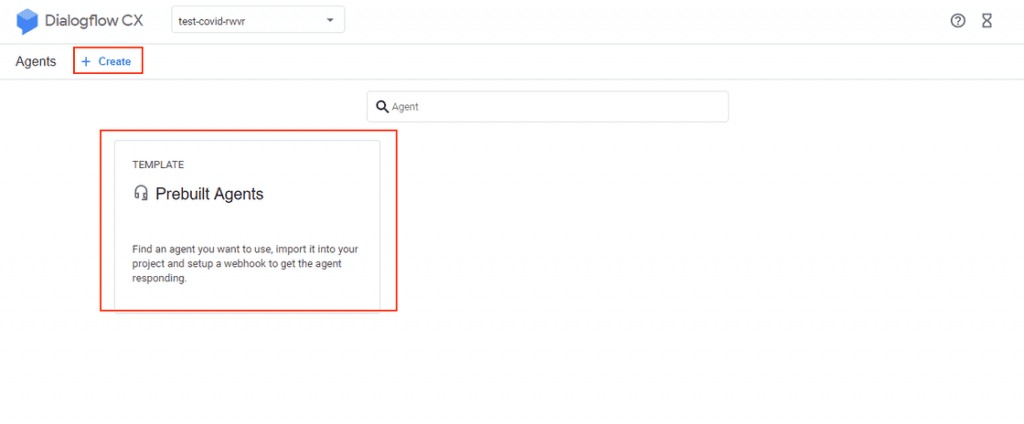
Step 3: Create an agent
Once the project is selected, create a new agent by clicking the Create button at the top or select an existing agent. You can also choose Prebuilt Agents templates for making it.
In the following example, the Prebuilt Agents – Car Rental template is used.
Click on Prebuilt agents; it will show all the templates available in Dialogflow CX. Select the required template.
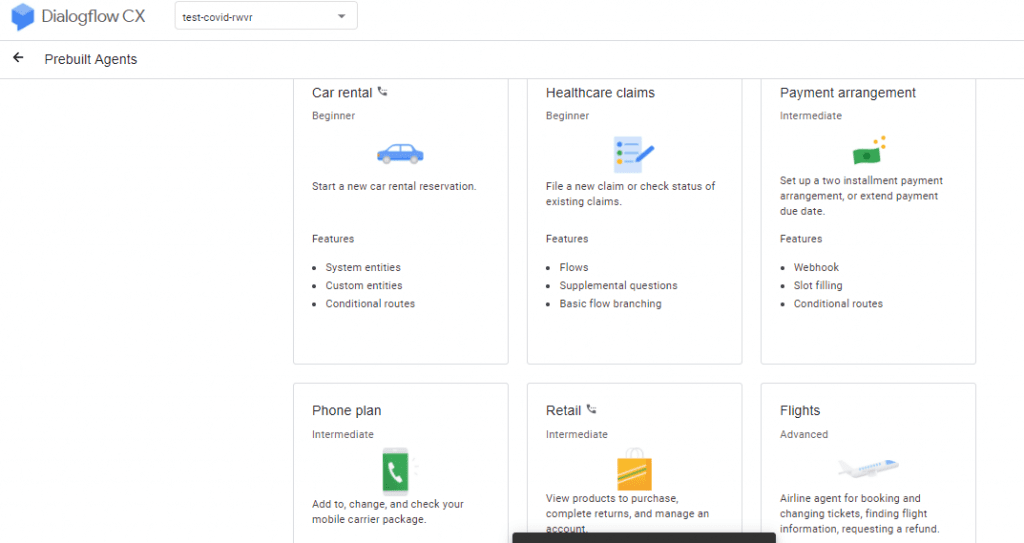
Let’s use the Car Rental agent for our project.
Step 4: Get your Dialogflow CX credentials
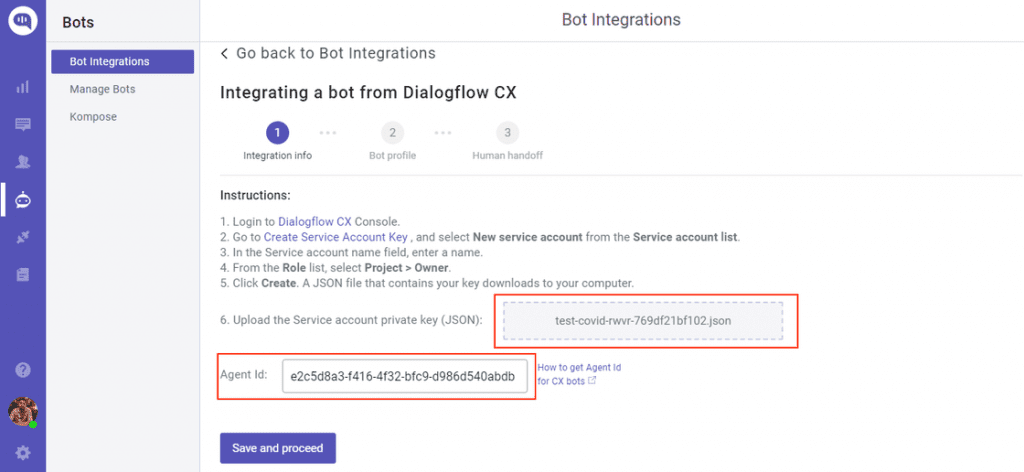
Before integrating Dialogflow CX with Kommunicate, we have to make sure the Dialogflow CX bot is created and API is enabled. Additionally, we have to get the service account key and the Agent ID.
Steps for creating the service account key file
✔️ To enable the API: https://cloud.google.com/dialogflow/cx/docs/quick/setup#api
✔️ Get service account key file as follows: https://cloud.google.com/dialogflow/cx/docs/quick/setup#auth
Please refer to the following doc for more information.
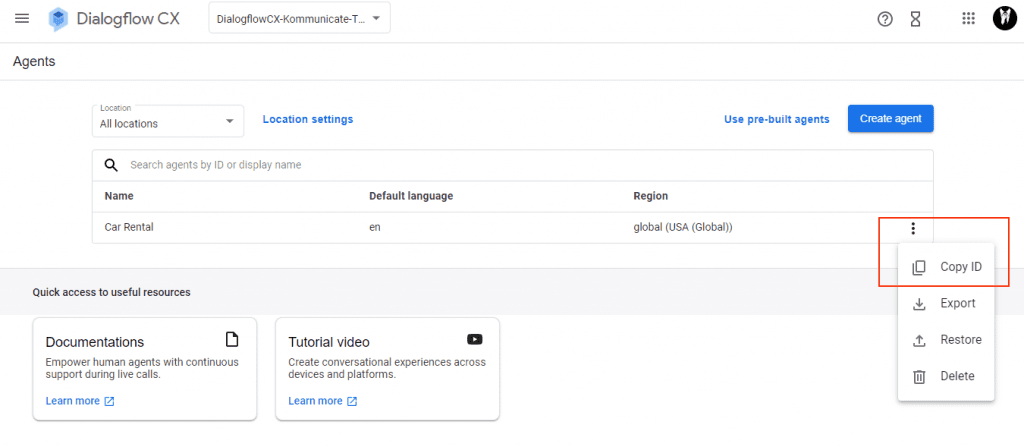
How to get Agent ID in Dialogflow CX console
Go to Dialogflow CX console >> Select the Project >> Then click on the three-dot & click Copy ID option which is the Agent ID.
The Agent’s name will be in the following format: projects/test-covid-rwvr/locations/global/agents/e2c5d8a3-f416-4f32-bfc9-d986d540abdbwhere.
Please note that the last alpha-numeric string is the Agent ID in the name. In our above project, it will be: e2c5d8a3-f416-4f32-bfc9-d986d540abdb. Copy the Agent ID as well.
Step 5: Integrate Dialogflow CX Bot into Kommunicate
Go back to the Bot Integration section in the Kommunicate Dashboard.
- Upload the “Service account key” you got from the previous step
- Mention the Agent ID (you got from the last step) in the Agent ID: (Dialogflow CX users only) field
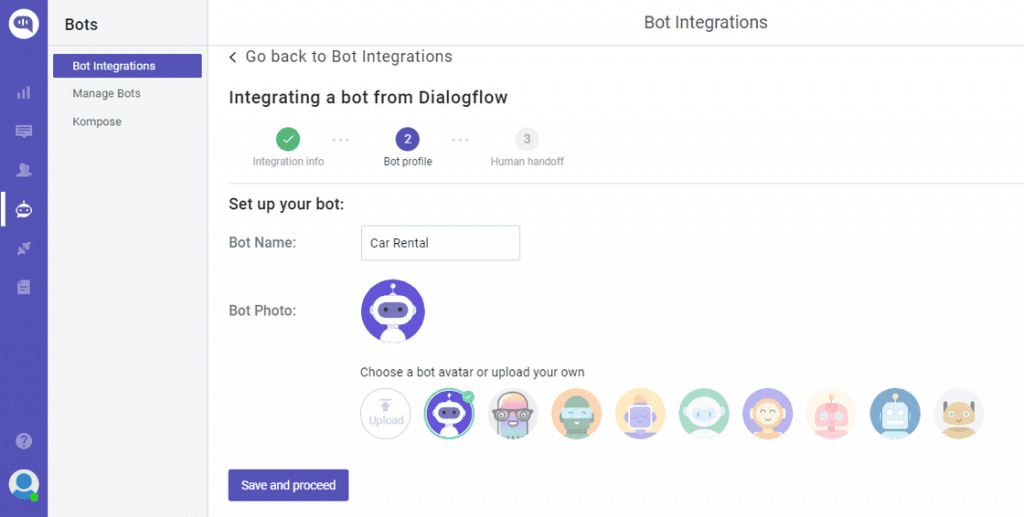
Click on Save and proceed. In the bot profile section that follows, you will be able to give your bot a name and identity. This name will be visible to your customers whenever the bot interacts with them.
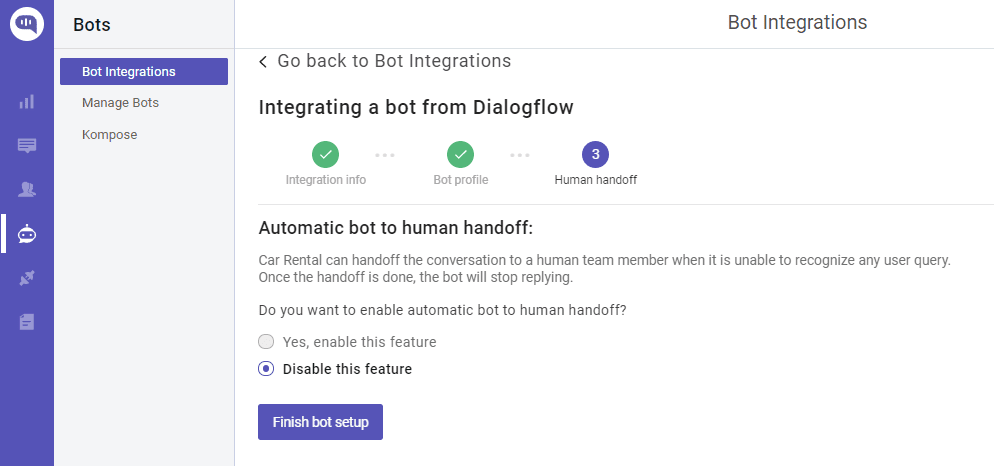
To complete the setup, click Save and proceed to the next steps. You can set up your bot profile and automatic chatbot to human handoff in the next steps.
You can check your newly created bot in two places:
- Dashboard →Bot Integration → Manage Bots: You can check all your integrated bots here
- Dashboard → Bot Integration: Your Dialogflow icon should be green with the number of bots are you have successfully integrated.
Step 6: Integrate Dialogflow CX bot in website
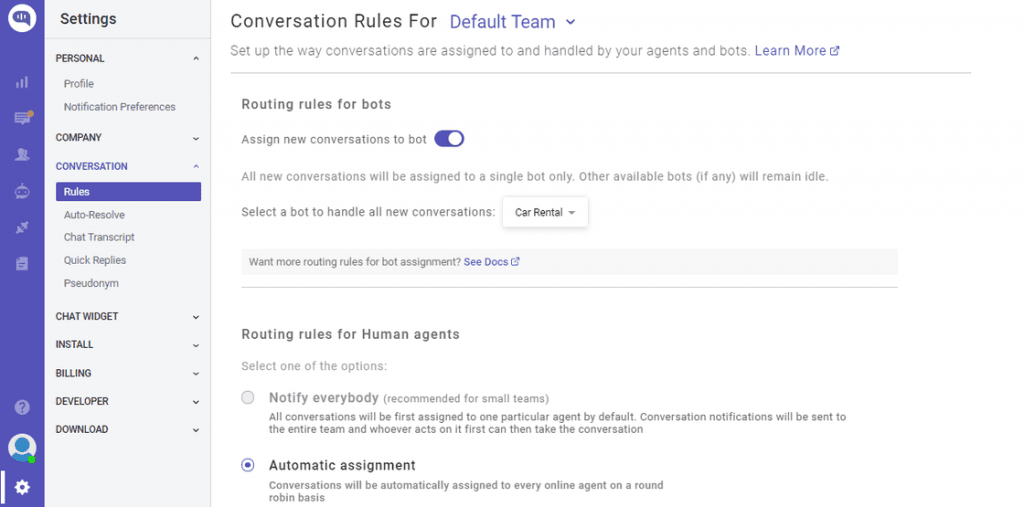
The final step is to connect the Dialogflow CX bot to your website, via the Kommunicate chat widget. Before that, to use the bot in customer conversations, you need to assign all the incoming conversations to the bot. You can do that from the Conversation rules section under ⚙️Settings.
Enable Assign new conversations to bot and select your newly configured bot from the Select a bot dropdown. Learn more about conversation rules here.
Navigate to Dashboard → ⚙️Settings. Click on the Install section and click the Web tab and copy the JavaScript code.
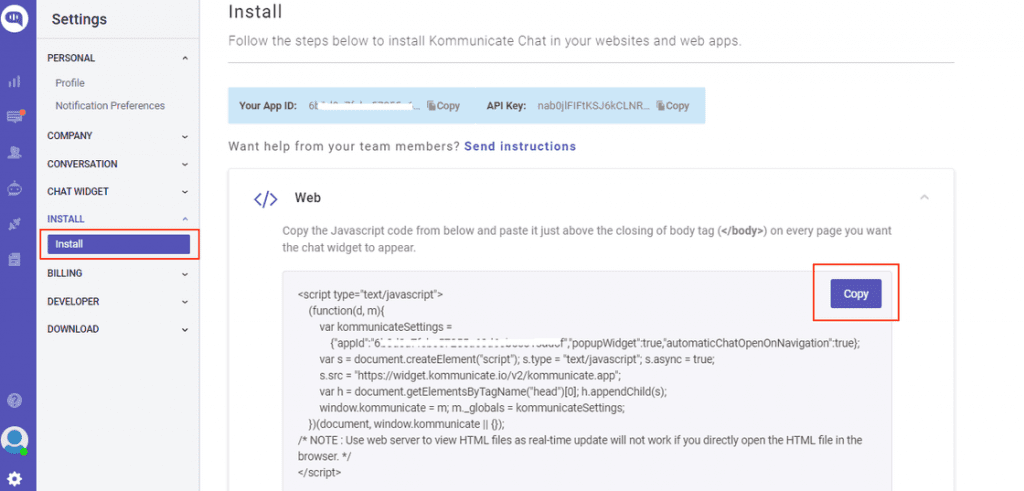
Copy the JavaScript code, add it to your website code. The Kommunicate chat widget will appear and you would be able to see your bot live in action. Please refer to the following link here for more information on web installation.
Wrapping Up
Integrating a Dialogflow CX chatbot with your website is a straightforward process when using the Kommunicate platform. By following the steps outlined in this guide, you can seamlessly set up a powerful virtual agent that enhances customer interactions and streamlines support. Dialogflow CX, with its state-of-the-art conversational design, paired with Kommunicate’s robust chat plugin, provides a comprehensive solution for elevating customer experience.

Avinash was a former employee at Kommunicate. He was a passionate marketer with a proven track record of quickly understanding a marketing campaign’s mission, vision, and objective and then communicating this to potential customers. He had an in-depth knowledge of all digital channels. Whenever he was not marketing, you could find him reading books, swimming or cooking.
At Kommunicate, we are envisioning a world-beating customer support solution to empower the new era of customer support. We would love to have you on board to have a first-hand experience of Kommunicate. You can signup here and start delighting your customers right away.


