Updated on January 17, 2025
Wix.com is a cloud-based web development platform. It allows users to create HTML5 web sites and mobile sites through the use of online drag and drop tools.
Can't wait to try out Wix live chat app on your website?

Click here to get your Wix live chat widget script
In this post, we will show you step by step guide to integrate live chat plugin on your Wix websites(Free and paid plan).
Firstly, choose a live chat plugin which you want to install on your website. I will take an example of Kommunicate, a live chat powered customer support platform. You can signup for free here and get the plugin script in a matter of seconds.
Start Building Your AI Chatbot Without Sign upSteps to install Live chat plugin in the Wix website (Free plan).
Note: In Wix free plan, you can adjust chat widget size only for the desktop version.
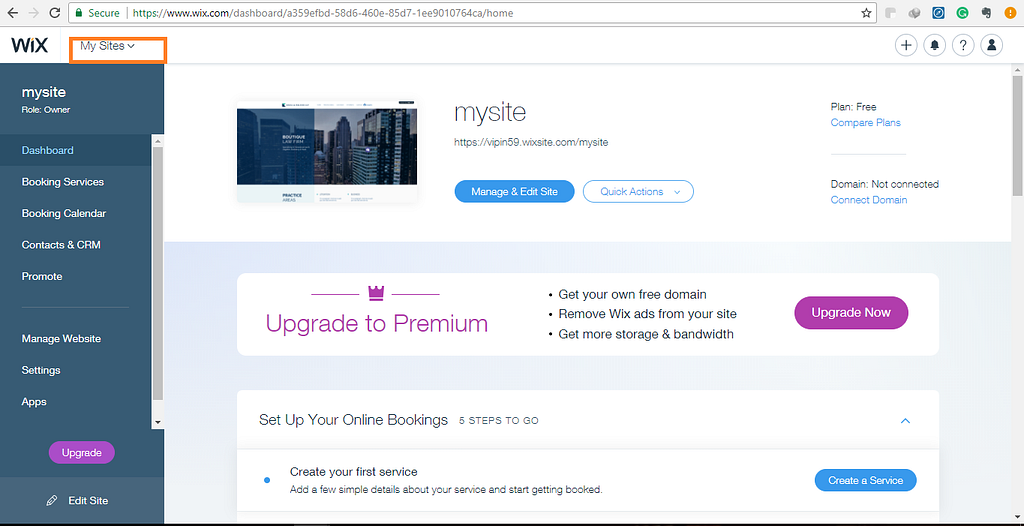
Step 1: Login to your Wix account
Login to your account and click on the My Sites.
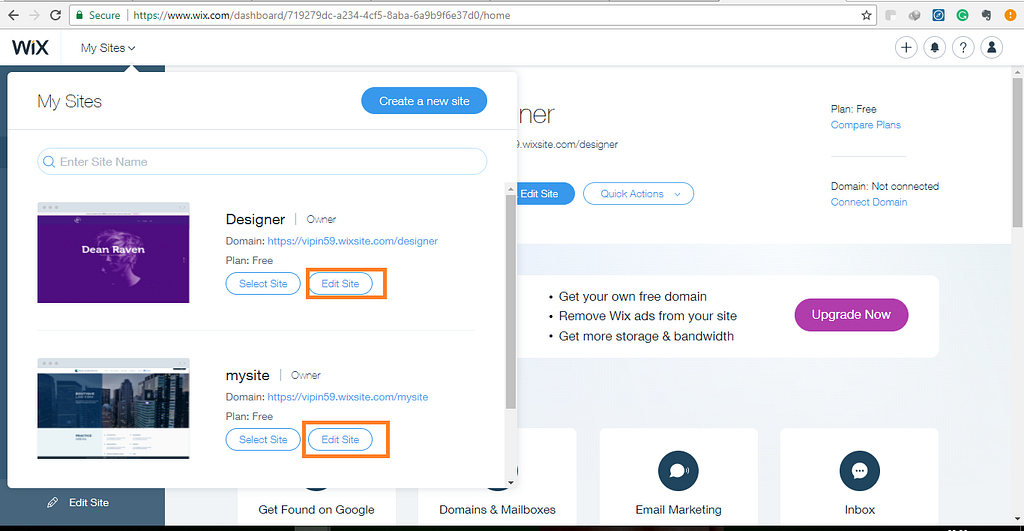
Step 2: Select the site you want to integrate live chat in
Select your site and click on the Edit Site button.
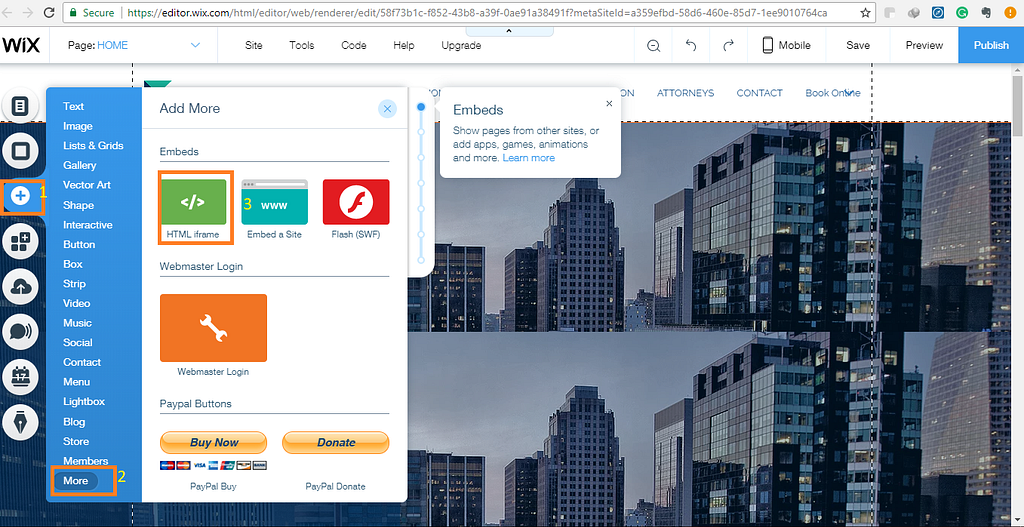
Step 3: Open HTML iframe
After clicking on the edit site. Go to the left side panel and click on Add icon then move to the cursor on More link => Open add more tab => select the HTML iframe.

Step 4: Paste your JavaScript code
Click on Enter code. HTML iframe Popup box will open. Here in this box paste our JavaScript code you got from Kommunicate dashboard.
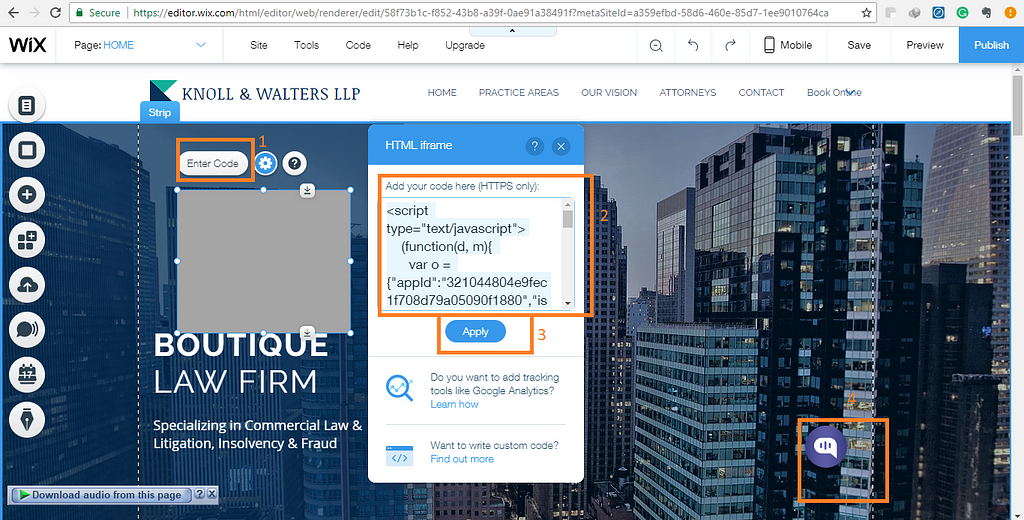
Adjust the width and height of chat widget ⇒ Click Apply
(Recommended size: Width – 400 px & Height 600 px)
Now you are done with integrating live chat.
Step 5: Adjust chat widget position
In this step, you need to adjust the chat widget position and enable it to show in all pages.
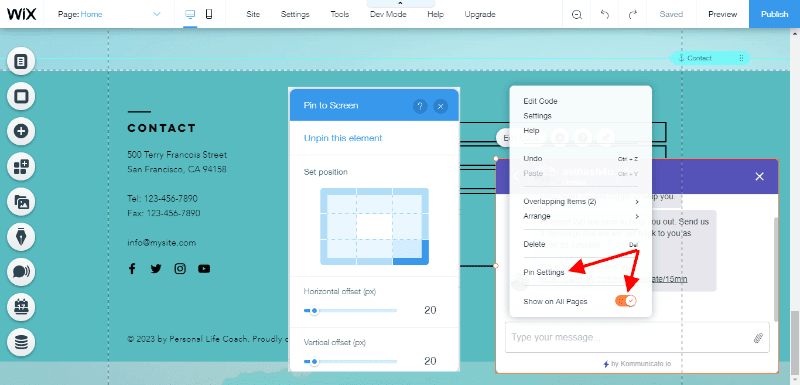
Right-click on your chat widget ⇒ Enable show on all pages ⇒ Select pin Settings/pin to screen as shown in the screenshot below. Then you will get the option to adjust position and size.
Set position and size as per your convinience.
Its done ! You are good to go! Happy Chatting!
Steps to install Live chat plugin in the Wix website (Paid plan).
If you are using a paid plan, please follow the below steps to install Kommunicate live chat.
Note: In Wix paid plan, you can adjust chat widget size for both mobile and desktop versions.
Step 1: Login
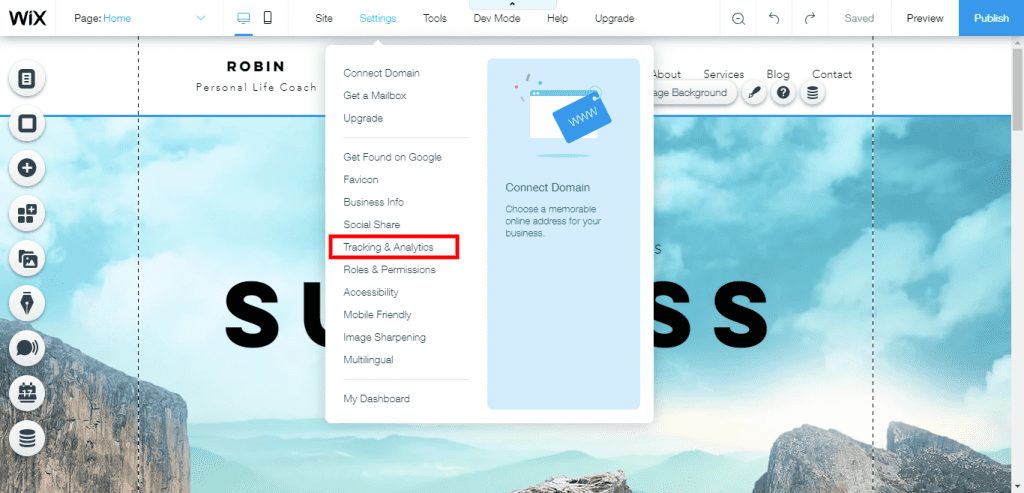
1 . Login to Wix dashboard
2. Choose your site ⇒ Settings ⇒ Tracking & Analytics
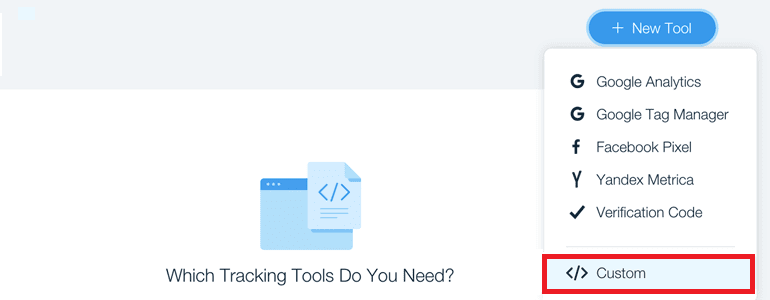
3. Next, click on New Tool and Custom.
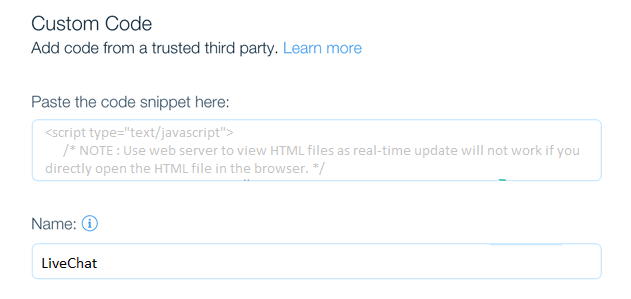
4. In the box, paste the code you got from Kommunicate dashboard and also give the Name for your chat widget implementation as LiveChat so that it’ll display on all pages.
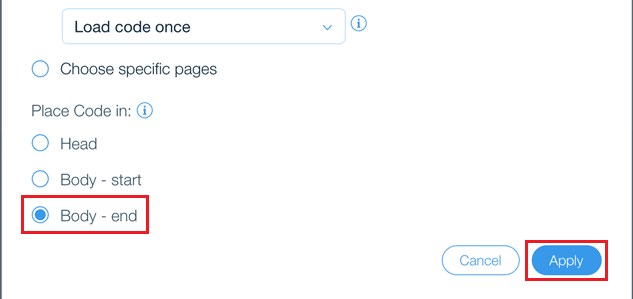
5. As a final step, select Body – end as the position for your LiveChat and click on Apply.
With these simple steps, you can integrate live-chat in your Wix websites.
Here is the video tutorial:
At Kommunicate, we are envisioning a world-beating customer support solution to empower the new era of customer support. We would love to have you on board to have a first-hand experience of Kommunicate. You can signup here and start delighting your customers right away.
P.S. — I thank Vipin from Kommunicate Team to put together the flow for adding live chat plugin in WordPress Websites.


