Updated on October 7, 2024
“WooCommerce is a free WordPress plugin that adds e-commerce functionality to your WordPress website, allowing you to have an online store. With just a few clicks, your WordPress website turns into a fully functional eCommerce website, complete with e-commerce chatbot integration for enhanced customer support.”
🚀 Read: Installing WooCommerce plugin
Benefits of Woocommerce
- Easy to use
- For Advanced Ventures
- Customizability and Support
- Wide variety of themes and plugins
- Multiple Payment Gateways
How chatbots add value to your WooCommerce store
A chatbot is a software component that simulates a conversation with human users. The e-commerce chatbots are increasingly being used at eCommerce stores to greatly improve user experience by offering product suggestions and answering common customer queries. For businesses looking to implement this technology, an ecommerce chatbot guide provides detailed instructions on setting up, customizing, and optimizing chatbots to enhance customer engagement and streamline support.
- It can serve a large number of users simultaneously at any time without slowing down.
- Customers get personalized shopping recommendations and price checks.
- It answers the questions intelligently and allows the owner to configure unanswered questions.
- It can help in conversions by providing product discovery and product suggestions to the user.
There are 2 phases to create a Woocommerce chatbot
- Create a Kompose chatbot and setup the answers
- Add the created chatbot to your Woocommerce site
Create a kompose chatbot and setup the answers
Step 1: Setup an account in Kommunicate
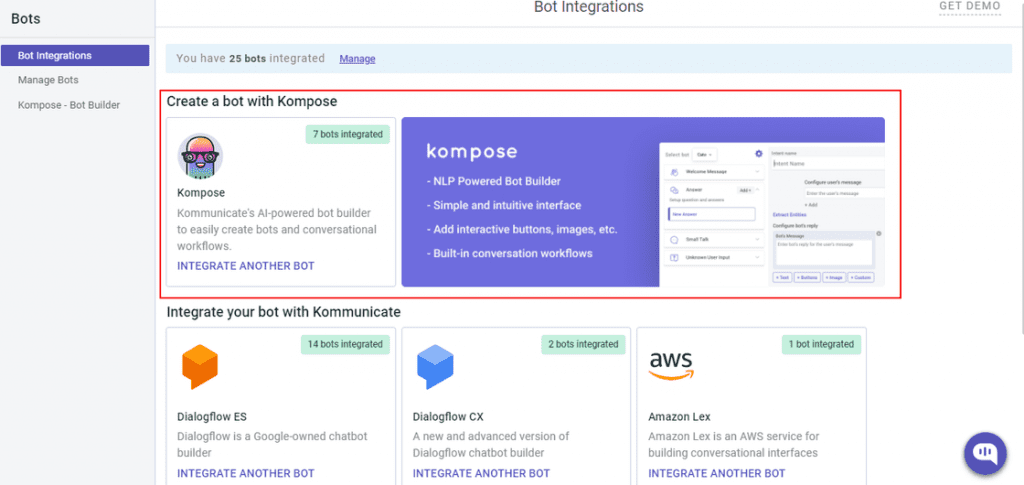
Login to your Kommunicate dashboard and navigate to the Bot Integration section.
If you do not have an account, you can create one here for free.
Locate the Kompose section and click on Integrate Bot.
Create a Custom Chatbot For Your Business Without Sign upNow, set up your bot by providing bot name, bot language, human handoff setting, and finish the bot setup.
You can check your newly created bot in the below section:
- Dashboard →Bot Integration → Manage Bots:
Step 2: Create welcome messages & answers for your Woocommerce chatbot
Go to the ‘Kompose – Bot Builder’ section and select the bot you created.
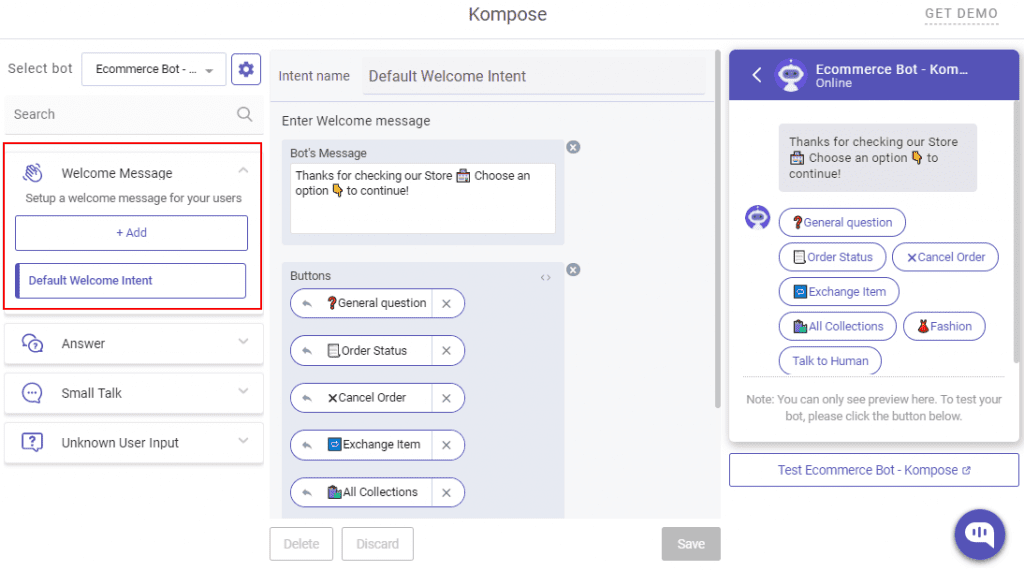
First set the welcome message for your chatbot. The welcome message is the first message that the chatbot sends to the user who initiates a chat.
- Click the “Welcome Message” section, in the “Enter Welcome message – Bot’s Message” box provide the message your chatbot should be shown to the users when they open the chat and then save the welcome intent.
Once the welcome message creation is completed, the next step is to create answers for your chatbot.
The answers section is where you’ve to add all the user’s messages and the chatbot responses.
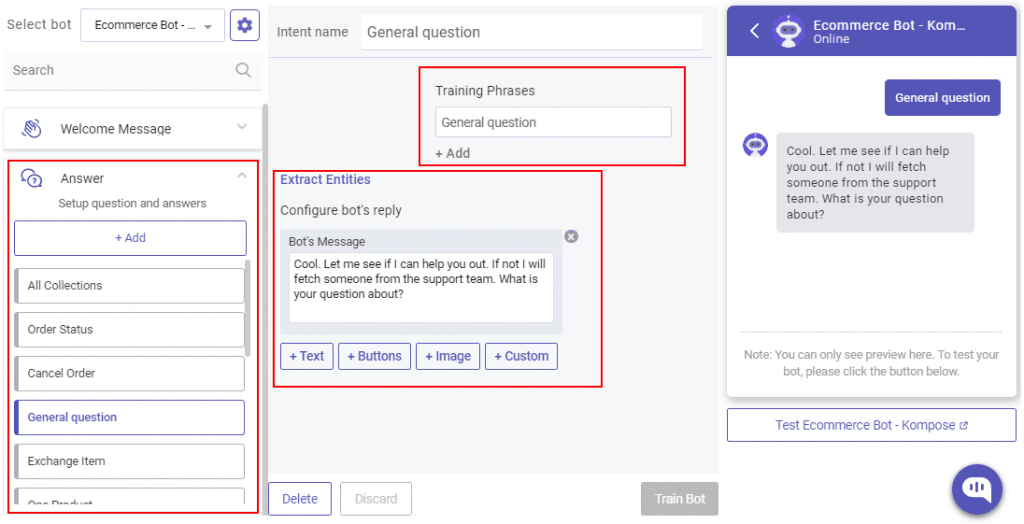
- Go to the “Answer” section, click +Add then give an ‘Intent name’
In the Configure user’s message section – you need to mention the phrases that you expect from the users that will trigger.
Configure bot’s reply section – you need to mention the responses (Text or as Rich messages) the chatbot will deliver to the users for the particular user’s message. You can add any number of answers and follow-up responses for the chatbot.
You can also refer to this blog for Kompose chatbot integration with Kommunicate.
🚀 Video: Create a Chat Bot in 5 Minutes
Step 3: How to activate the chatbots
Once you create a bot then you can set it as a default bot in the conversation routing rules section as shown below.
- Click on ⚙️Settings >> Conversation rules >> Routing rules for bots >> Then click on bot like below and select your bot
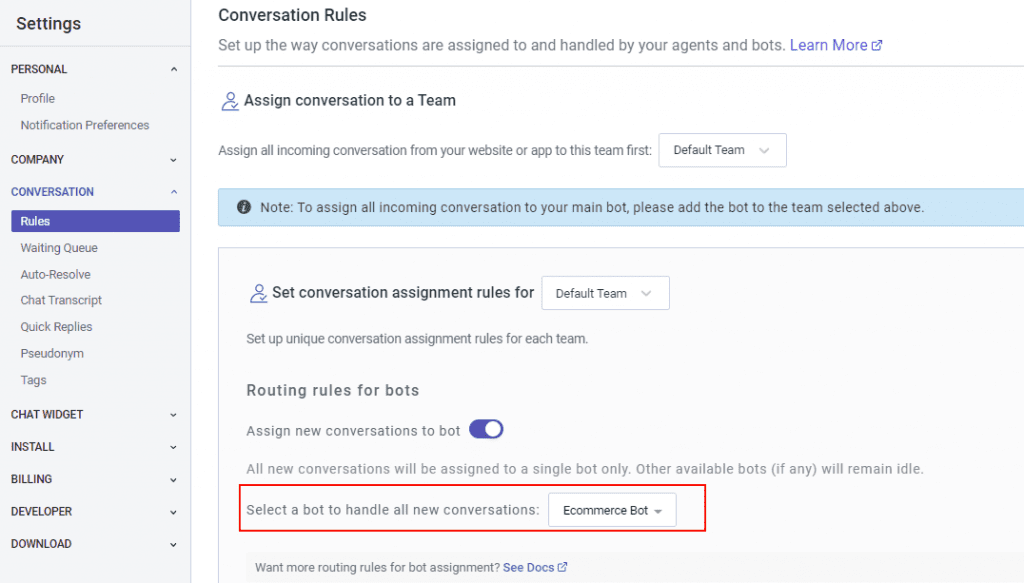
Now, this bot will reply in all the conversations.
Add the chatbot to your Woocommerce website
Step 4: Login to your WordPress admin dashboard
From the left navigation panel, click on Plugins. After that, click on Add New

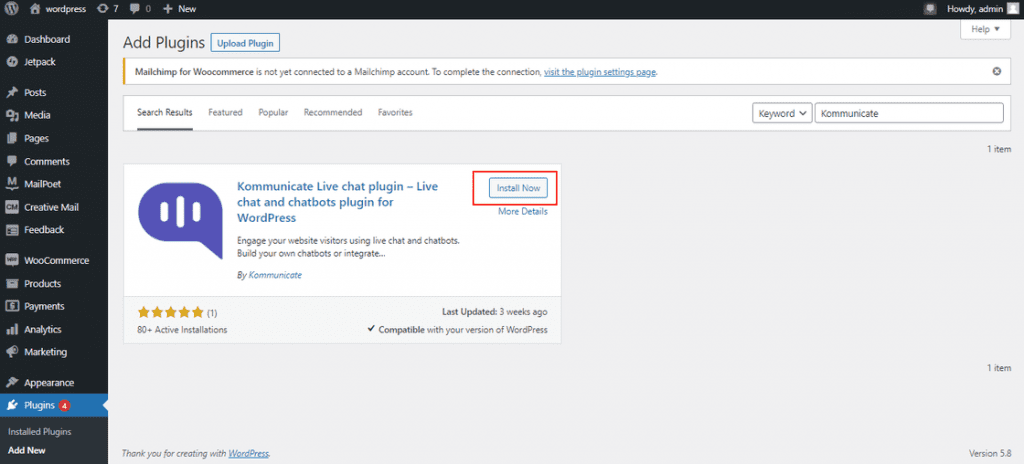
Step 5: Add New Plugin
Navigate to the search bar and search for ‘Kommunicate’. You will see a Kommunicate Live Chat plugin. Click on the Install Now button for that plugin. Please make sure you Activate the plugin to make use of it.
🚀 Read: Add Chabot to Shopify
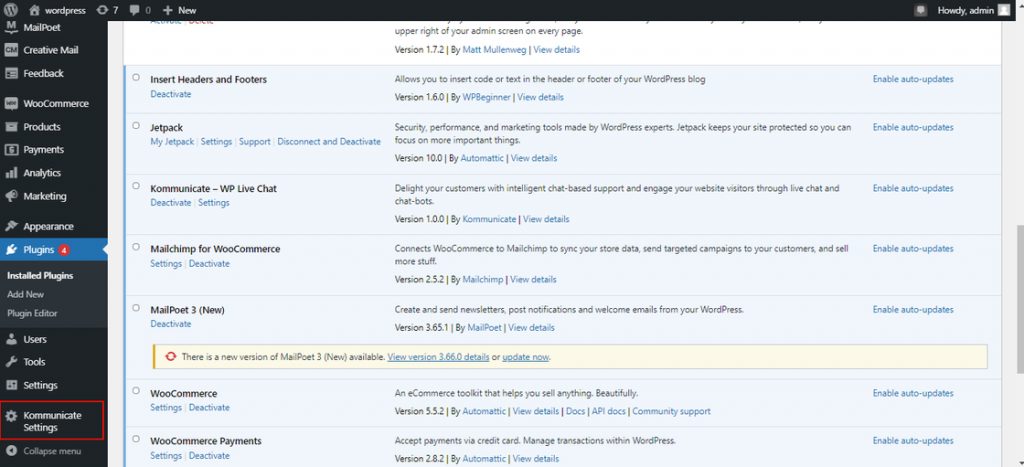
Step 6: Open Kommunicate plugin panel
From the left navigation menu, below the Settings option, click on the Kommunicate Settings.
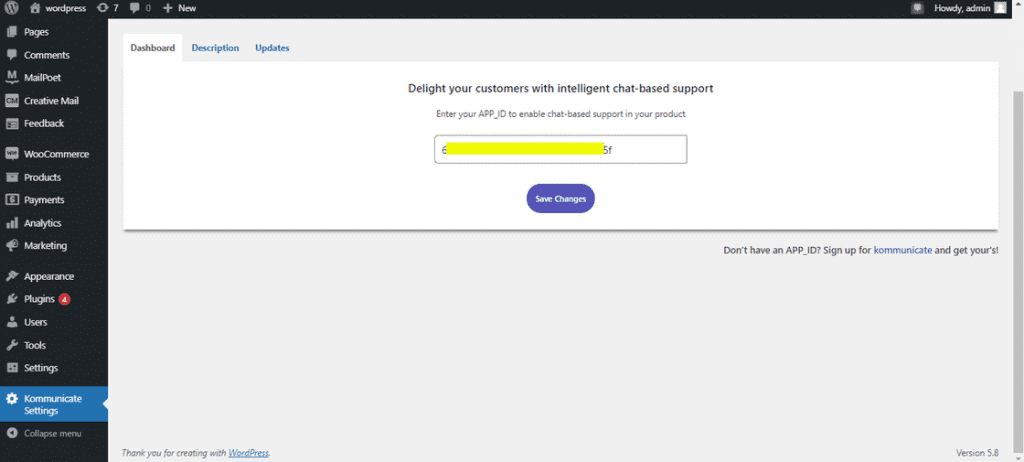
Step 7: Add your Kommunciate App ID
Here, it will ask you for your APP ID. Copy your Kommunicate App ID from the Kommunicate dashboard -> Settings -> Install. Insert the copied APP ID in the box and Save Changes.
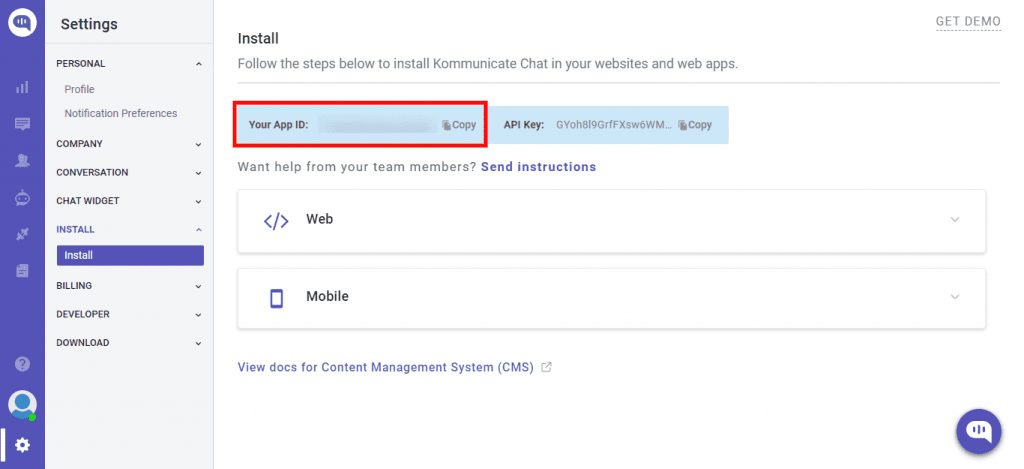
To Get the APP ID:
Go to the Kommunicate dashboard -> Settings -> Install
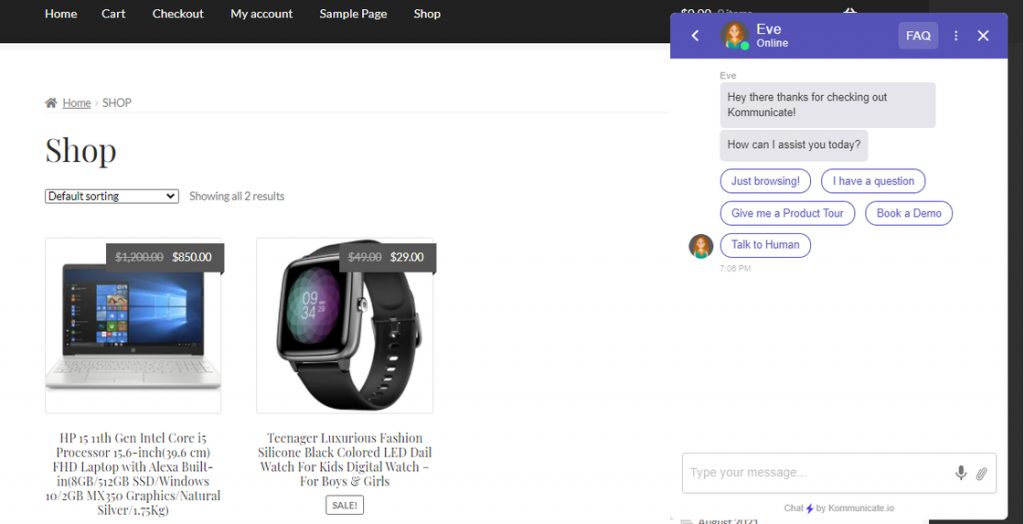
Open your Woocoomerce website and you will see the Kommunicate chat widget will be loaded along with the bot responses. You can manage the conversations from Kommunicate dashboard.
Creating and installing your Woocommerce chatbot is very simple and requires no coding skills or technical expertise. Install on your Woocommerce site and improve the revenue with the chatbots.
🚀 Read: Create & Add Chatbot to Bigcommerce
At Kommunicate, we are envisioning a world-beating customer support solution to empower the new era of customer support. We would love to have you on board to have a first-hand experience of Kommunicate. You can signup here and start delighting your customers right away.


