Updated on May 28, 2026
Flask is a micro web framework written in Python, while Dialogflow is Google’s NLU-powered chatbot development framework. Dialogflow chatbots enable enterprises to automate customer interactions and provide instant support and personalization at scale.
But why use Flask for chatbot development? Here are the benefits listed:
Benefits of using Flask:
- Customization: Flask has a minimalist and modular design. Developers can thus build chatbots specifically tailored to meet the needs of enterprises. You can customize every aspect of the chatbot’s behavior using Flask.
- Scalability: Flask is lightweight and can be used to build scalable chatbots that can handle many concurrent requests. Flask-based chatbots can be deployed by Enterprises on Google Cloud Platform or AWS, ensuring smooth performance.
- Easy Deployment: In enterprise settings, rapid deployment and iteration are essential to stay ahead of the competition. This is possible with the help of Flask, which allows you to quickly deploy chatbots to production environments. This also minimizes downtime and accelerates the time to market.
Do you want to find out more about the Dialogflow? Check out these articles:
- How to Add a Dialogflow Chatbot in Whatsapp
- How to Integrate a Dialogflow Bot with Telegram
- How to Integrate Dialogflow CX Bot in Website
Pre-requisites:
Before starting to build your chatbot with Dialogflow and Flask. We need to gather some essential tools and prepare the environment. Consider this your pre-flight checklist for a smooth journey:
- You will need Dialogflow and Kommunicate accounts to deploy the chatbot.
- You will need Python and Flask frameworks installed on your system. For more info about the Flask framework, please refer to this link.
We will be using Flask in this tutorial. You can see this tutorial if you want to add a Dialogflow chatbot to the Django framework.
Begin Your Chatbot Journey Now Without Sign upSteps to Add Dialogflow Chatbot to Flask
Step 1: Create an agent
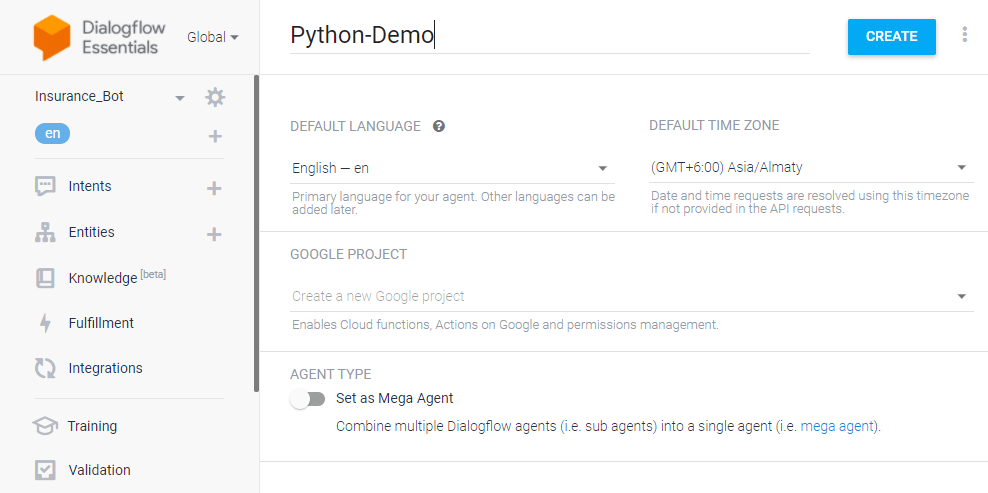
Login to the Dialogflow console. An agent is just a chatbot. You can train the agent with training phrases and corresponding responses to handle expected conversation scenarios with your end users.
Click the dropdown near the Agent settings, click Create new agent, provide an agent name (We’re using Python-Demo), and then click CREATE.
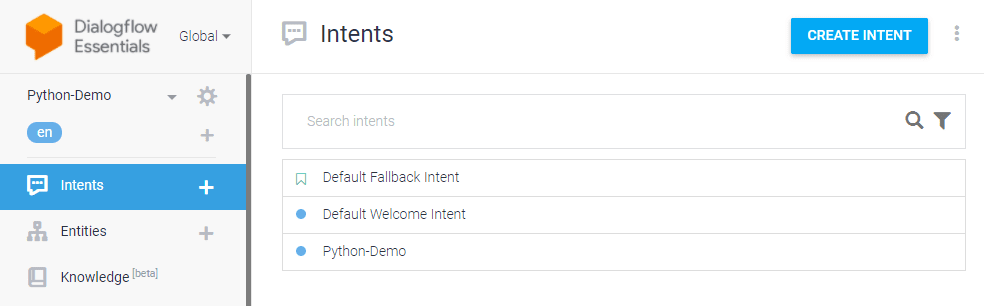
Step 2: Create an intent
An intent categorizes the end-user’s intention for one conversation turn. For each agent, you can define many intents. When an end-user writes or says something, referred to as an end-user expression, Dialogflow matches the end-user expression to the best intent in your agent.
Click the CREATE INTENT button, provide an intent name (for example, python-demo), and save.
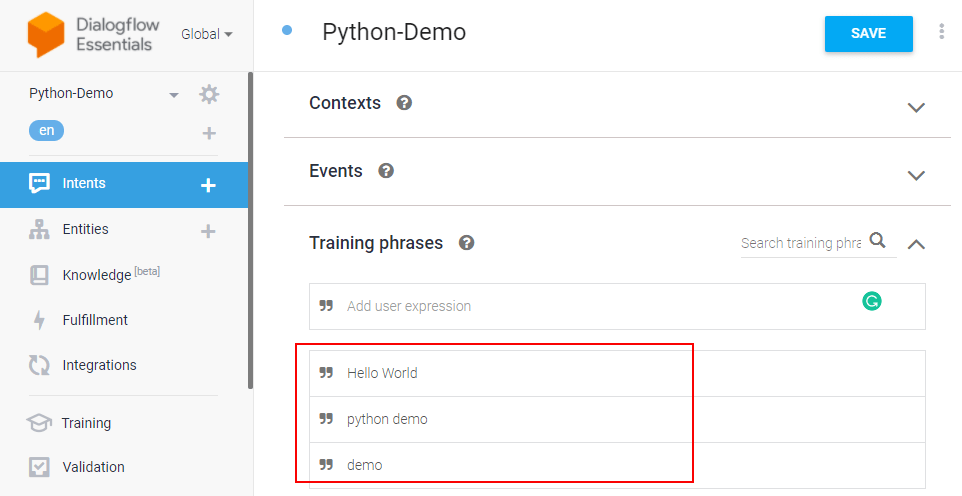
Step 3: Add training phrases
These are example phrases for what end-users might say. When an end-user expression resembles one of these phrases, Dialogflow matches the intent.
Click the intent created (python-demo) and add the user phrases in the Training phrases section.
🚀 Here’s a video for you on creating a Dialogflow chatbot and learning more about agents, intents, and entities:
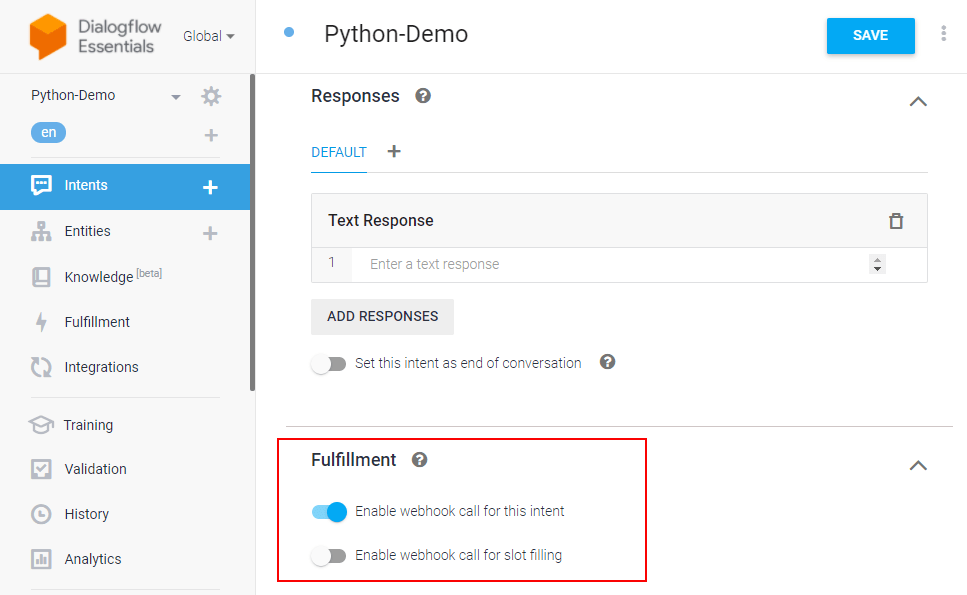
Step 4: Enable fulfillment
After adding an intent, you don’t need to add agent responses in the Responses section. Since we are using Flask for the same, you need to enable webhook for this intent. The webhook will help us transfer data and responses between Dialogflow and Flask. Dialogflow provides webhook services via Dialogflow Fulfillment.
Fulfillment is a code deployed through a web service to provide data to a user. You can enable webhook calls for all those intents that require some backend processing, database query, or third-party API integration.
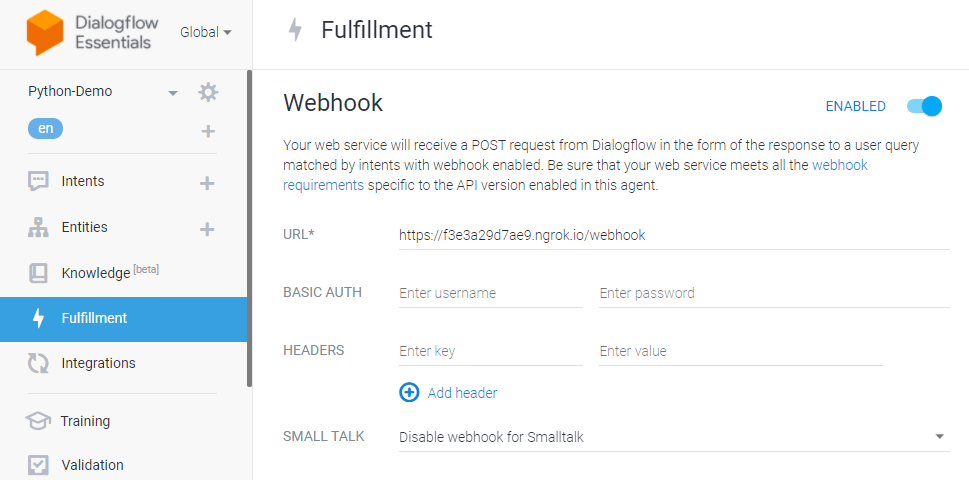
Under the Fulfillment section, click Enable webhook for this intent and save the intent.
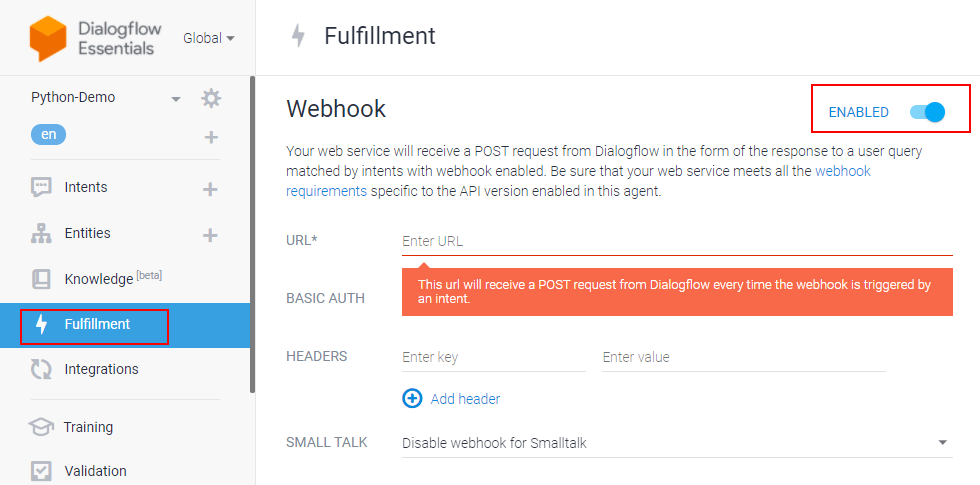
Dialogflow fulfillment has two options – Webhook and Inline Editor. The inline editor is also a webhook but hosted by Google Cloud functions. We are going to use the webhook.
Go to the “Fulfillment” section & enable Webhook.
Step 5: Use Python with Flask & enable the webhook server
The webhook requires a URL, and it should be an HTTPS protocol. The webhook URL will receive a POST request from Dialogflow every time an intent triggers the webhook.
We are using Python programming language and Flask framework to create the webhook.
Create a file (for example – app.py). Import all the necessary libraries (ex: os, JSON, send_from_directory, request) for Python. Please check if you have Flask on your system. If not, install it using pip, and here’s the documentation.
import flask
import json
import os
from flask import send_from_directory, request
We need to define and add a route/webhook method with a POST request to handle all the agent webhook requests. A POST request will be sent to this URL /webhook. It executes all the processes inside the method.
Also, a fulfillment text is added to return that when it triggers the training phrase from Dialogflow.
If you need to add more conditions & responses, you can define them inside the webhook method.
<pre class="wp-block-code"><code># Flask app should start in global layout
app = flask.Flask(__name__)
@app.route('/favicon.ico')
def favicon():
return send_from_directory(os.path.join(app.root_path, 'static'),
'favicon.ico', mimetype='image/favicon.png')
@app.route('/')
@app.route('/home')
def home():
return "Hello World"
@app.route('/webhook', methods=['POST'])
def webhook():
req = request.get_json(force=True)
print(req)
return {
'fulfillmentText': 'Hello from the bot world'
}
if __name__ == "__main__":
app.secret_key = 'ItIsASecret'
app.debug = True
app.run()</code></pre>
Step 4: Use Ngrok to create Public Url
After setting up the Python process, let’s use Ngrok to create a public URL for the webhook and listen to port 3000 (in this example). For Dialogflow fulfillment, you will need an HTTPS-secured server since the local server (localhost) will not work. You can also use a server and point a domain with HTTPS to that server.
You will get a URL like https://f3e3a29d7ae9.ngrok.io/webhook, where the webhook is the POST route for Dialogflow we mentioned in the Python file.
Copy the URL you created (In this example – https://f3e3a29d7ae9.ngrok.io/webhook) and paste it into the Dialogflow fulfillment URL field.
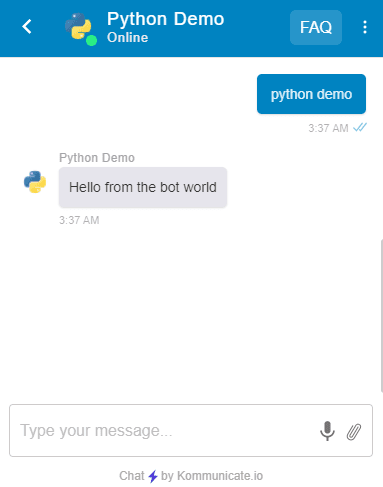
Step 7: Add chatbot to Python
Once the Dialogflow setup is done, you can easily add it to your website or apps using Kommunicate & test the Python chatbot working.
Automate customer queries, streamline support workflows, and boost efficiency with AI-driven email ticketing from Kommunicate!Wrapping Up
How easy was that? You can add a Dialogflow chatbot to your Python frameworks in a few simple steps. Do try this out and let us know in the comments. We would love to try your chatbot out.
Frequently Asked Questions(FAQs)
1. What are the benefits of using Dialogflow and Flask for building a chatbot?
Dialogflow: User-friendly interface, pre-built NLP features, flexible integration options.
Flask: Lightweight and versatile, allows for custom logic and flexibility.
Combination: Cost-effective, powerful, and easy to learn compared to other platforms.
2. What types of chatbots can I build with Dialogflow and Flask?
This combination allows you to build various chatbots, from simple FAQ bots to more complex conversational assistants. The possibilities are limited only by your imagination and skills.
3. Can I deploy my chatbot publicly with this method?
Absolutely! Depending on your needs, we’ll discuss different deployment options, including local testing and cloud platforms.
4. Can I use your code snippets directly in my project?
Yes, the code snippets in this blog are provided for your reference and learning purposes. Feel free to adapt and integrate them into your project, tailoring them to your needs.
5. What are the limitations of using this method for building chatbots?
While powerful, using Dialogflow and Flask together may have limitations depending on your complexity requirements. Specialized bot development platforms might be necessary for highly complex chatbots with advanced AI features.

Adarsh Kumar is the CTO & Co-Founder at Kommunicate. As a seasoned technologist, he brings over 14 years of experience in software development, artificial intelligence, and machine learning to his role. His expertise in building scalable and robust tech solutions has been instrumental in the company’s growth and success.


