Updated on May 5, 2026
A live chat plugin in WordPress lets you add a chat widget to your website so visitors can ask questions, get support, and connect with your team in real time.
If you have ever thought about building a website or a blog, WordPress must have been a top of mind recall. WordPress is an online, open-source blogging and website content management system.
Can't wait to try out the wordpress live chat demo?

Click here to get your kommunicate live chat plugin script
It powers a whopping 20 million websites on the internet. It is easily the most popular option for anyone looking to build a site (be a tech or non-tech guy). Nearly 30% of the world’s top 1 million sites are powered by WordPress.
What gives WordPress an edge over other players in the amount, quality and accessibility of plugins to add numerous features in your website. In this post, I will guide you through simple steps to add a live chat plugin on your WordPress websites.
Firstly, choose a live chat plugin which you want to install on your website. I will take an example of Kommunicate, a live chat powered customer support platform. You can signup for free here and get the plugin script in a matter of seconds.
There are two ways to add Kommunicte live chat in your WordPress website
1. By directly installing the WordPress-Live Chat plugin on your website, you can find the plugin here.
OR
2. You can follow the custom installation process described below.
Boost support efficiency and resolve queries faster with
AI-powered email ticketing from Kommunicate!
Adding Live Chat Plugin in WordPress Website
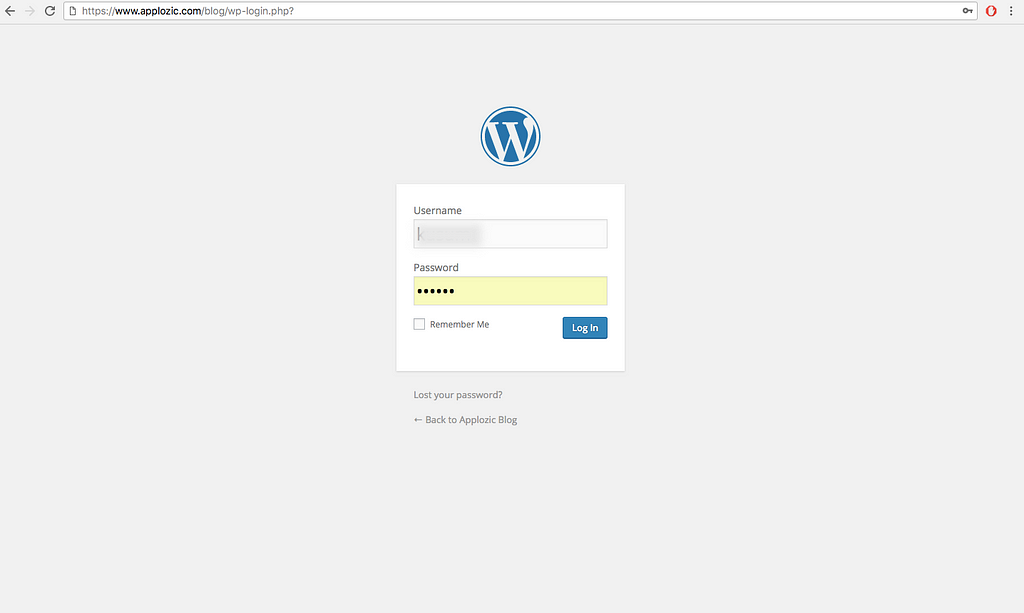
Start Building Your AI Chatbot Without Sign upStep 1: Log in to WordPress
Simply log in to your website’s WordPress dashboard.
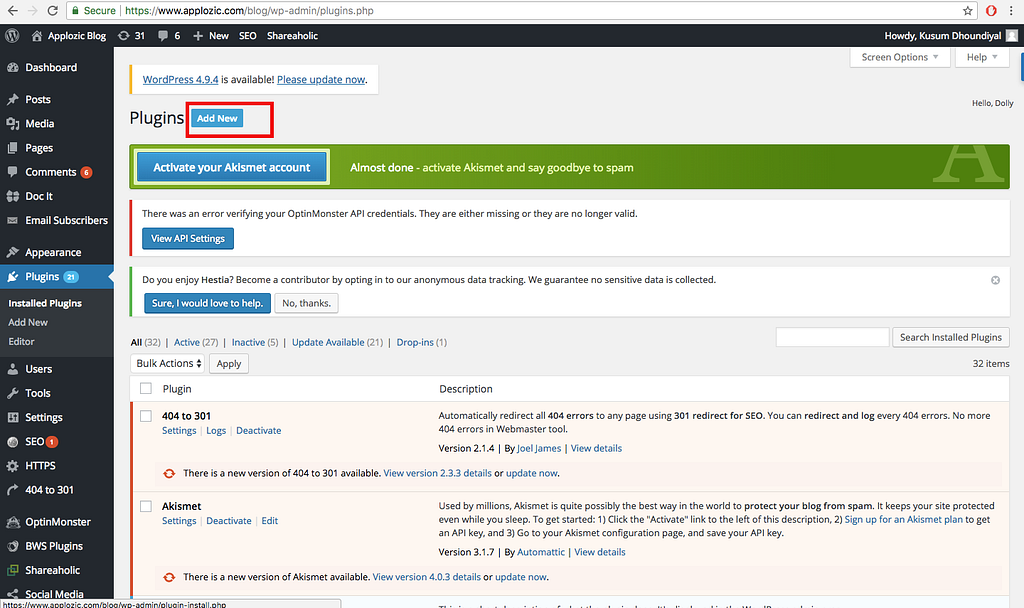
Step 2: Navigate to Plugins
From the left navigation panel, click on Plugins. Thereafter, click on Add New.
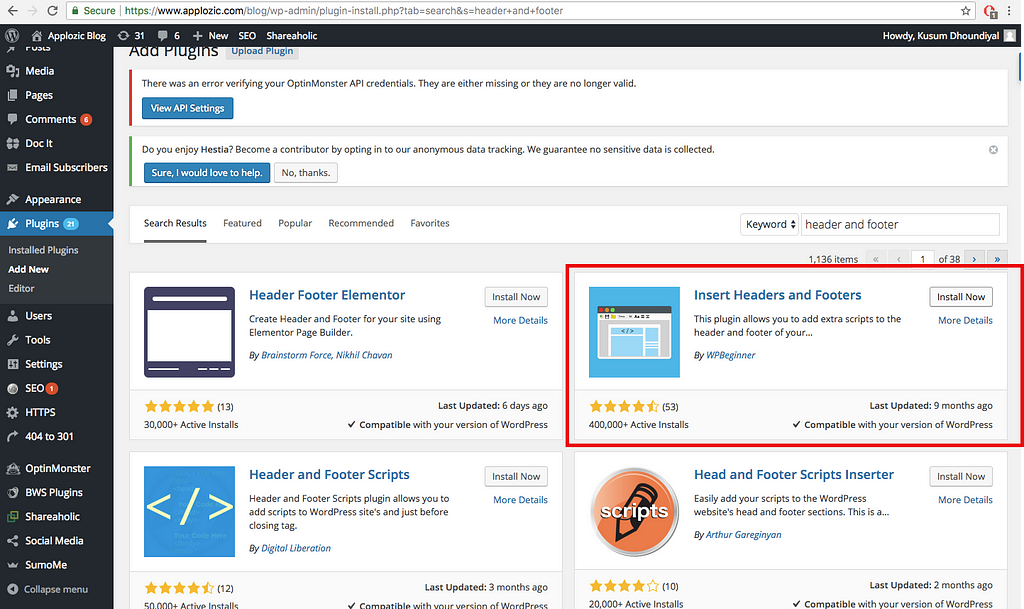
Step 3: Add New Plugin
Navigate to the search bar and search for ‘Insert Header and Footers’. You will see many options on the search result page. Click on the Install Now button for the Insert Headers and Footers plugin. Please make sure you Activate the plugin to make use of it.
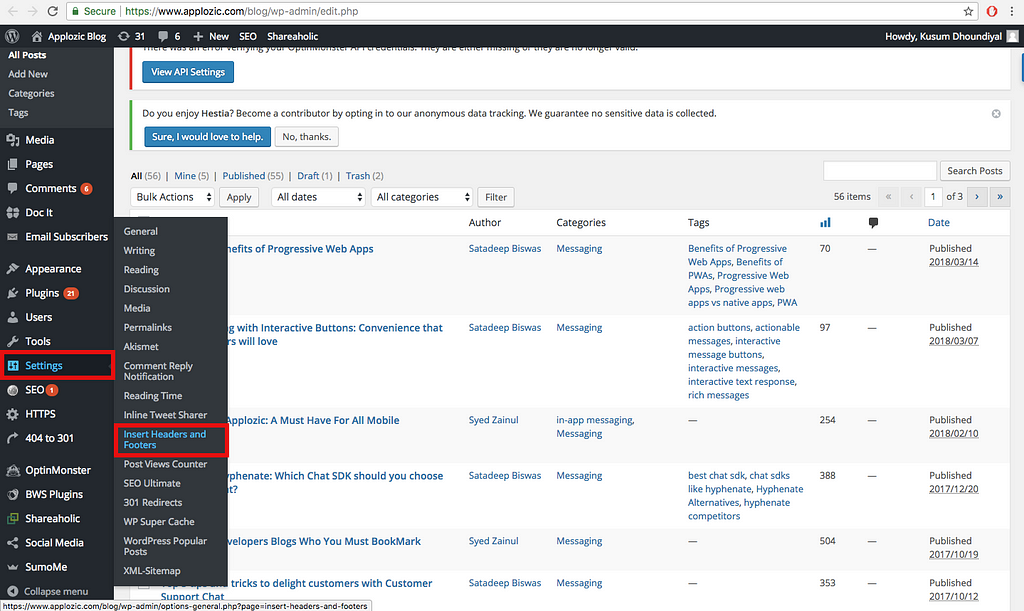
Step 4: Open Headers and Footer Console
From the left navigation menu, click on Settings. Select Insert Headers and Footers from the Settings menu.
Step 5: Add the Live Chat Script
Signup for Kommunicate for free trial, and copy your live chat plugin script from Kommunicate dashboard -> Settings -> Install. Insert the copied script in the Script in Footer section of the Header and Footer console.

Voila! Live chat is now active on your website
Open the website and check out the chat plugin. You will find it in the bottom-right corner. Now your website visitors can chat effortlessly with you. You can manage the conversations and appearance from Kommunicate dashboard.
Adding live chat on your WordPress websites and as easy as it gets and does not require any coding skills or technical knowledge. Leverage the live chat to interact with your website visitor and customers easily.
At Kommunicate, we are envisioning a world-beating customer support solution to empower the new era of customer support. We would love to have you on board to have a first-hand experience of Kommunicate. You can signup here and start delighting your customers right away.
Suggested Read: WordPress Chatbot: How to Create Without Any Coding
P.S. — I thank Kusum from Kommunicate Team to put together the flow for adding live chat plugin in WordPress Websites.


