Updated on June 23, 2026
The chatbots are cropping up and gaining popularity everywhere. It’s also commonplace for chatbots to appear on websites, instead of a user attempting to search your website to find what they need, they can just engage in directions conversation with your chatbot. In this post, we will learn how to add a Dialogflow bot, one of the most popular platforms for building chatbots, to WordPress websites with the help of Kommunicate.
If you don’t have Kommunicate a/c, please signup here for free!
There are two stages one needs to follow to add a Dialogflow bot to WordPress websites. We will go through them in detail below. We will use Kommunicate’s chat widget and Dialogflow bot in this article. Both these tools are free to try.
If you don’t have a Dialogflow chatbot, please read this step by step guide and build your own chatbot.

Stage 1: Integrate Dialogflow Bot with Kommunicate
The first stage in the process is to integrate your Dialogflow chatbot with Kommunicate account. Here are steps to follow –
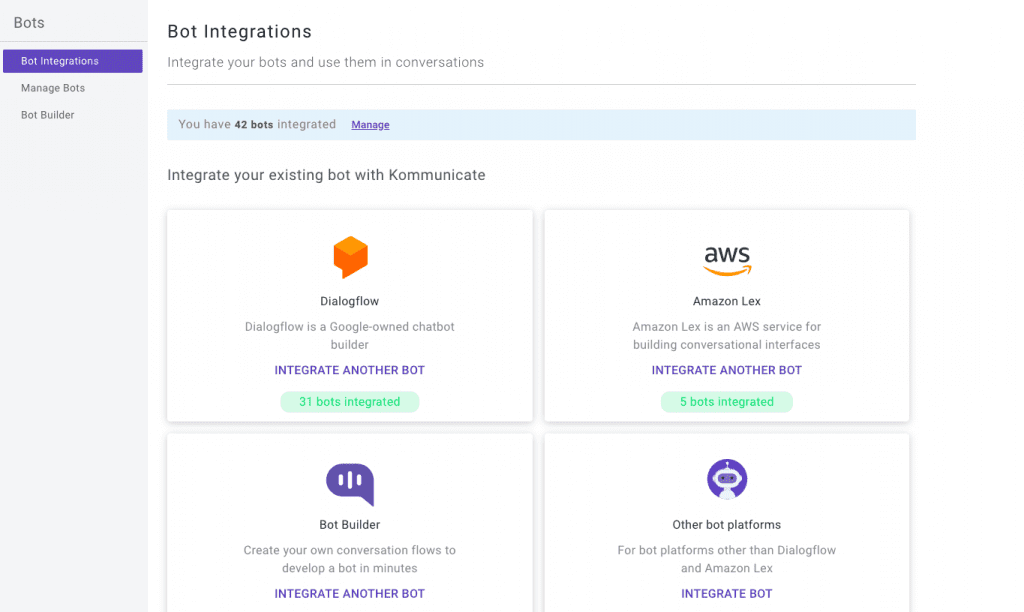
Step 1 – Login to Kommunicate Account
Login to your Kommunicate account and click on the Bot section. If you do not have an account, you can create one here. Locate the Dialogflow section and click on it.
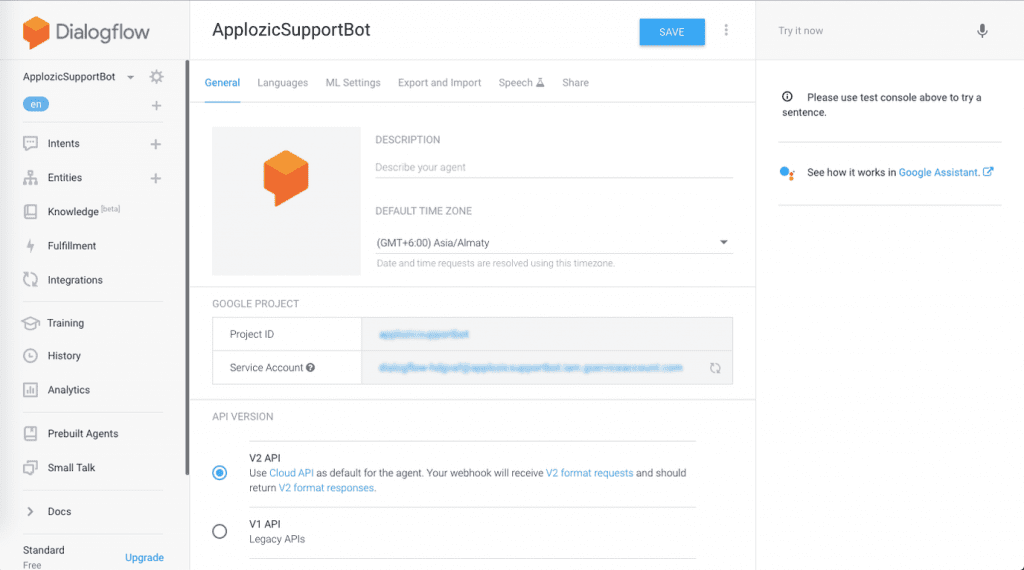
Step 2 – Get Your Dialogflow API Credentials
After clicking, a setting popup box will open. You will be asked for Dialogflow credentials. By logging into your Dialogflow console, you can obtain these. Follow the below steps to get it –
Click on the Settings icon (gear icon on the left panel) and choose V2 API as the preferred API version. Save your settings, and follow the setup instructions.
- Open Dialogflow agent settings (gear icon on the left panel)
- Click on the google cloud link which is mentioned in the google project bar
- In the Google, cloud page navigate to Credentials section by clicking on API’s & services
- Under the Credentials section find the service account and click on edit for Dialogflow integrations
- In the bottom of the screen click on ADD key button and create key option, JSON key will be downloaded
- Now upload the key file.
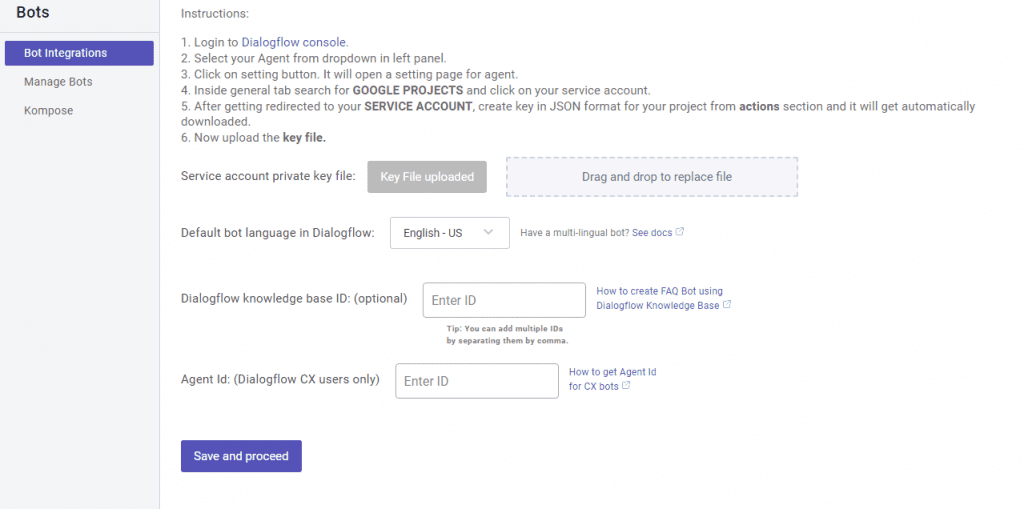
Step 3 – Connect Dialogflow Bot with Kommunicate
Go back to Dialogflow settings screen of Kommunicate, enter your credentials, then click on next to save and progress. You’ll be able to give your bot a name in the user profile section that follows. Your customers will see that name whenever the bot interacts with them.
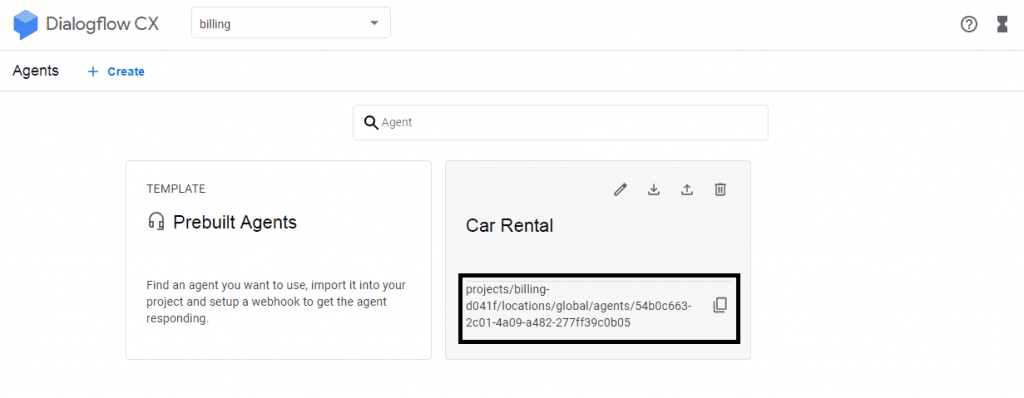
To integrate Dialogflow CX into Kommunicate follow the same instructions to download the JSON key and mention the Agent Id in the Kommunicate dashboard.
To get the Agent Id: Go to Dialogflow CX console >> Select the Project >> In the Agent you have created ‘Copy the agent name to the clipboard will be in the format mentioned below, where the Agent Id is 54b0c663-2c01-4a09-a482-277ff39c0b05
Save, and move to the next steps to complete the setup.
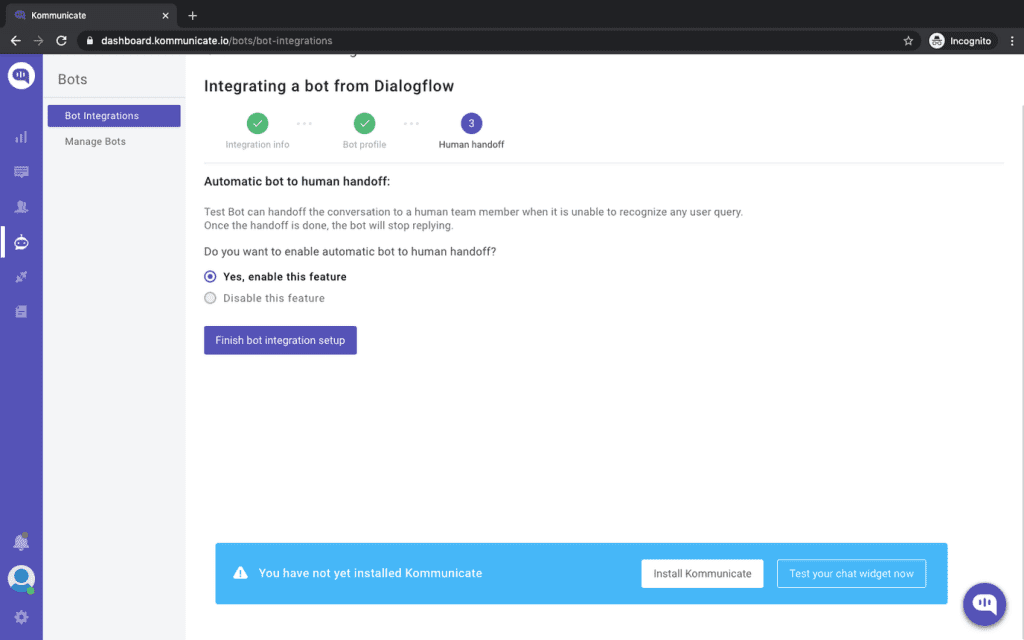
You can check your newly created bot here in the Dashboard →Bot Integration → Manage Bots section.
Suggested Reads:
Now that your Dialogflow bot is connected with Kommunicate, next stage is to connect your WordPress account with Kommunicate to make the bot live on your website.
Stage 2: Integrate Kommunicate with WordPress
Follow the following steps to integrated your WordPress account with Kommunicate –
Step 1 – Login to WordPress Account
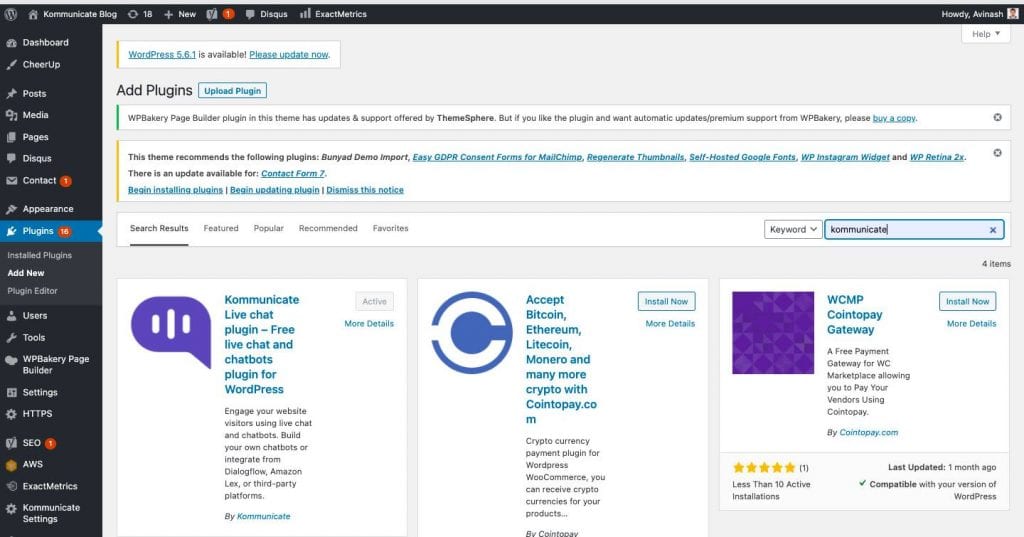
Log in to your WordPress dashboard and click on Plugins from the left navigation panel. Then click on Add New button.

Step 2 – Search and Activate “Kommunicate Live Chat” Plugin
Locate the “Kommunicate Live Chat” plug-in in the search page and click the Install Now button. Once installed, Activate the plugin.
Step 3 – Connect Kommunicate with WordPress
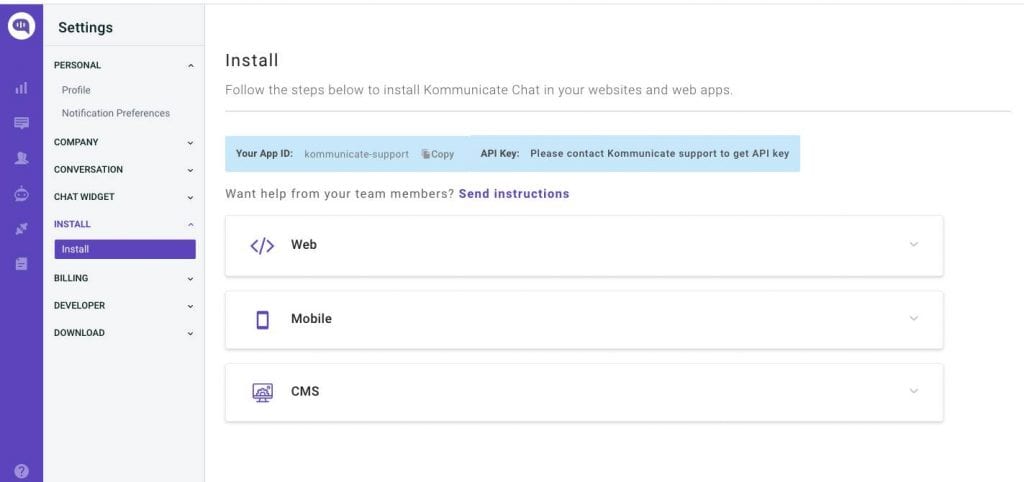
Once you’ve installed and activated your plugin, you can then navigate to it in the left sidebar menu or through the Plugins page under Kommunicate settings.

Here you need to add your Kommunicate APP_ID to enable chat-based support in your product. The App ID can be found inside the Kommunicate dashboard in Settings -> Install
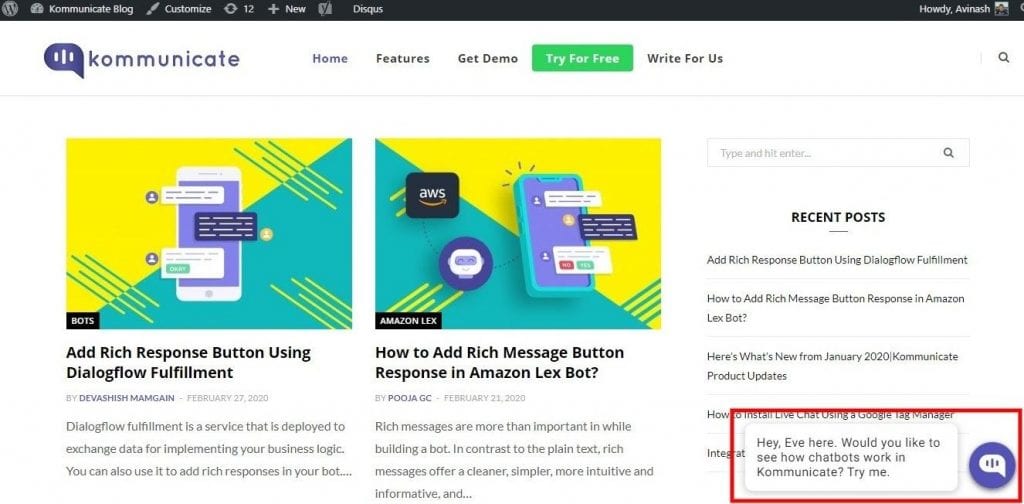
And that’s it! You have completed the integration. Congratulations!!
Now open the website and check out the chat widget and play around with your bot. You will find it in the bottom-right corner. Now your website visitors can chat effortlessly with you. You can manage the conversations and appearance from the Kommunicate dashboard.
Watch Our Step-by-Step Video Tutorial
If you prefer a visual guide, we’ve got you covered! Check out our comprehensive video tutorial that walks you through the entire process of adding a Dialogflow bot to your WordPress website. Whether you’re a beginner or an experienced developer, our video will make the integration process smooth and straightforward.

Adarsh Kumar is the CTO & Co-Founder at Kommunicate. As a seasoned technologist, he brings over 14 years of experience in software development, artificial intelligence, and machine learning to his role. His expertise in building scalable and robust tech solutions has been instrumental in the company’s growth and success.
At Kommunicate, we are envisioning a world-beating customer support solution to empower the new era of customer support. We would love to have you on board to have a first-hand experience of Kommunicate. You can signup here and start delighting your customers right away.


