Updated on June 23, 2026

There are numerous posts about developing a chatbot using Dialogflow. But creating a chatbot isn’t enough. Connecting Dialogflow to the web interface is even more exciting and challenging. With Angular being a popular and emerging platform, here is our guide to integrating the Dialogflow chatbot with Angular JS.
We have previously written guides on integrating chatbots with websites and apps in our quest to simplify chatbot integration with different platforms.
In case you want a video tutorial, here is one:
Prerequisites
You would need a Dialogflow chatbot or working knowledge of Dialogflow and Angular JS to get started. To integrate the chatbots with Angular, you will need a Kommunicate account. All the aforementioned tools are free to try out.
If you don’t have Kommunicate a/c, please signup here for free – we will need this in further steps.

Steps to integrate Dialogflow chatbot with Angular JS
I will explain how I connected Dialogflow and Angular with the help of Kommunicate.
Note: To keep it straightforward, this tutorial uses basic and plain code development. This project can also be found on my Github. To get an in detail tutorial on how to integrate the bot into a website you can check here.
Step 1: Create your Dialogflow chatbot
To get started, you can easily create a chatbot in Dialogflow or edit one of their provided sample chatbot templates. To go further, you can create your own Intents & Entities.
Step 2: Integrate Dialogflow chatbot with Kommunicate
Login to your Kommunicate dashboard and navigate to the Bot section. If you do not have an account, you can create one here. Locate the Dialogflow section and click on Settings.
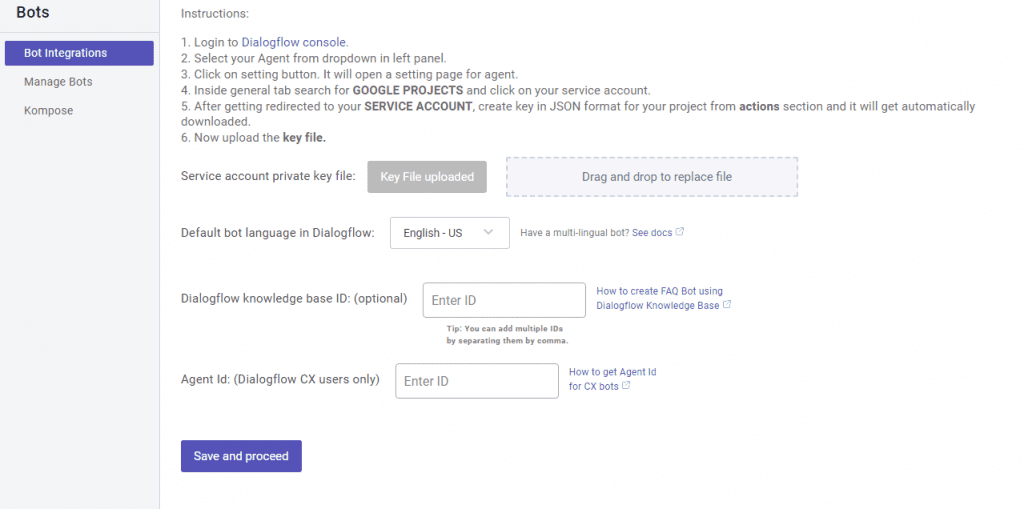
Now, navigate to your Dialogflow console and download the service account key file. Here are the steps to locate the file:
- Open Dialogflow agent settings (gear icon on the left panel)
- Click on the Google Cloud link, which is mentioned in the google project bar
- On the Google Cloud page, navigate to the Credentials section by clicking on APIs & services
- Under the “Credentials” section, find the service account and click on Edit for Dialogflow integrations
- At the bottom of the screen, click the “Add Key” button and select the “Create Key” option. This will download a JSON key.
To integrate Dialogflow CX into Kommunicate, follow the exact instructions to download the JSON key and add the Agent ID to the Kommunicate dashboard.
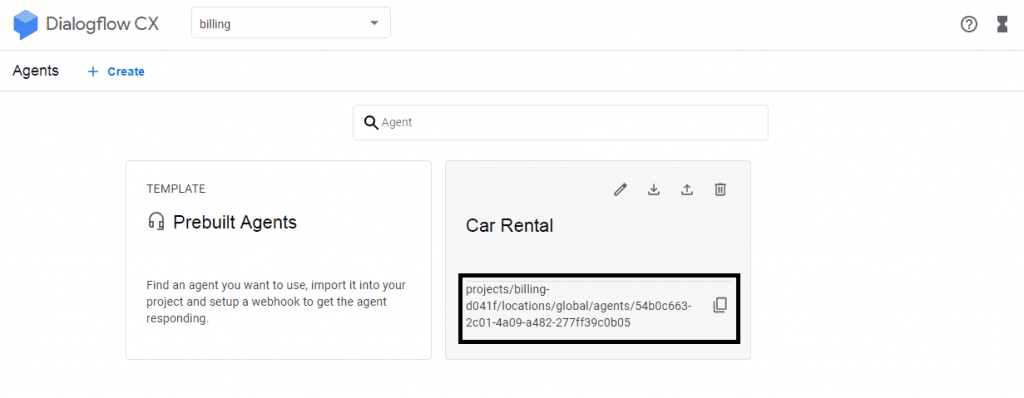
To get the Agent Id: Go to Dialogflow CX console >> Select the Project >> In the Agent you have created ‘Copy the agent name to the clipboard will be in the format mentioned below, where the Agent Id is 54b0c663-2c01-4a09-a482-277ff39c0b05
projects/billing-d041f/locations/global/agents/54b0c663-2c01-4a09-a482-277ff39c0b05
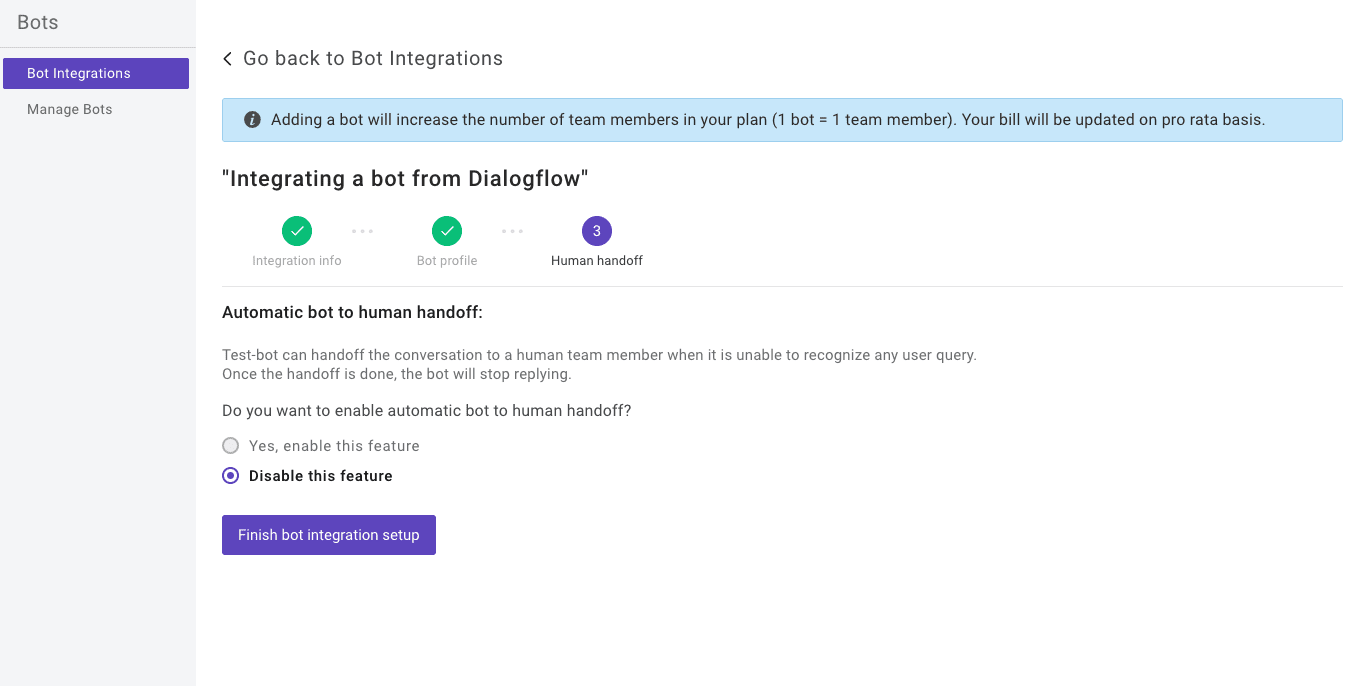
Setup your bot’s name and profile picture and choose whether to allow the bot to human handoff for your newly created bot. Click Finish bot integration setup to finish with the intigration.
You can check/edit your integrated bot using the below path:
Dashboard →Bot Integration → Manage Bots: You can check all your integrated bots here.
Dashboard → Bot Integration: Once finished, your Dialogflow section will have a green icon with the number of bots you have successfully integrated.
Step3: Install the Angular CLI globally.
To install the CLI using npm, open a terminal/command prompt and enter the following command:
npm install -g @angular/cli
Now, create a new workspace and initial app project. Run the CLI command ng new and provide the name my-app, as shown here:
ng new my-app
The initial app project contains a simple Welcome app, which is ready to run. Angular includes a server to build and serve your app locally.
Now, navigate to the workspace folder (my-app).
Launch the server by using the CLI command ng serve, with the –open option.
cd my-app
ng serve --open
Step 4: Installing chatbot in the Angular component
Install chatbot on the angular component. The CLI will create the first Angular component. It is the root component and is named app-root.
Run any code editor and open workspace folder (my-app).
Note: Components are the fundamental building blocks of Angular applications. They display data on the screen, listen to user input, and take action based on that input.
@Component({
  selector: 'app-root',
  templateUrl: './app.component.html',
  styleUrls: ['./app.component.css']
})
export class AppComponent {
  title = 'My First Angular App!';
}
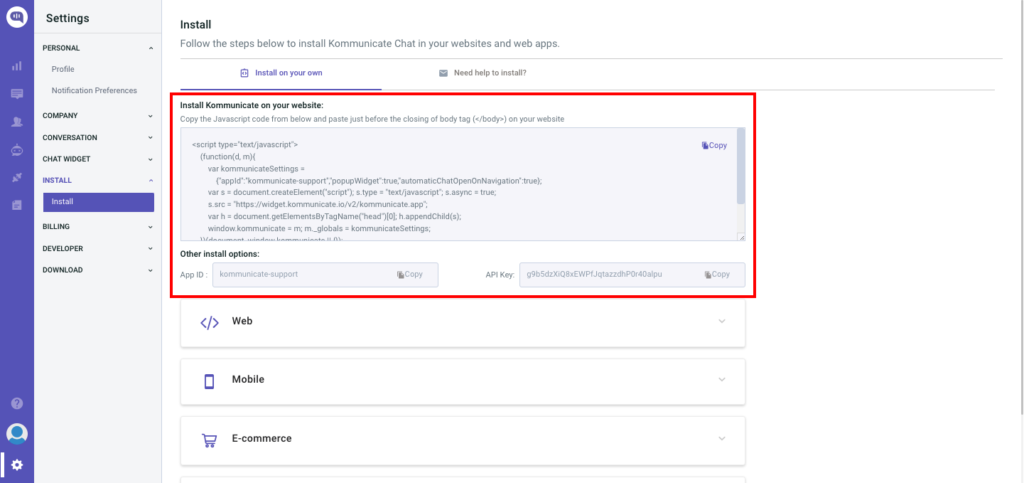
To install the chatbot, open Kommunicate and navigate to Dashboard → Settings. Click on Install under the Configuration section. Copy the JavaScript code to be added to your website or your application.
Paste the javascript code into the app.component.ts file. The code of the component should look like this
import { Component } from '@angular/core';
@Component({
  selector: 'app-root',
  templateUrl: './app.component.html',
  styleUrls: ['./app.component.css']
})
export class AppComponent {
  title = 'my-app';
ngOnInit() {
    (function(d, m){
        var kommunicateSettings = {"appId":"Your App ID","popupWidget":true,"automaticChatOpenOnNavigation":true};
        var s = document.createElement("script"); s.type = "text/javascript"; s.async = true;
        s.src = "https://widget.kommunicate.io/v2/kommunicate.app";
        var h = document.getElementsByTagName("head")[0]; h.appendChild(s);
        (window as any).kommunicate = m; m._globals = kommunicateSettings;
    })(document, (window as any).kommunicate || {});
  }
}
The ng serve command launches the server, watches your files, and rebuilds the app as you change those files.
The –open (or just -o) option automatically opens your browser to http://localhost:4200/.
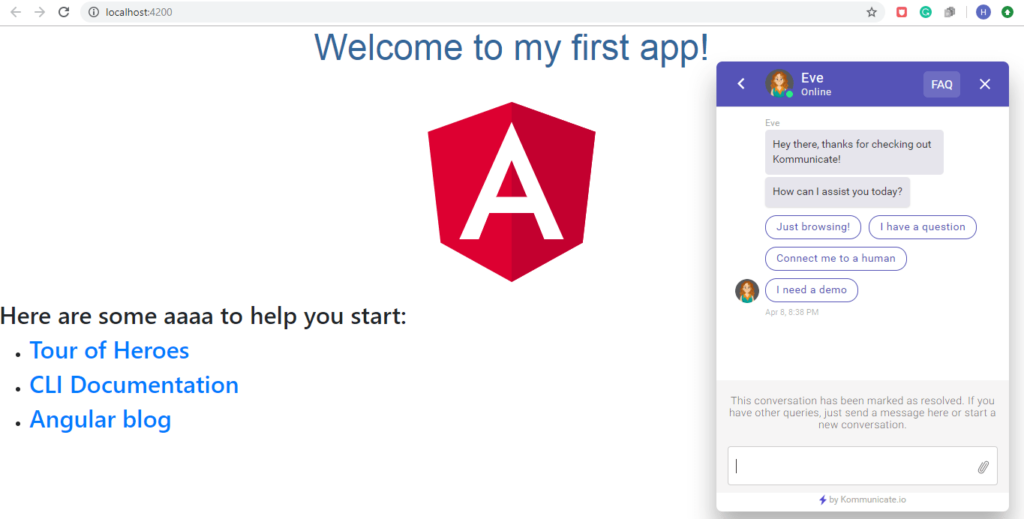
If you run the browser, you should see a chat widget screen pop up, which means your chatbot is ready. This is how you integrate Dialogflow chatbot with Angular using Kommunicate in few simple steps.
Automate customer queries, streamline support workflows, and boost efficiency with AI-driven email ticketing from Kommunicate!Here are some more guides to create and integrate chatbots in your platforms:
- Integrate Dialogflow chatbot into your website
- Beginner’s guide to building Dialogflow chatbots
- Integrate chatbot into your Android and iOS apps
- Integrate chatbots into PhoneGap/Ionic/Cordova apps
- How to Add Chatbot in Vue.js Apps
At Kommunicate, we envision a world-beating customer support solution to empower the new era of customer support. We would love to have you on board for a first-hand experience with Kommunicate. You can sign up here and start delighting your customers right away.


