Updated on February 21, 2025
Zendesk Sunshine is the omnichannel conversations platform from Zendesk that helps you customize your communications. It’s a popular tool for customer service teams that want to integrate their products across social media and messaging apps to provide outstanding customer journeys to their clients.
However, integrating AI with Zendesk Sunshine is not straightforward. The integration process is cumbersome (needing additional subscriptions and multiple coding steps), and customers have consistently complained about the lackluster AI agent.
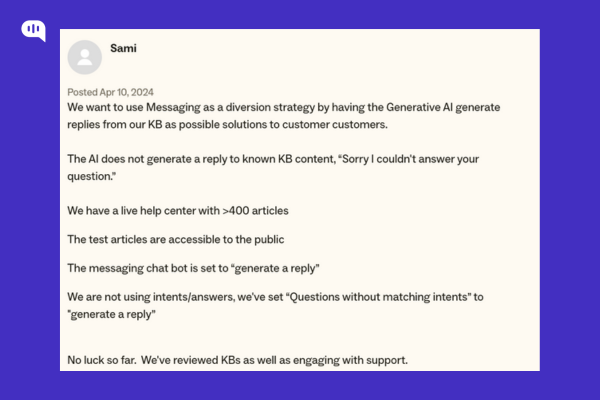
For example, take this review by Sami from the Zendesk forum: “We want to use messaging as a diversion strategy by having the Generative AI generate replies from our KB as possible solutions to customers. The AI does not generate a reply to known KB content, “Sorry I couldn’t answer your question.” We have a live help center with >400 articles. The messaging chatbot is set to “generate a reply.” We are not using intents/answers; we’ve set “Questions without matching intents” to “generate a reply.” No luck so far. We’ve reviewed KBs and engaged with support.”
Zendesk’s AI also performs poorly compared to Intercom’s Fin, an AI agent that Kommunicate has outperformed in accuracy and response generation.
Thus, it makes sense to integrate a more advanced and accurate AI agent with Zendesk Sunshine to take advantage of the Zendesk ecosystem while providing better automation.
This article will cover how we can add AI models like Claude Haiku, GPT 4, and Gemini to Zendesk Sunshine Conversations.
Before You Start
To integrate Zendesk Sunshine with advanced AI models, you need the following:
1. Admin access on a Zendesk Sunshine account
2. A Kommunicate account
Building Your AI Chatbot with Kommunicate
- Go to the Kommunicate dashboard
- Go to dashboard.kommunicate.io
- Click on the Bot Icon on the left-hand side (A).
- Choose Bot Integrations
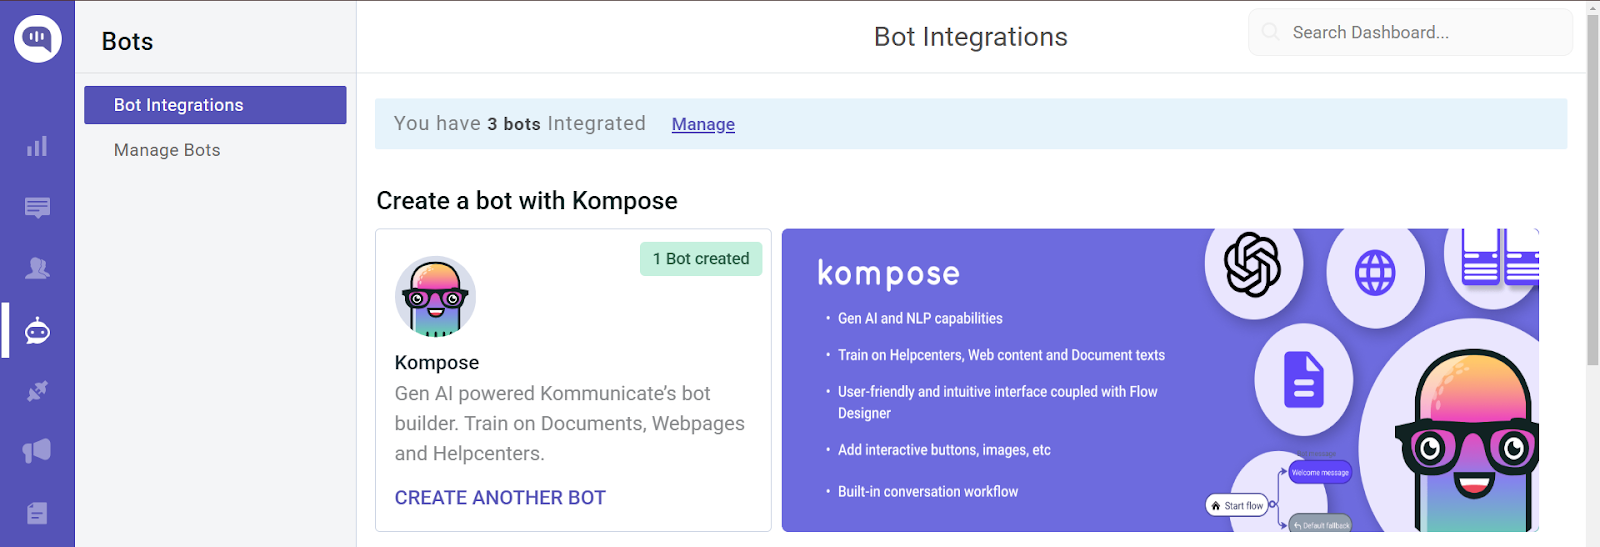
- You’ll see the Manage Bots page if you have already created a chatbot with Kommunicate.
- In that case, click on the Bot Integrations tab in the left-hand menu, (A)
- Choose Your AI Company
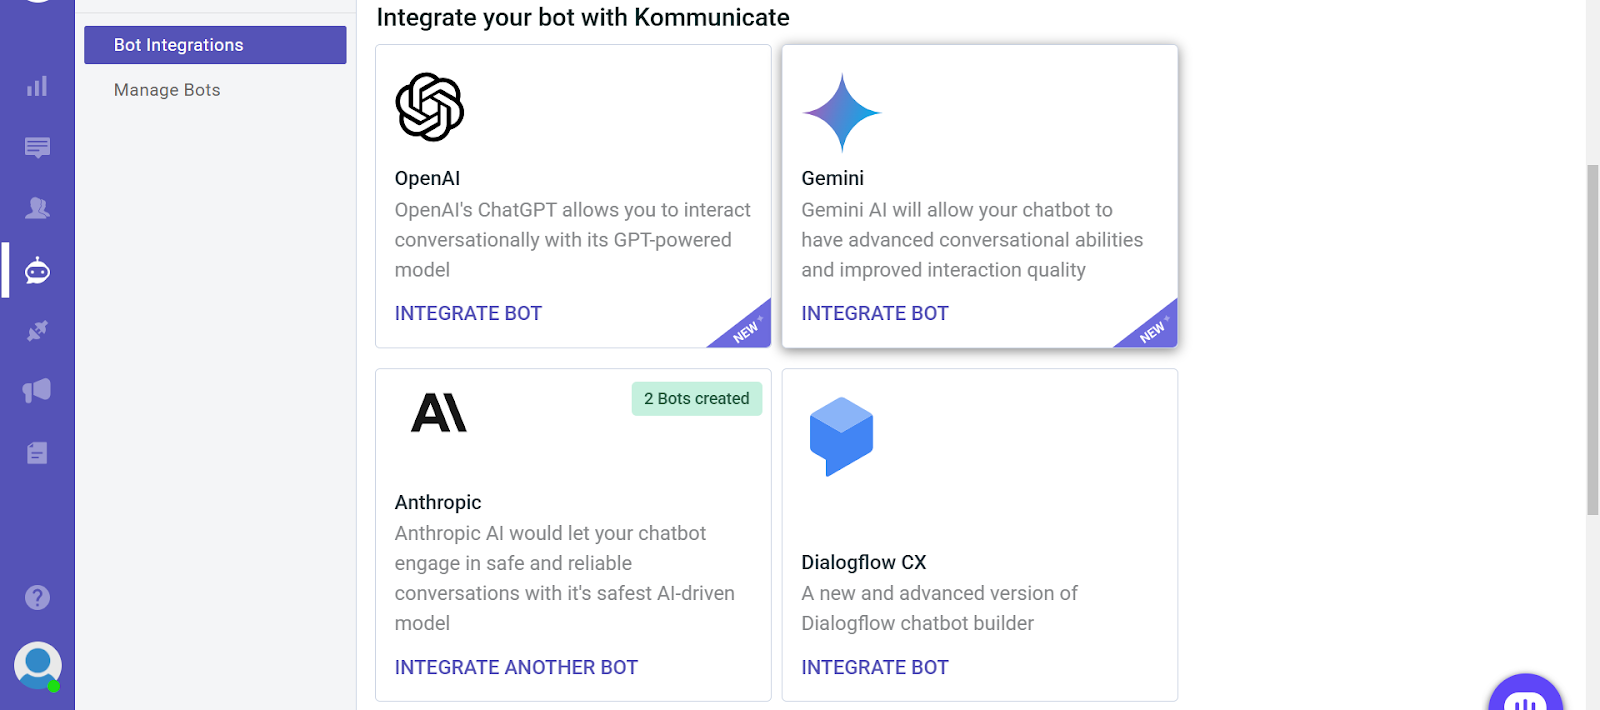
- Choose the AI you want to train your chatbot with. We have Open AI, Gemini, and Anthropic models available.
- You can choose from Open AI, Gemini, and Anthropic. In this case, we’re selecting an Anthropic model.
- Choose Your AI Model and Set Parameters
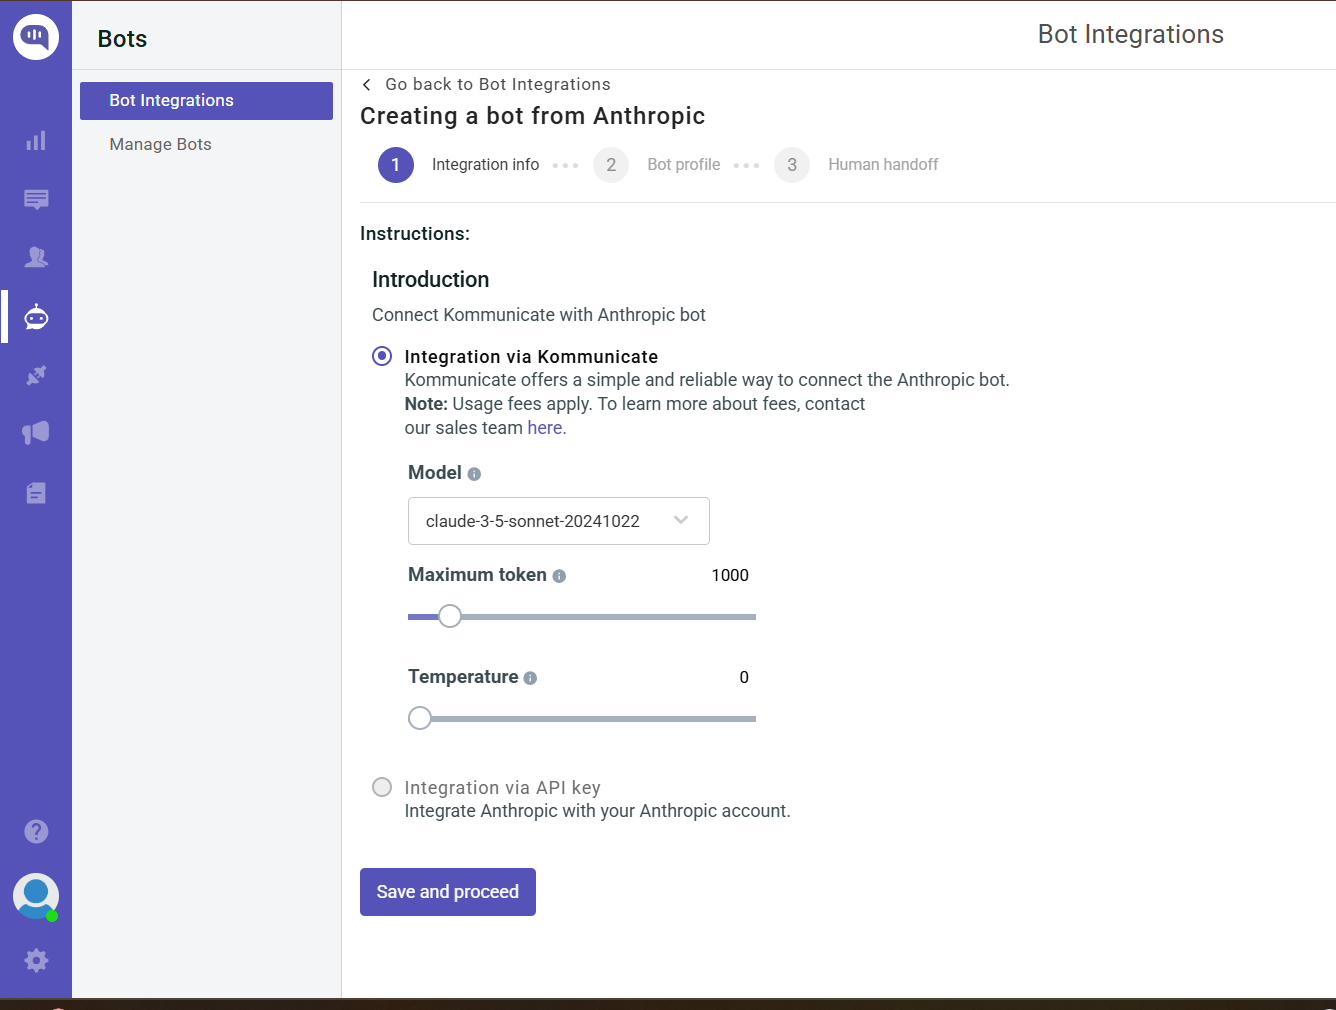
- You can create a model with the Claude Sonnet or Claude Haiku models. For this customer service chatbot, we will select the Claude Sonnet model.
- Now, select the Maximum Token. This helps you determine how long the AI’s answer can be. 1000 is a standard output number, so we are keeping this number unchanged.
If you’re working in an industry where the answers are information-dense, you can increase the number of tokens. However, you might incur additional AI costs. - Select the Temperature. This is a metric that controls the creativity of your AI chatbot. We will select 0 because we don’t want creative answers in a search and recommendation chatbot.
- Once you’ve selected your model, maximum tokens, and temperature, click Save and Proceed, and you will be taken to the next page.
- Select How Your Chatbot Will Look
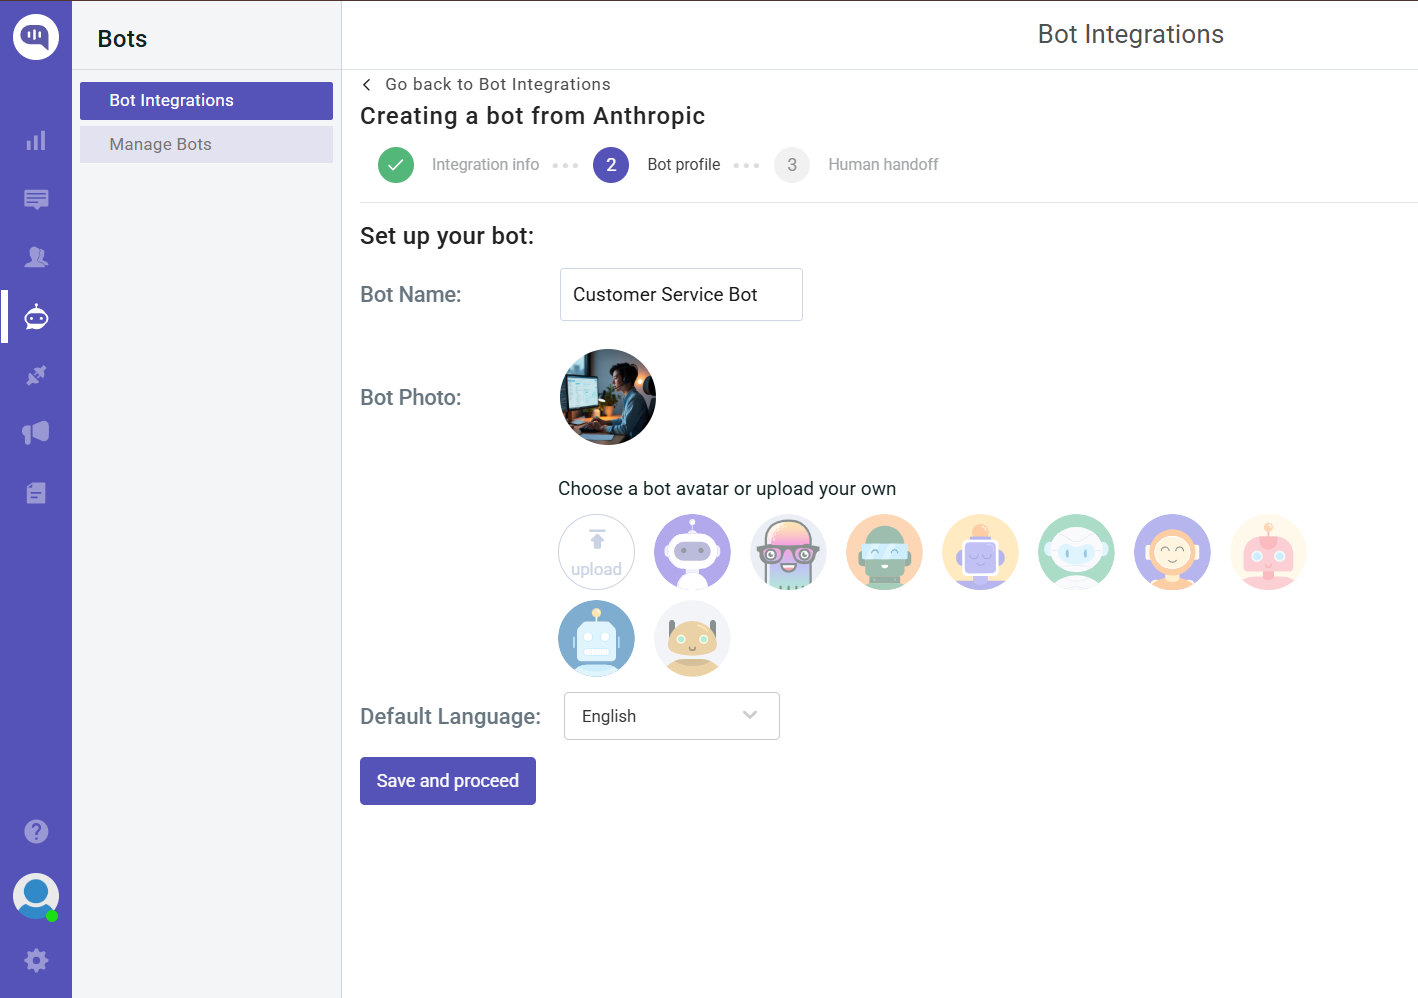
- First, set a name for your chatbot. For this demo, we will call our bot Customer Service Bot.
- Then, select the avatar that will be the profile picture of your chatbot. We’re choosing a custom avatar from our brand.
- Click on Save and Proceed to continue.
- Select if you Want a Human-in-the-Loop System.
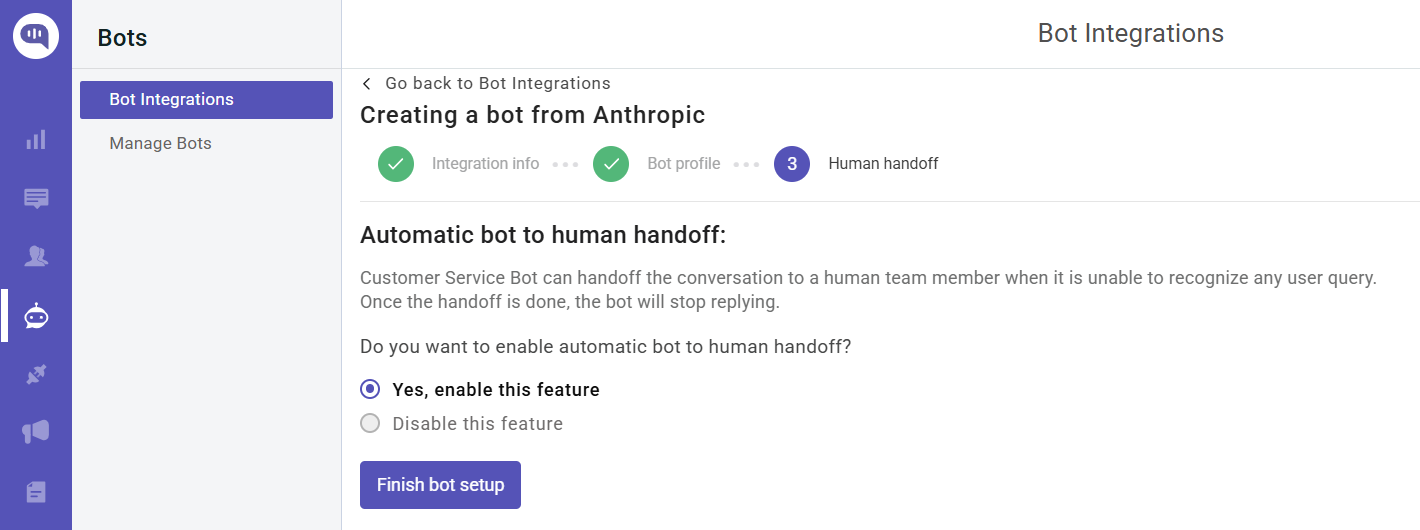
- We have a human handoff feature where the bot can push the chat to a particular human agent when the questions are too complex.
- Click on Yes, enable this feature for the bot, and click on Finish bot setup.
- You’ve Created Your Chatbot
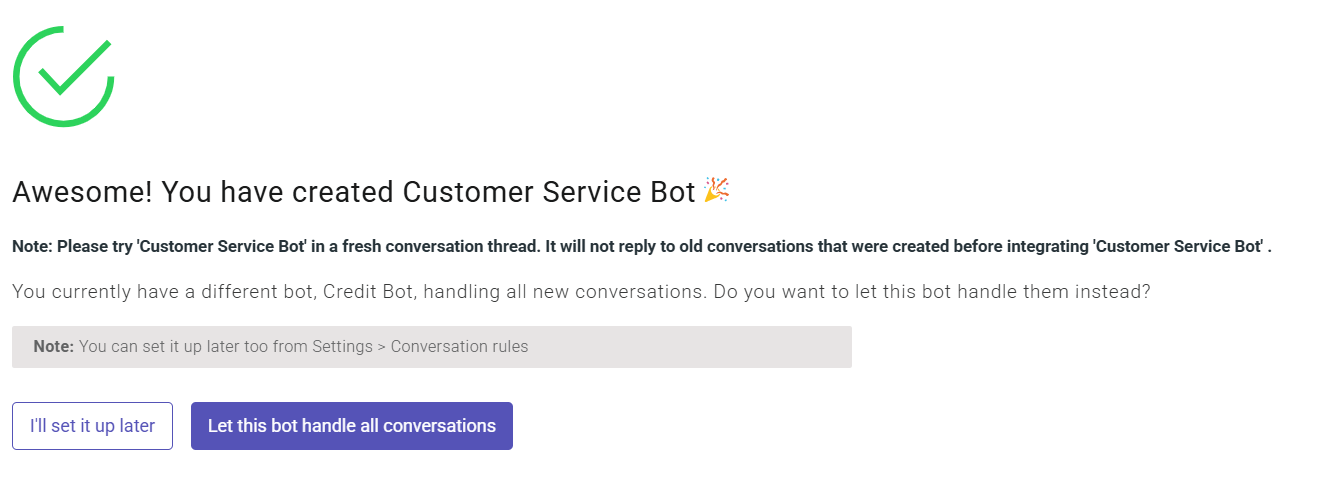
- Your chatbot has been created!
- Click on “I’ll set it up later,” and let’s start training our Customer Service Bot.
- Set Up Welcome Message
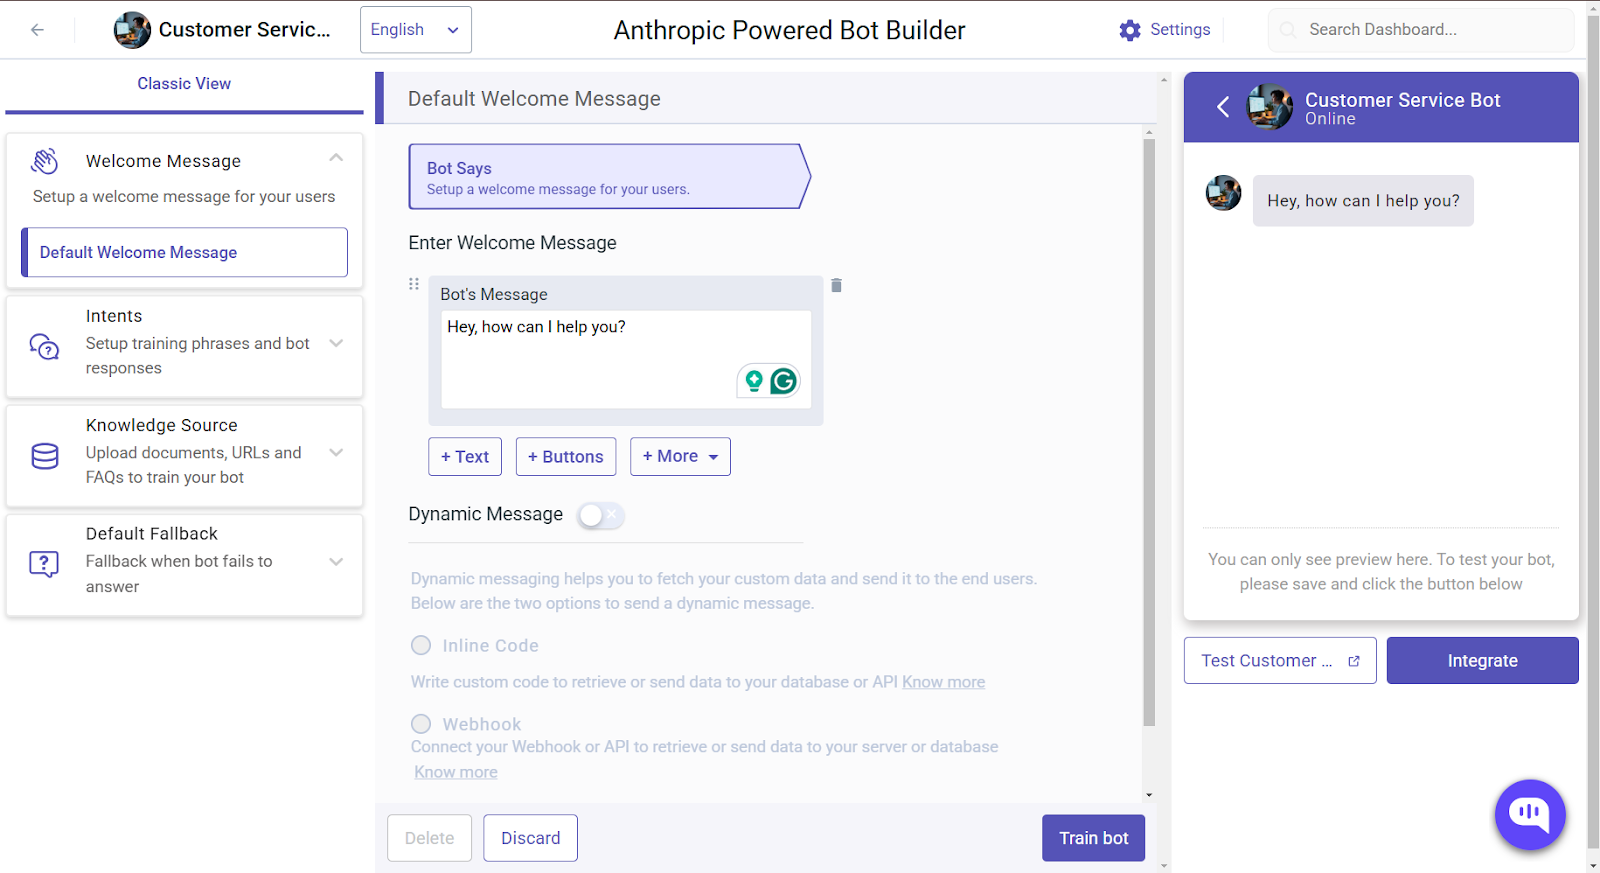
- Write a message to greet your customers whenever they interact with the bot.
- Click on Train bot to finalize this change.
- Set Up Some Example Answers
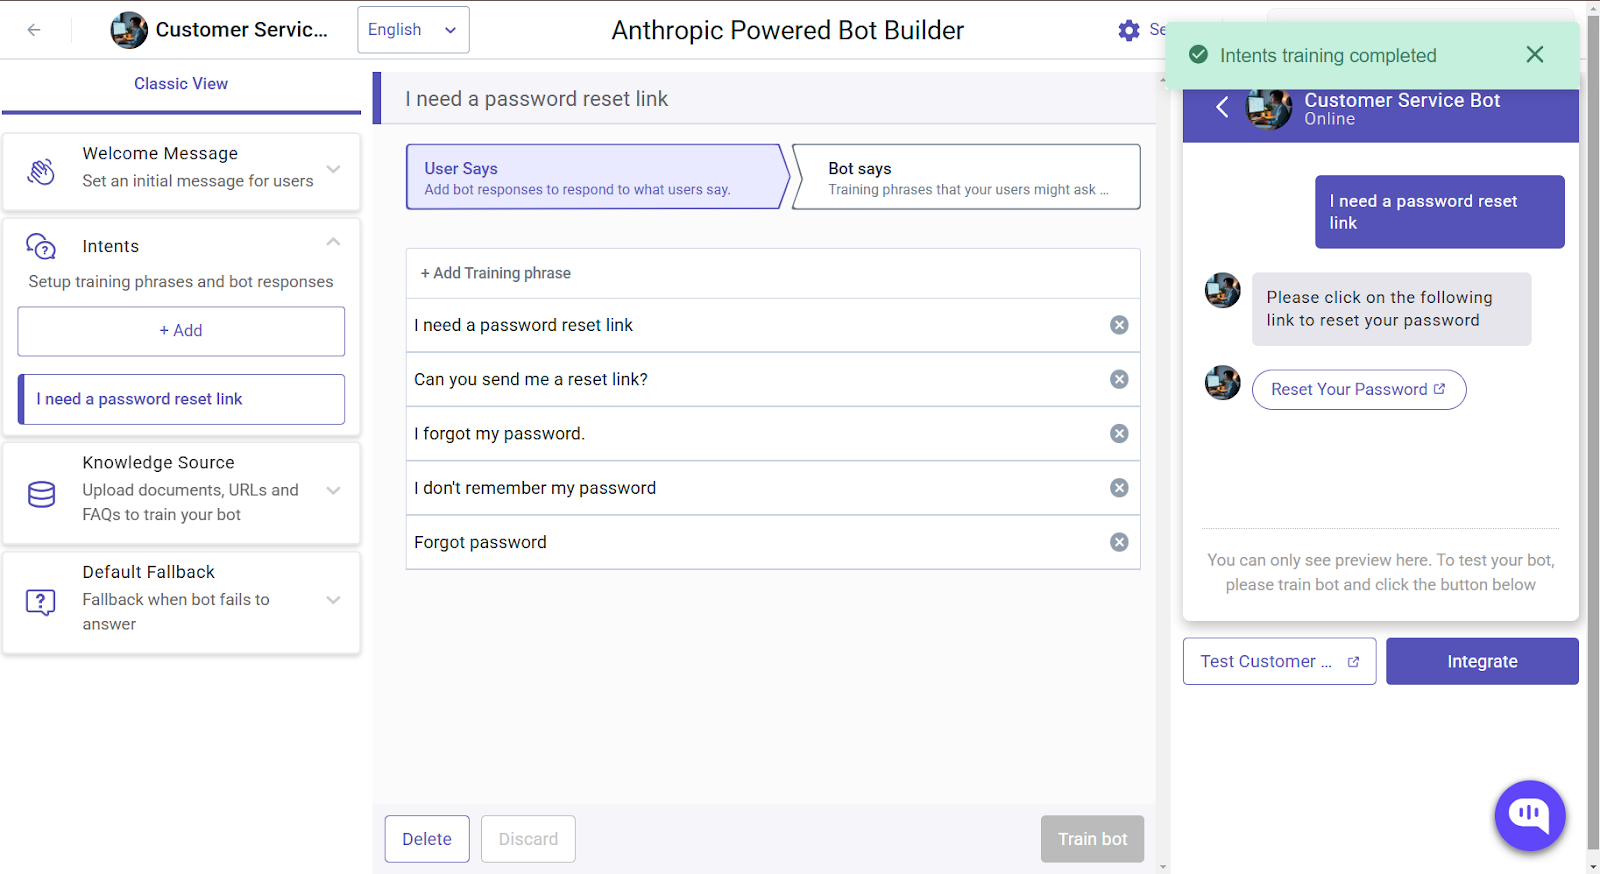
- Click on the Intents button on the left side of the previous screen.
- Here, you can train your bot to give specific responses to some questions. For example, we are training the bot to answer a question about forgotten passwords.
- Next, we will set up the answers.
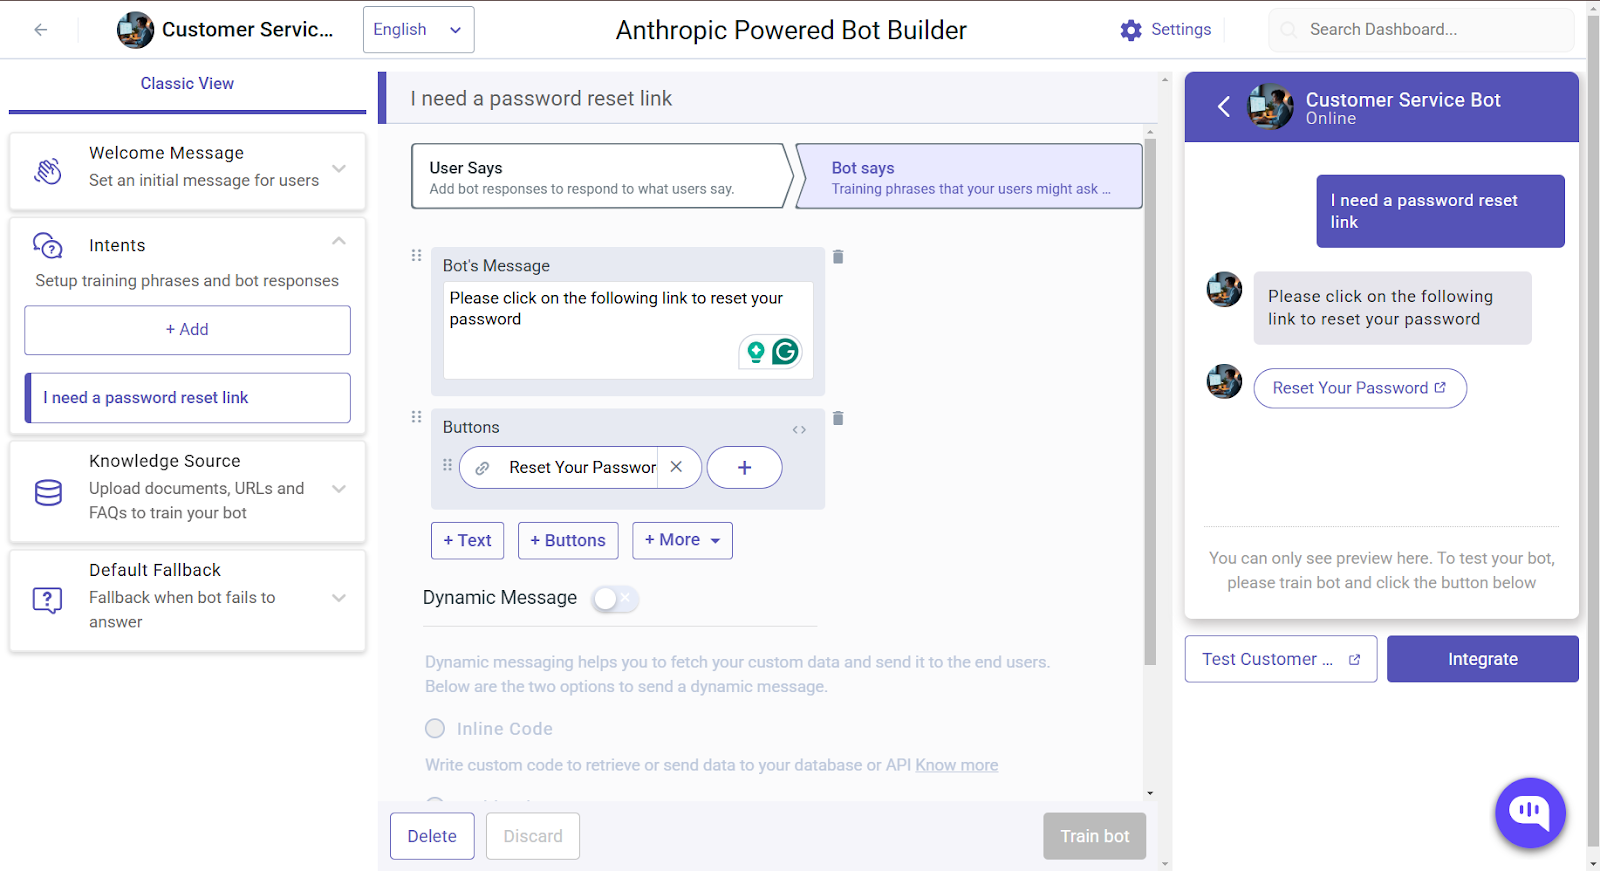
- In the Bot Says section, you can set up your answer; since we will pass a reset link to the customer in this process, we will click on + Buttons.
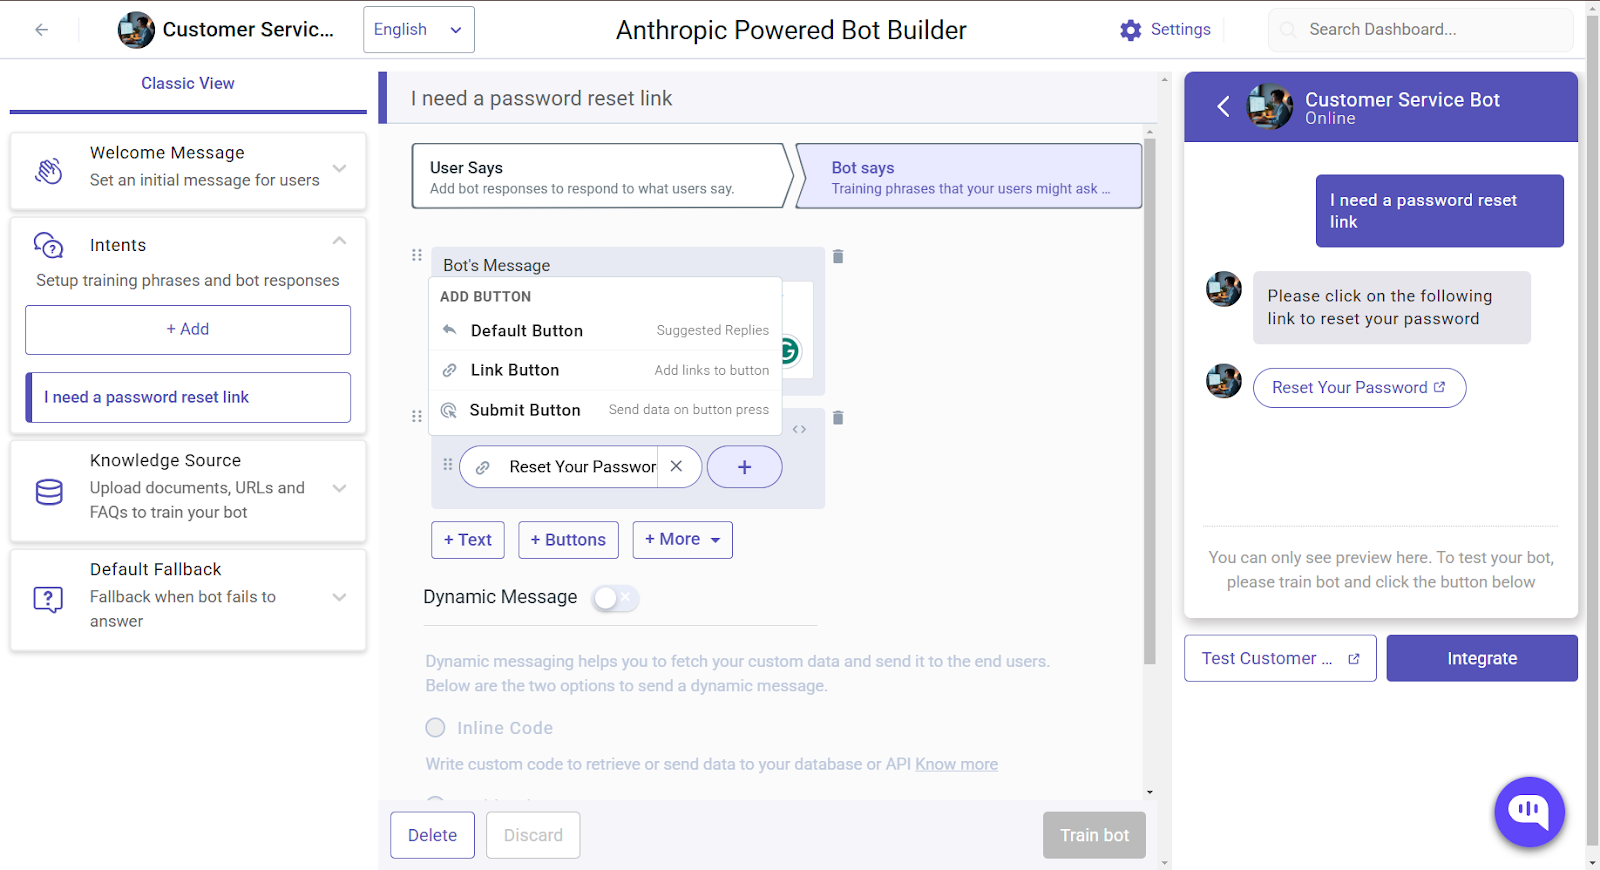
- We are adding a Link Button to pass the reset password link to the customer.
- This will open a separate dialog where you can customize the button.
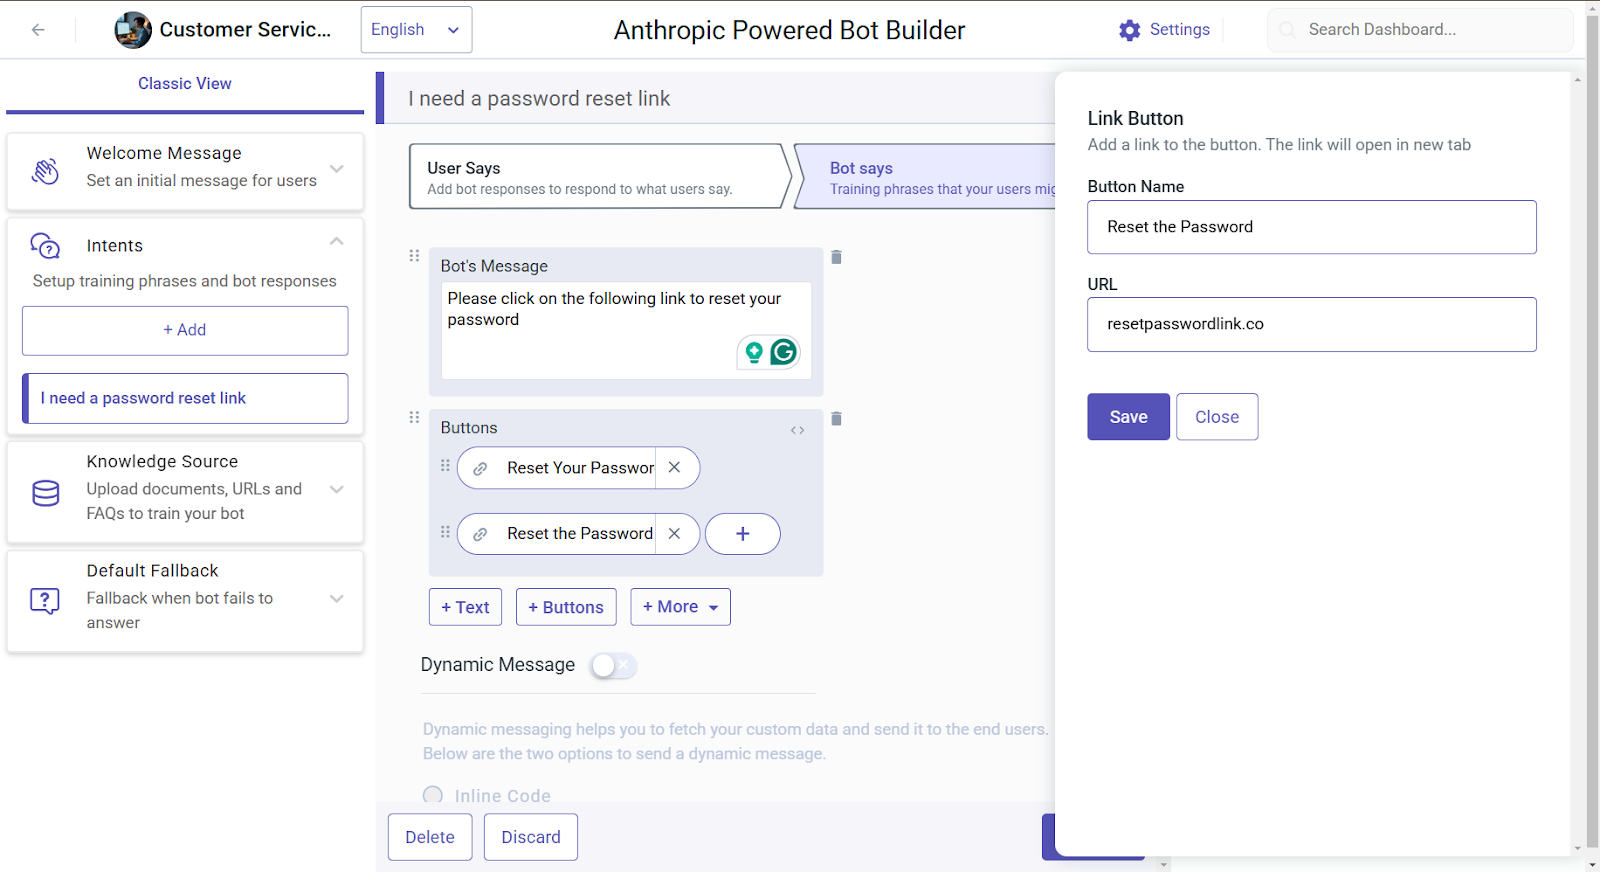
- Here, we set up the Reset Link and click on Save.
- Next, click the Train Bot button to train the chatbot to respond.
- Let’s Teach Our Bot About Customer Service (Document Upload)
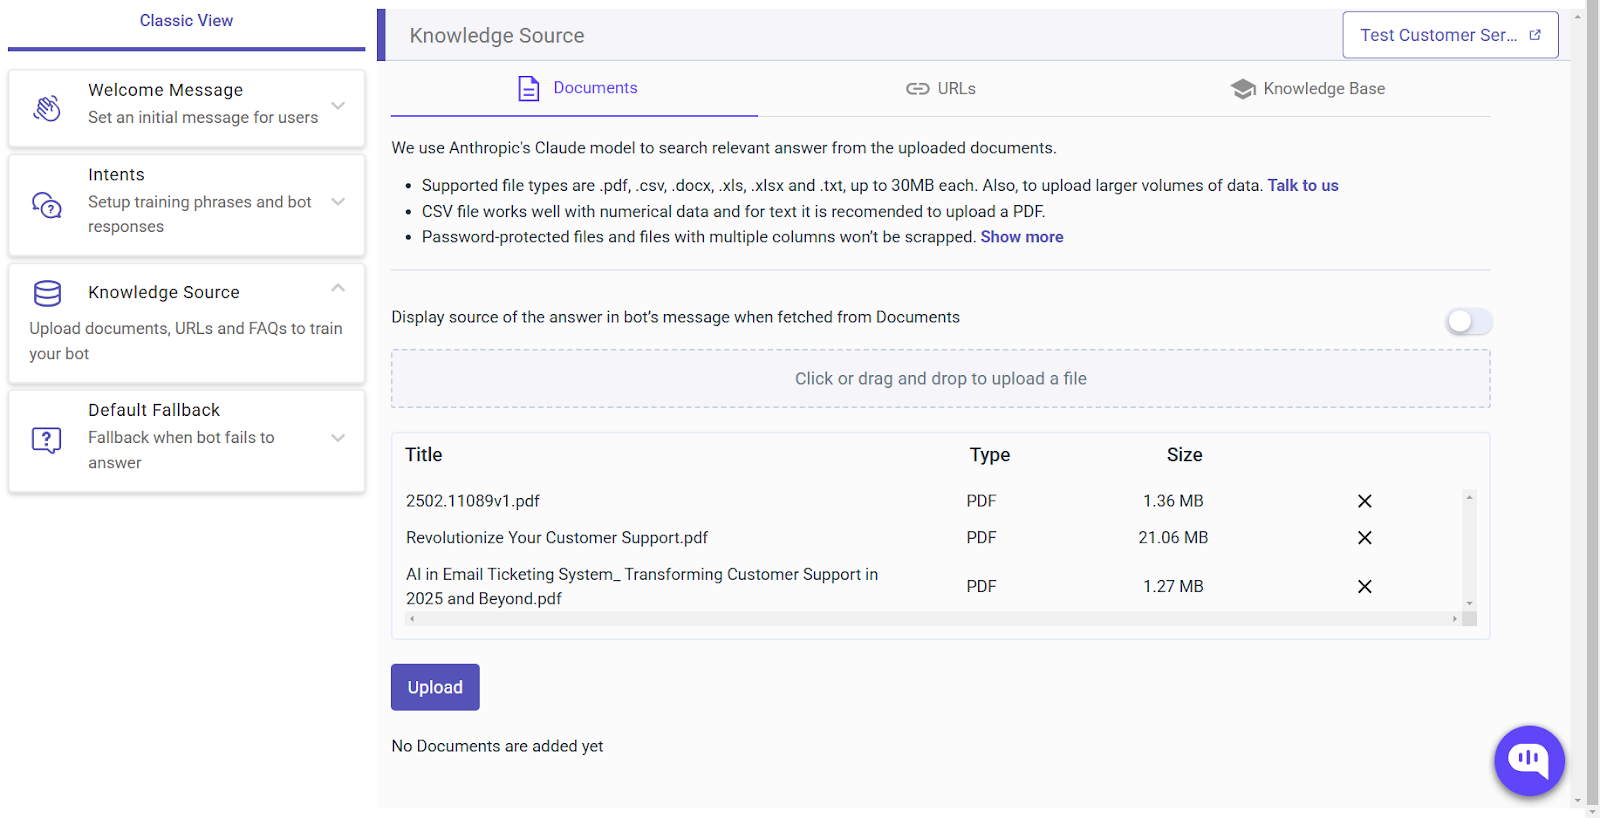
- We’re using documents to train our Customer Service Bot (You can also do this with URLs).
- We have uploaded three PDFs by clicking on Upload.
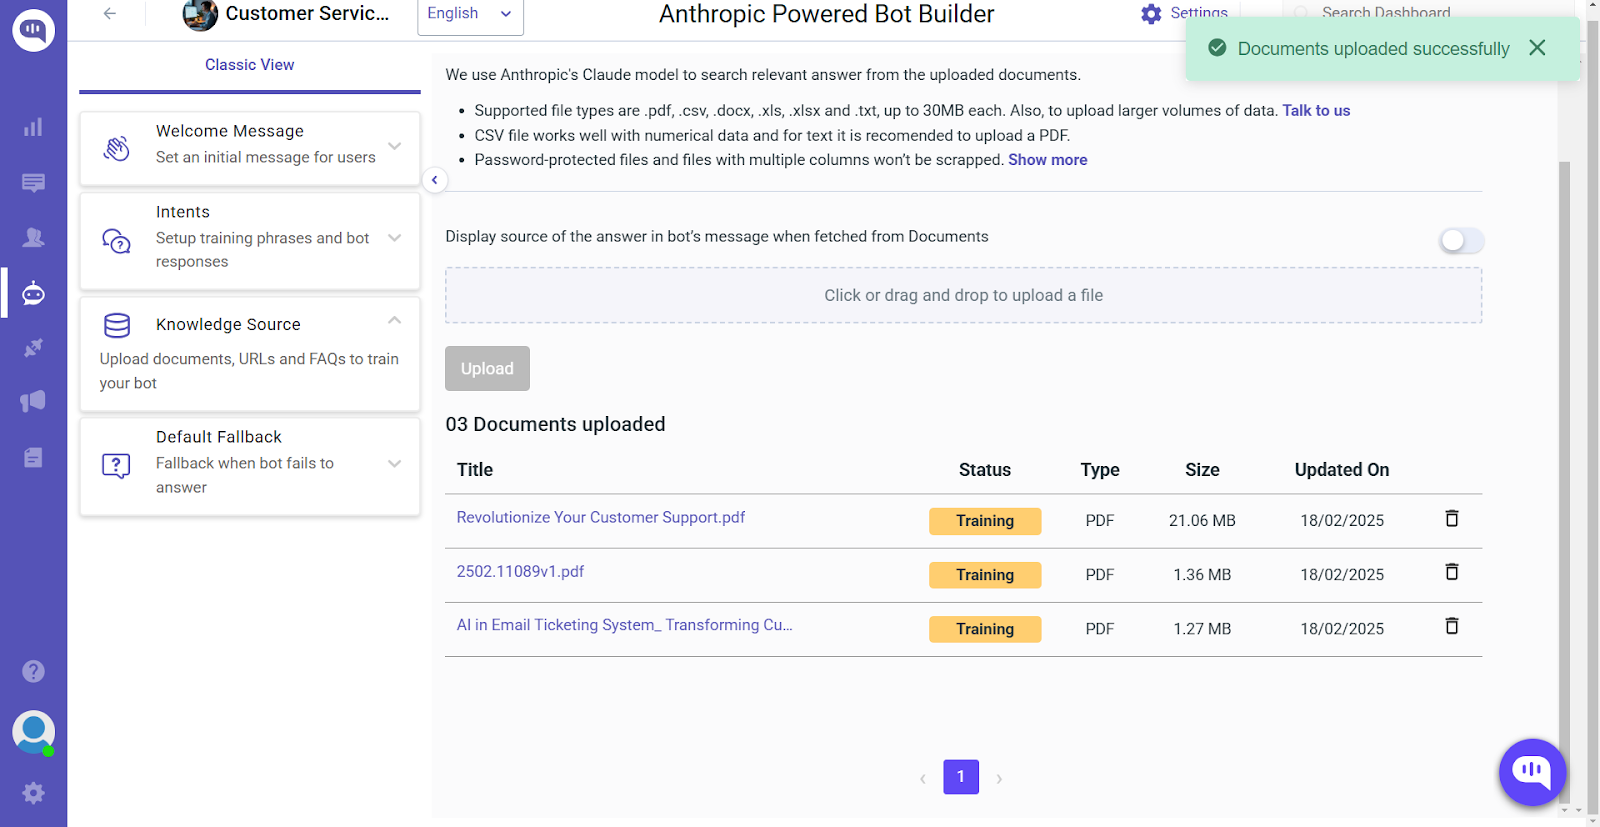
- Once you upload your documents, the Claude model is trained with it.
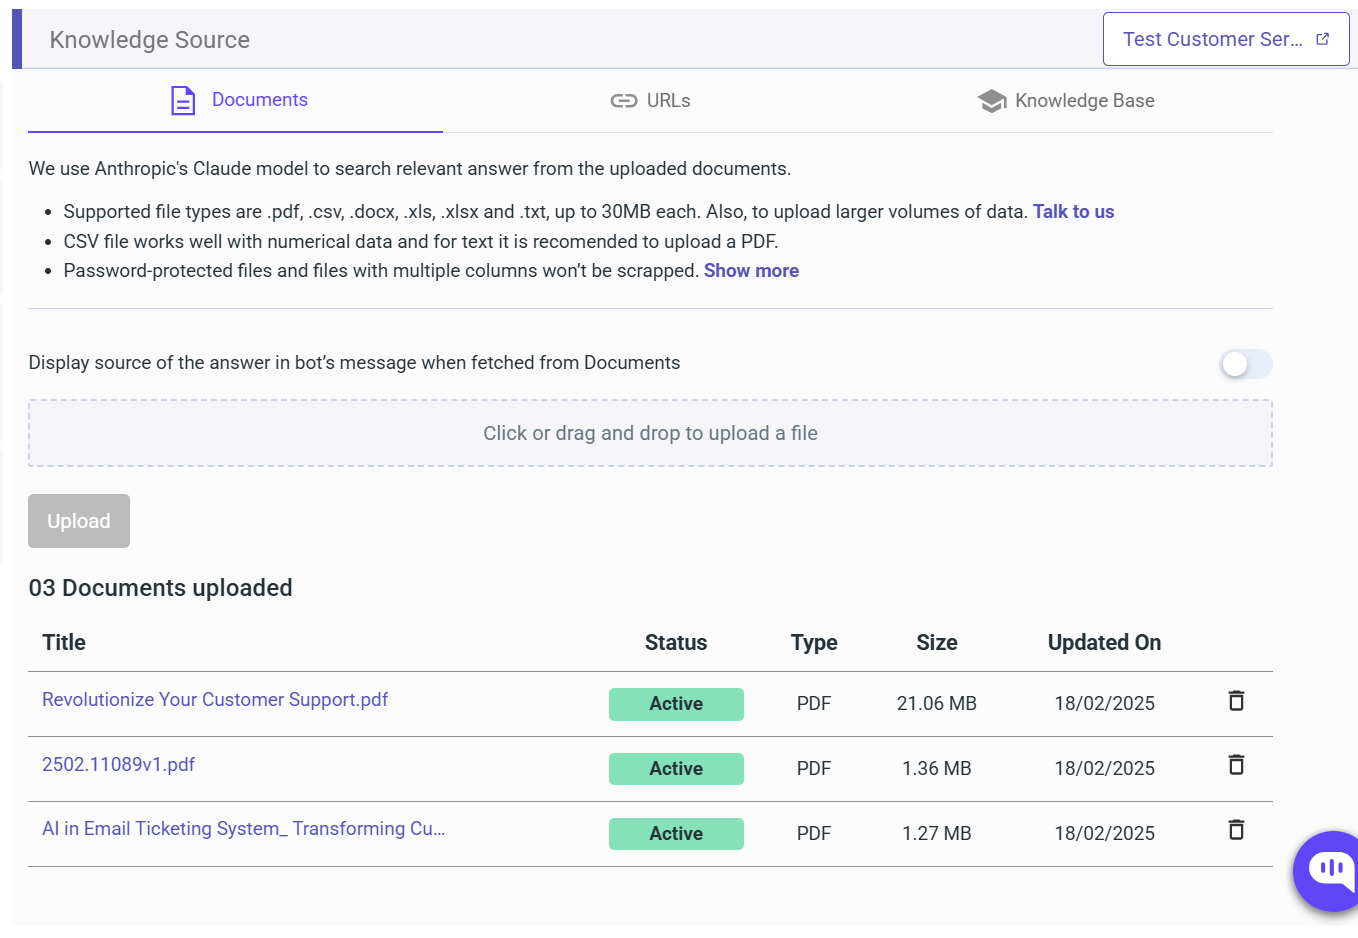
- Once the training is complete, the documents will show Active status.
- Creating a Fallback Option
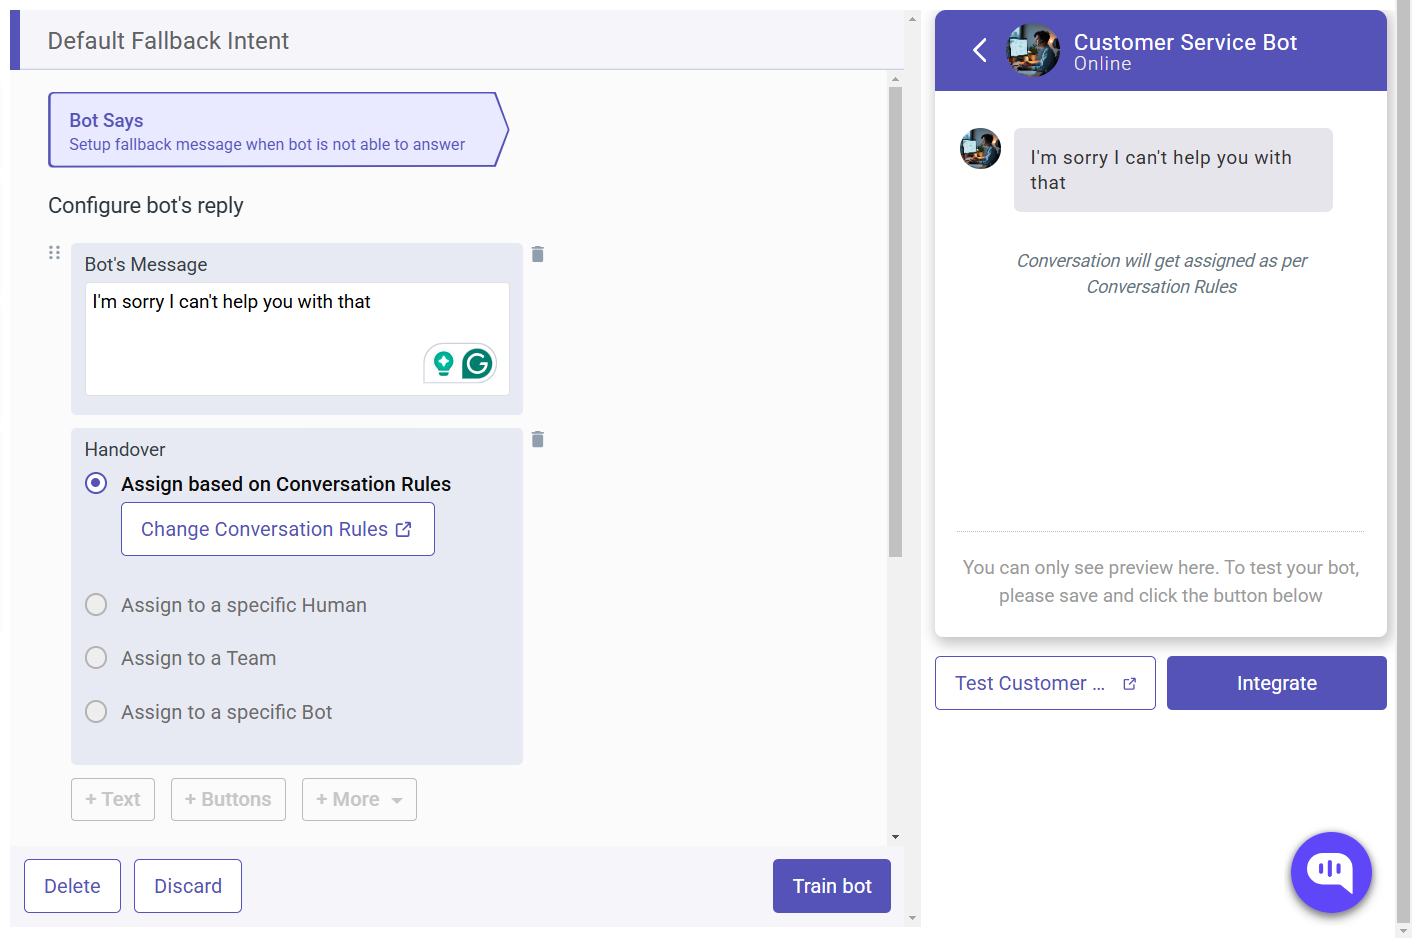
- The bot might sometimes fail to answer a question despite our documents and trained answers.
- In this case, we will transfer the query to a human agent and send an intimation to the customer when that happens. We do this by Assigning based on Conversation Rules.
- Testing the Bot

- Go back to the Welcome Message or Intents screen.
- Click on Test Bot on the right-hand side to check how the bot responds to different questions.
Now that we have an AI chatbot ready to deploy let’s integrate it with Zendesk Sunshine.
Integration with Zendesk Sunshine
- Generate API Key for Zendesk Sunshine
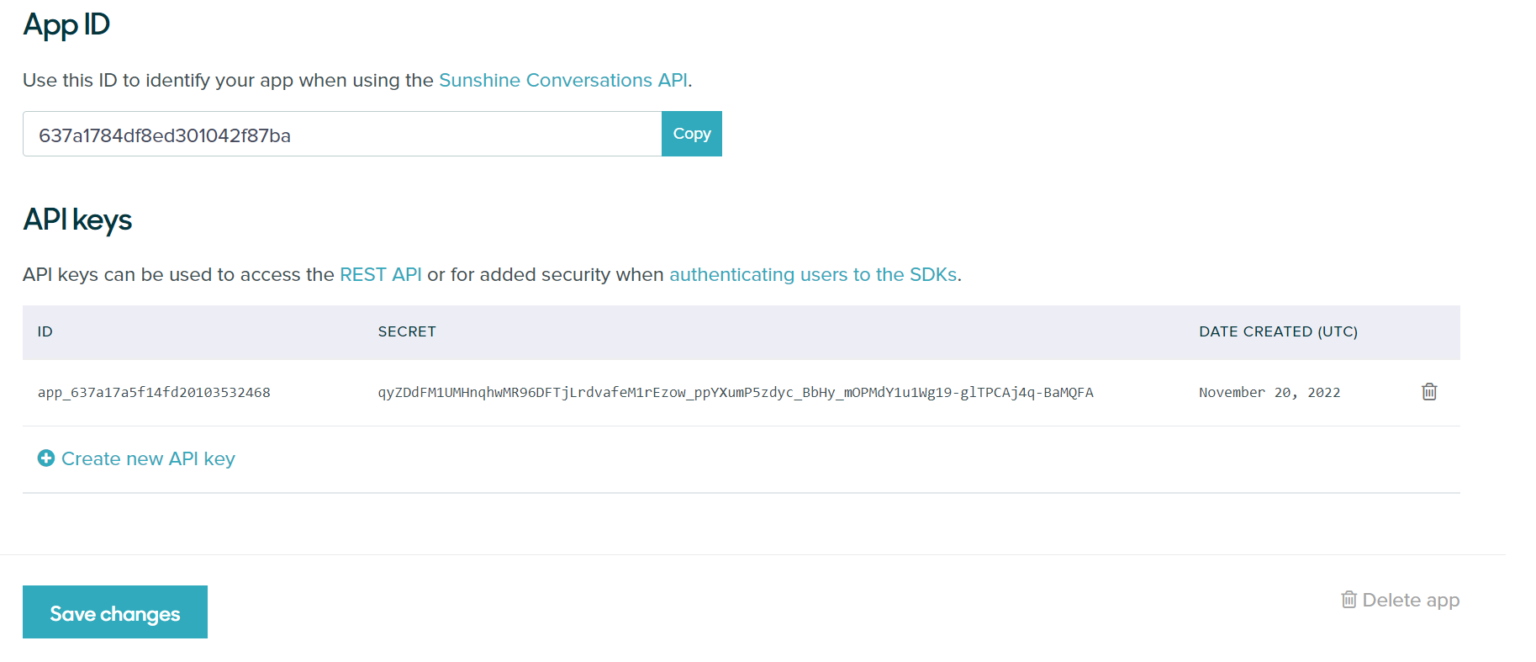
- Login to Zendesk -> Go to Admin Center -> Apps and Integrations -> Conversation Api -> Create Api Key-> Give a name to your Key and click on Next.
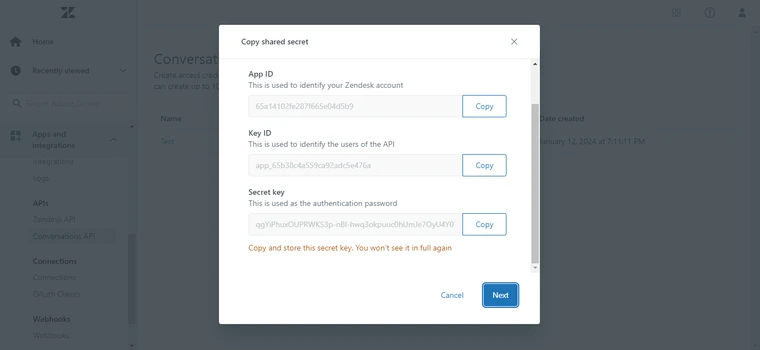
- Copy the information from this dialog because you won’t be able to access it later.
- Manage the API with Kommunicate
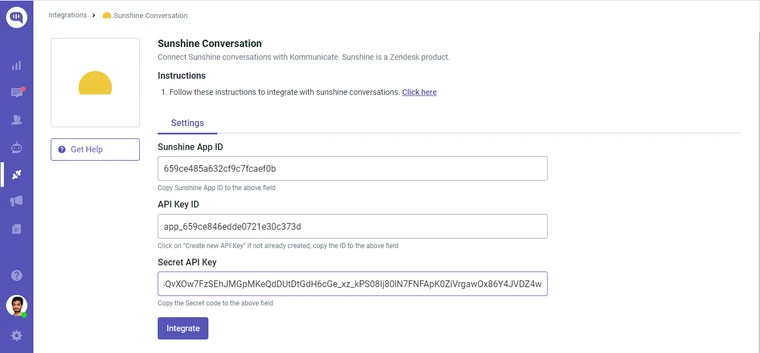
- Login to Kommunicate -> Go to Integrations -> Sunshine Conversation -> Fill in the Details -> Click on Integrate.
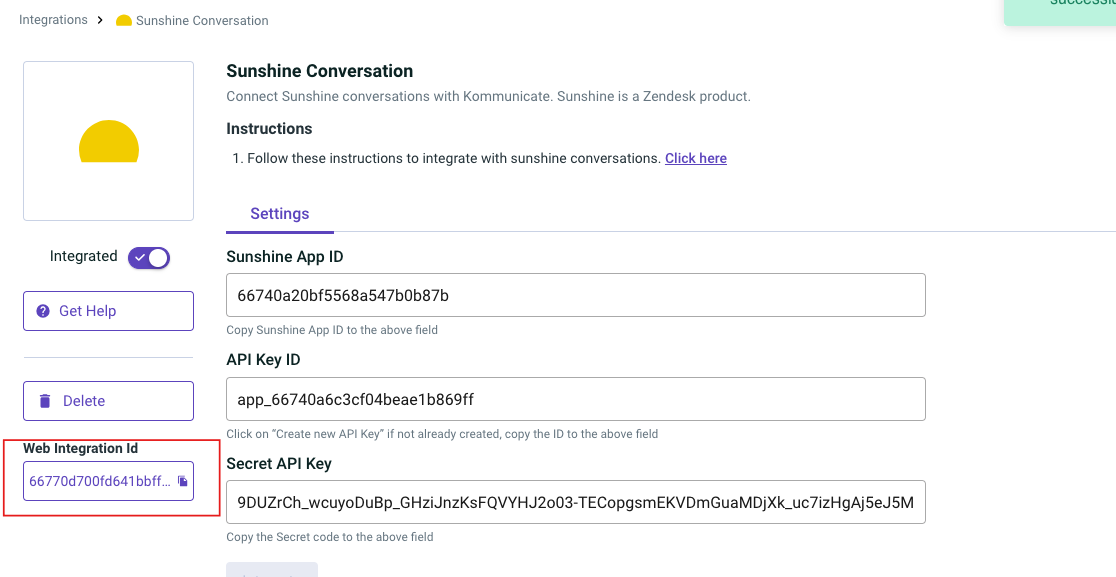
- After integrating, copy the Web Integration ID
- Set Up Your Website

- Add the following script to your <head> tag on the website:
<script>

    !(function (o, d, s, e, f) {

        var i,

          a,

          p,

          c = [],

          h = [];

        function t() {

          var t = "5";

          try {

            if (!f) throw new Error(t);

            var e,

              n = "https://cdn.smooch.io/",

              r = "smooch";

            e =

              "string" == typeof this.response

                ? JSON.parse(this.response)

                : this.response;

            var o = f.match(/([0-9]+)\.?([0-9]+)?\.?([0-9]+)?/),

              s = o && o[1],

              i = o && o[2],

              a = o && o[3],

              p = e["v" + s],

              c = e["v" + s + "." + i + ".patch"];

            if (e.url || p || c) {

              var h = d.getElementsByTagName("script")[0],

                u = d.createElement("script");

              if (((u.async = !0), a)) u.src = c || n + r + "." + f + ".min.js";

              else {

                if (!(5 <= s && p)) throw new Error(t);

                u.src = p;

              }

              h.parentNode.insertBefore(u, h);

            }

          } catch (e) {

            e.message === t && console.error(e);

          }

        }

        (o[s] = {

          init: function () {

            i = arguments;

            var t = {

              then: function (e) {

                return h.push({ type: "t", next: e }), t;

              },

              catch: function (e) {

                return h.push({ type: "c", next: e }), t;

              },

            };

            return t;

          },

          on: function () {

            c.push(arguments);

          },

          render: function () {

            a = arguments;

          },

          destroy: function () {

            p = arguments;

          },

        }),

          (o.__onWebMessengerHostReady__ = function (e) {

            if ((delete o.__onWebMessengerHostReady__, (o[s] = e), i))

              for (var t = e.init.apply(e, i), n = 0; n < h.length; n++) {

                var r = h[n];

                t = "t" === r.type ? t.then(r.next) : t.catch(r.next);

              }

            a && e.render.apply(e, a), p && e.destroy.apply(e, p);

            for (n = 0; n < c.length; n++) e.on.apply(e, c[n]);

          });

        var n = new XMLHttpRequest();

        n.addEventListener("load", t),

          n.open("GET", "https://" + e + ".webloader.smooch.io/", !0),

          (n.responseType = "json"),

          n.send();

      })(window, document, "Smooch", "integration-id", "5");

    </script>

Add the following script to the <body> tag

<script>

      Smooch.init({

        integrationId: "integration-id", // Add the integration id here

        canUserSeeConversationList: false,

        businessName: 'Kommunicate',

        businessIconUrl: 'https://static.zdassets.com/sunco-accounts/sunco-dashboard/v19/43f8f7a97a52a609c850cdbdfac3107a.svg',

      }).then(function (data) {

          Smooch.createConversation({

            metadata: {

              isFirstTimeCustomer: true,

            },

          }).then((conversation) => {

            console.log("Hello Sunshine");

          });

      });

</script>- Add the following script to the <body> tag
<script>

      Smooch.init({

        integrationId: "integration-id", // Add the integration id here

        canUserSeeConversationList: false,

        businessName: 'Kommunicate',

        businessIconUrl: 'https://static.zdassets.com/sunco-accounts/sunco-dashboard/v19/43f8f7a97a52a609c850cdbdfac3107a.svg',

      }).then(function (data) {

          Smooch.createConversation({

            metadata: {

              isFirstTimeCustomer: true,

            },

          }).then((conversation) => {

            console.log("Hello Sunshine");

          });

      });

</script>- Replace integration-id with the Integration ID that you got from the earlier step.
- Setup Default Fallback
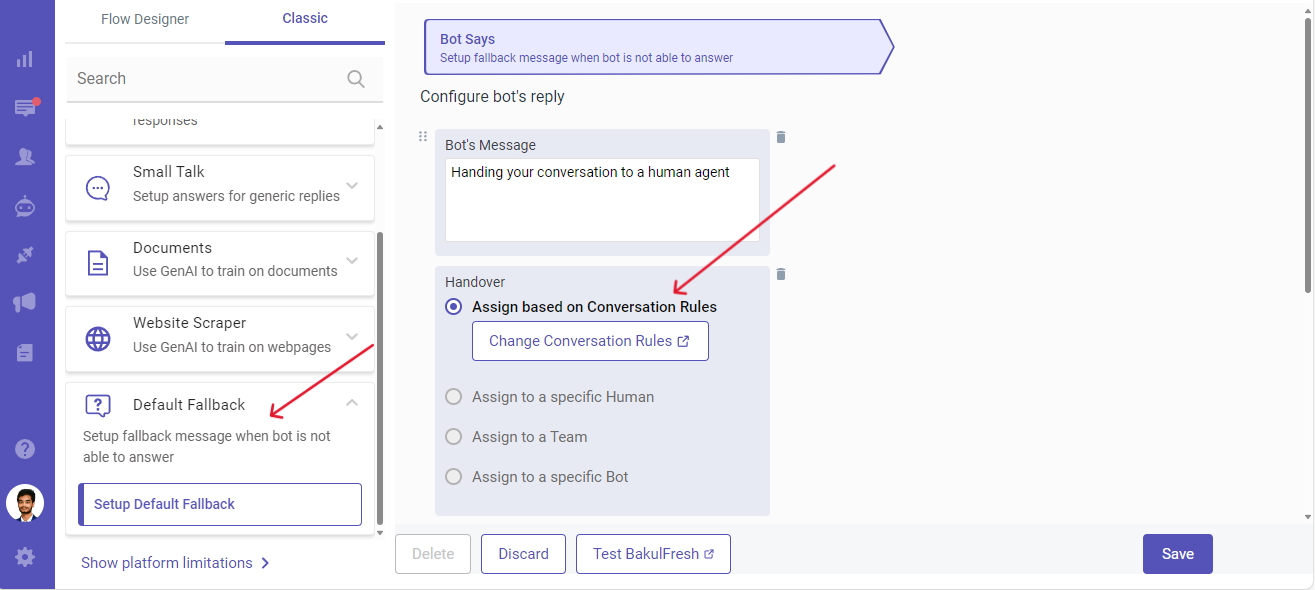
- As we did earlier, we will set up the default fallback option in the bot training section.
- This will ensure that the bot follows the conversation rules you set up and performs human handover.
Congrats! Your chatbot has been integrated with Zendesk Sunshine.
Conclusion
Many enterprise and mid-sized businesses use Zendesk Sunshine for their daily use. However, other players, including Intercom and Kommunicate, constantly outperform their AI models.
That’s why we’ve set up an easy integration guide so that you can benefit from superior AI models and the Zendesk ecosystem.
In case you’re looking to automate your customer service live chat and emails, we have the perfect solution available. Talk to us to know more!

Adarsh Kumar is the CTO & Co-Founder at Kommunicate. As a seasoned technologist, he brings over 14 years of experience in software development, artificial intelligence, and machine learning to his role. His expertise in building scalable and robust tech solutions has been instrumental in the company’s growth and success.


