Updated on mayo 5, 2025
POV: Your business is growing. You have more leads pouring from all directions. You have to start catering to customers with better efficiency lest you lose the very factor that drew towards you – customer service.

But, there is a challenge. You have been running your store offline for so long. An offline store in today’s mobile app world is almost a fossil. It cannot sustain itself for long. You have to get on to the eCommerce bandwagon sooner or later. Statista forecasts that retail e-commerce sales will cross 7.4 trillion dollars by 2025. eCommerce is the future, and your business needs to get on the bandwagon before it is too late.
Shopify offers the easiest path for that. Shopify has becomethe de-facto platform through which anybody can launch their online store.
According to builtWith.com, over 3.9 million eCommerce sites are built with Shopify.
The biggest benefit is that you don’t have to worry about servers, development costs, and similar technical challenges that can derail you from the everyday act of running the business.
Don’t let technical challenges bog you down. With Shopify, you can take your business growth to new heights. While you check out Shopify, you can also consider alternatives to Shopify if you have a complex setup. Here is a detailed walkthrough of what you need to do at each stage to make Shopify work for your business.
Step 1: Visualize your Shopify store
First impressions last forever, and there is no denying this fact. And it holds true for online shopping as well. Your prospective customers will decide to buy from your store or close the tab and move on in less than 5 seconds. So it is critical that you create an impressive first impression for your Shopify theme store.
Shopify makes it relatively easy to create an account and start your online store. This does not involve any delays. However, it is ideal that you prepare yourself with some information that will make the rest of the process easier. The planning process begins with sketching what your store will look like and how it will function.
Of course, it could be overwhelming to decide on something so critical very early on in the planning phase. To make things easier, ask yourself these questions:
- If you were to visit your online store as a customer, what would it look and feel like?
- What would the home page be like?
- What components will be present, and how will you search and find products?
- How will you feature the products/product categories on the home page?
Use a wireframe to visualize your ideas in such a manner that you can translate your ideas into a real-world online store. Once a vague idea has formed, do flesh out the visuals in your mind on pen and paper. Wireframes also give an idea about the scale of a component, the need for copy, how each component will react, and so on.
If you feel overwhelmed with too many ideas, create a mind map that groups together ideas into epics and related topics. This will help you articulate your thoughts in a decent fashion before getting on to work on the Shopify platform.
Having this information beforehand will give you the confidence to march forward and take care of bigger things that will bring your Shopify store to life.
Step 2: Name your Shopify store
Your store name is essentially the brand name with which customers and the world at large will remember your business.
While it is great to get creative with naming your online store, take care not to go overboard with a name that is confusing, misleading, or even illegal. Follow these pointers to ensure that you name your Shopify store the right way:
- The name should be short and easy to remember.
- It should be legal.
- It should not be confusing or identical to any other existing business name.
- The name should suit your business as it grows.
- The name should carry some meaning, ideally related to your product/offerings.
- Check for the domain, trademark, and copyright availability.
- The name should be easy to spell.
- Be culturally sensitive.
Know that you can incorporate or register your business with the State using a business name and have a separate brand name. In other words, you can have a separate company name and a brand name. You can use The company name for all legal contracts, transactions, etc., while the general public and customers will know you by the brand name.
Now that you have a clear idea of what your Shopify store should be called and how your store will look, it is now time to login to Shopify and create your Shopify account.
Reduce response time, enhance support workflows, and improve customer satisfaction with AI-driven email ticketing from Kommunicate!Step 3: Create a Shopify account
Now let’s get down to the business of setting up the Shopify account. Head straight to the Shopify website.
The first fold itself will ask for your email address to create an account.
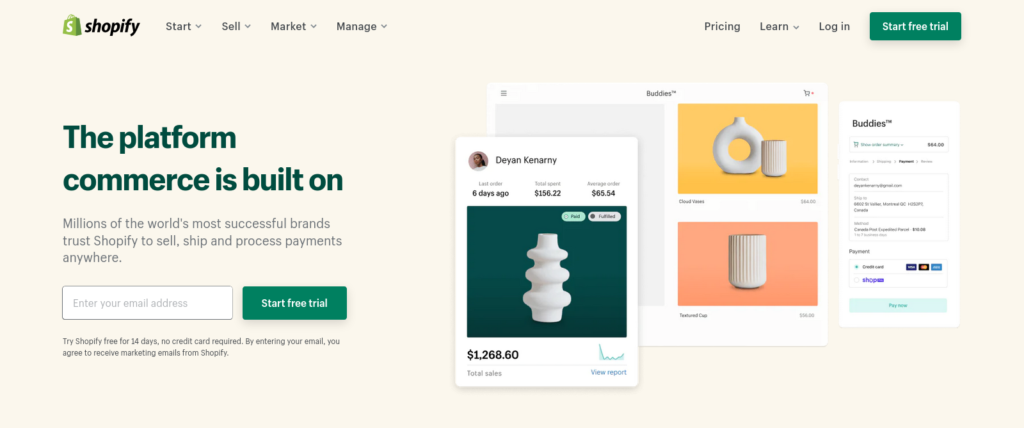
By signing up for an account, you get to try Shopify free for 14 days. Unlike most online services, Shopify does not ask for credit card information upfront. So you don’t have to worry about discontinuing the trial upon the expiry of the free trial.
Once you enter your email address, you will be redirected to a page where you have to set up a password for your account. You’ll also get a unique URL based on your email address. Feel free to change it if you want to personalize it with your business name or your first name, for example.
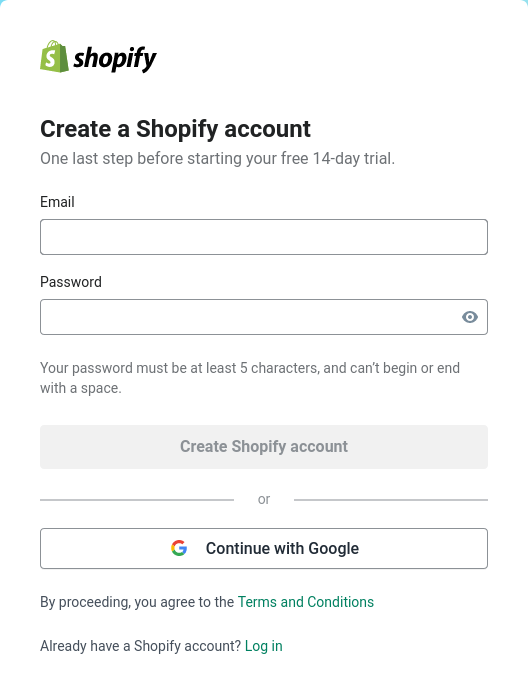
Note: The URL you see is for you to access the Shopify console and not the domain address that customers and the outside world will use to reach your website.
Once you have given all the inputs and are satisfied with them, click on the ‘create your store’ CTA to proceed.
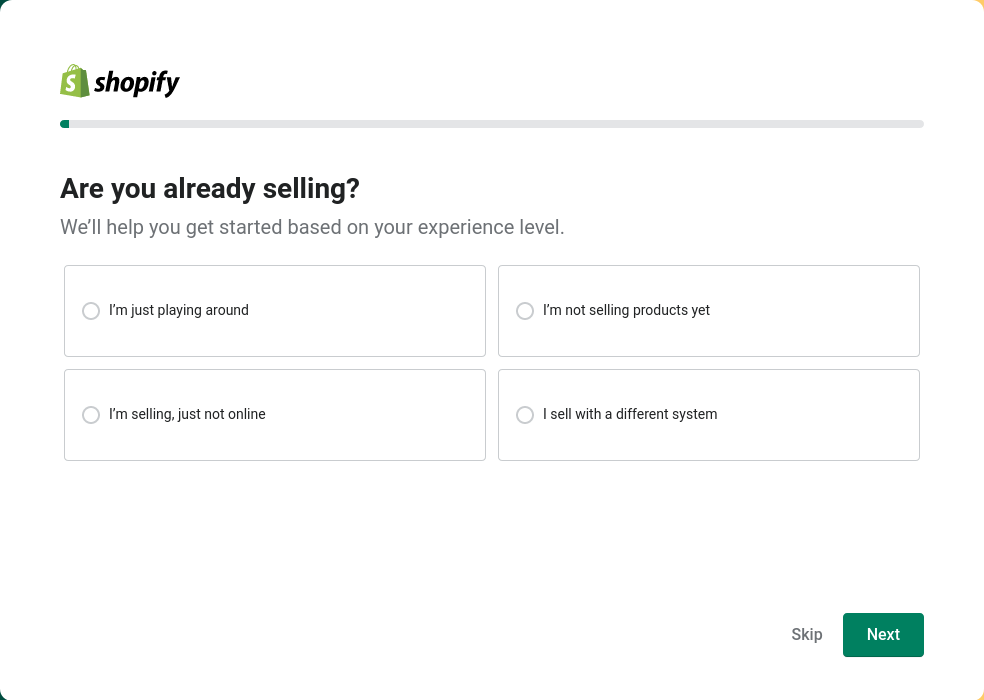
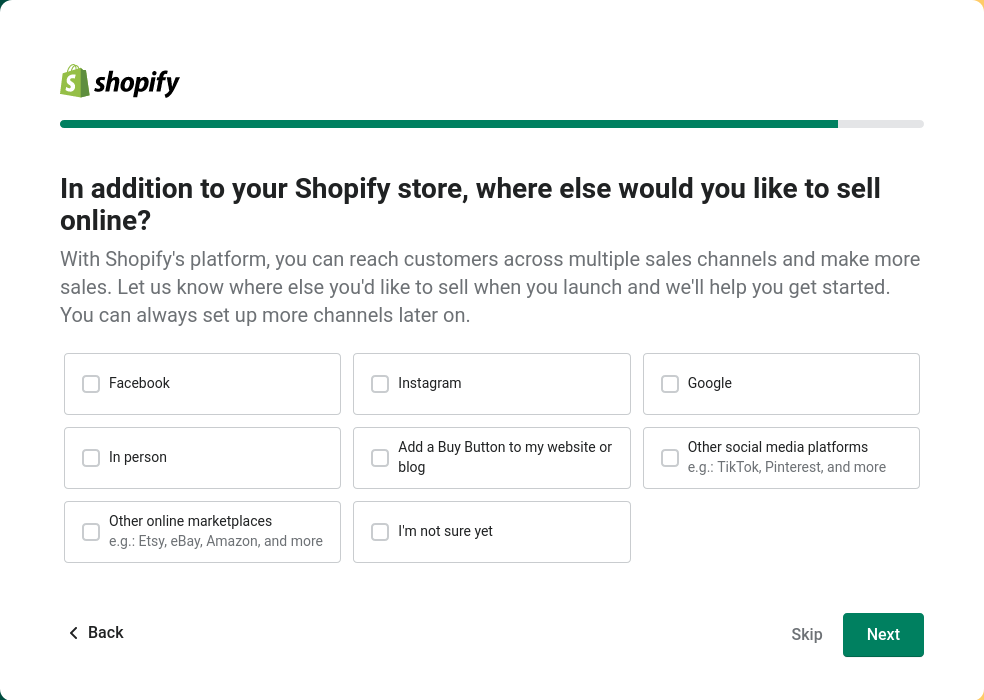
In the next step, Shopify will ask some questions to understand your needs and offer relevant offerings.
The store also gives an option to sell across social channels like Facebook, Instagram, and Google, along with in-person selling.
In the next step, you have to choose the country or business location. Shopify will recommend the default shipping rates, currency, and much more based on this location.
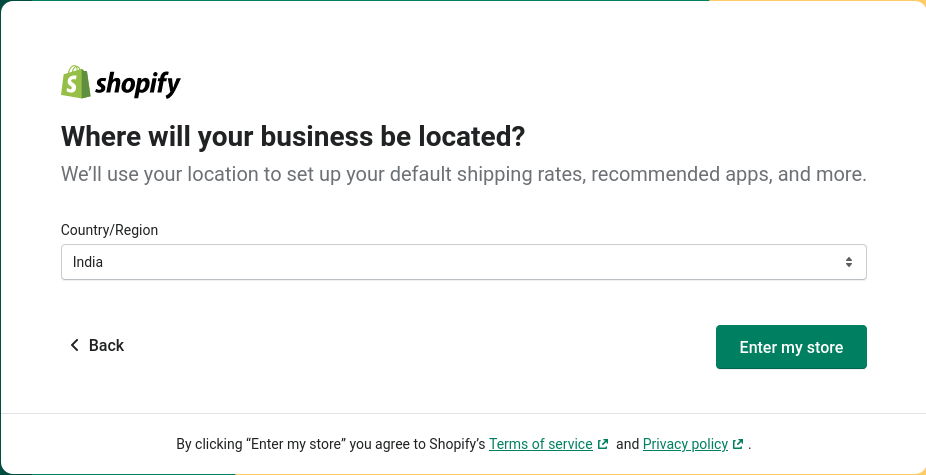
Upon finishing this step, you will be able to enter the Shopify control console. Here, you can configure all your store settings.
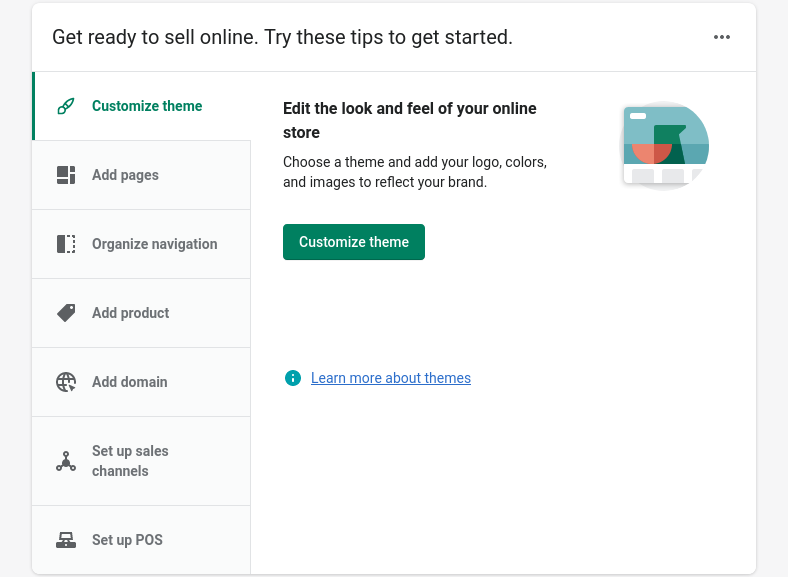
Step 4: Select and customize a Shopify theme
One of the striking features of the Shopify eCommerce platform is the pre-built themes. Using these themes, you can use to customize the look and feel of your website. The Shopify theme store offers 70+ premium and free eCommerce website templates, crafted by some well-known web designers. Rest assured, your store will have a cutting-edge look and feel that earlier was the vestige of brands with deep pockets.
The theme is an overall visual appeal of your website. It is the front end of your website. It is how your website looks on the web, mobile, or any other device.
To customize the theme, click on the ‘Customize theme’ button in the admin panel. You can preview the themes before choosing the right one that suits your preferences.
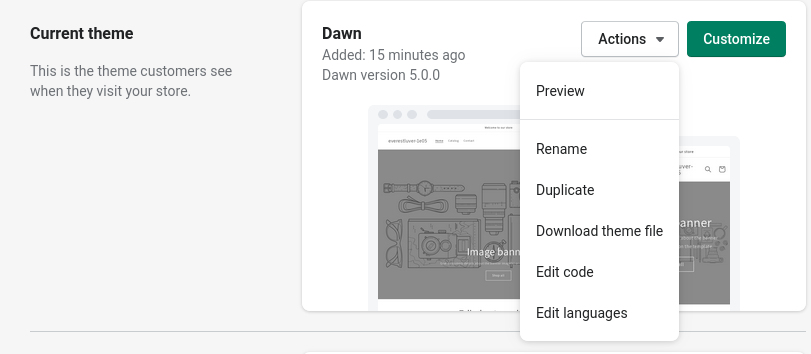
You may also explore the ‘Theme library’ to find more free and premium themes.
Step 5: Get familiar with the Shopify dashboard
The Shopify dashboard is fairly simple and easy to navigate. You have separate sections to control orders, products, customers, analytics, marketing, discounts, and also to the integration of third-party apps.
You can find all the controls in the top left corner just below the home button.
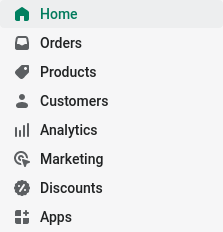
- Home – To access the homepage of the admin panel where all controls are visible.
- Orders – current orders, payments from customers, orders to be shipped, abandoned checkouts, and so on.
- Products – Manage your products, inventory, transfers, collections, and gift cards.
- Customers – A unified view of all customers, their contact details, a summary of order history, segment, etc.
- Analytics – A bird’s eye view of key metrics about the store performance, including sales, online conversion rate, unit of products sold, sales by social source, and much more.
- Marketing – Online store performance, orders, and sales from marketing, marketing cost, and marketing apps that are integrated to augment the store performance.
- Discounts – create and manage discount codes, promo codes, etc., that customers can apply at the checkout stage.
- Apps – Apps that your store could be using or can use to facilitate specific operations like cash on delivery management, sale countdown timers, social sales channels, etc.
Suggested Read: Top Shopify Bots & Sneaker Bots for Your Store [2022]
Step 6: Optimize the settings of your store
There are some basic settings you must enable in your Shopify store so that handling online transactions becomes a breeze through. This involves setting up store contact details, shipping and delivery addresses, taxes and duties, default store currency, time zone, shop policies, and so on.
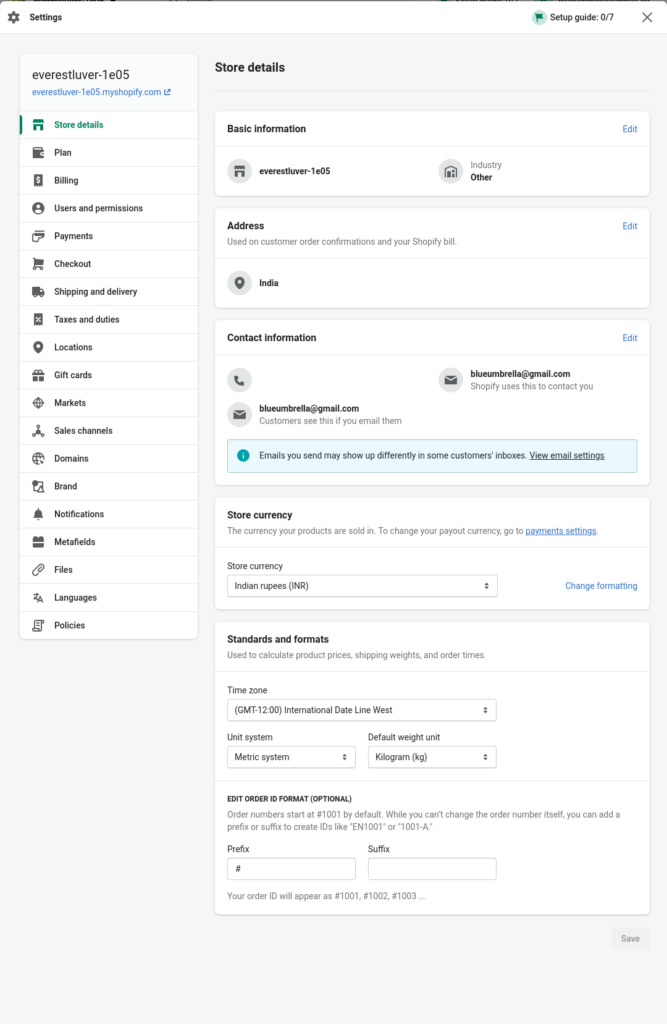
All of these can be configured by clicking on the ‘Settings’ button located at the bottom left corner of the admin panel.
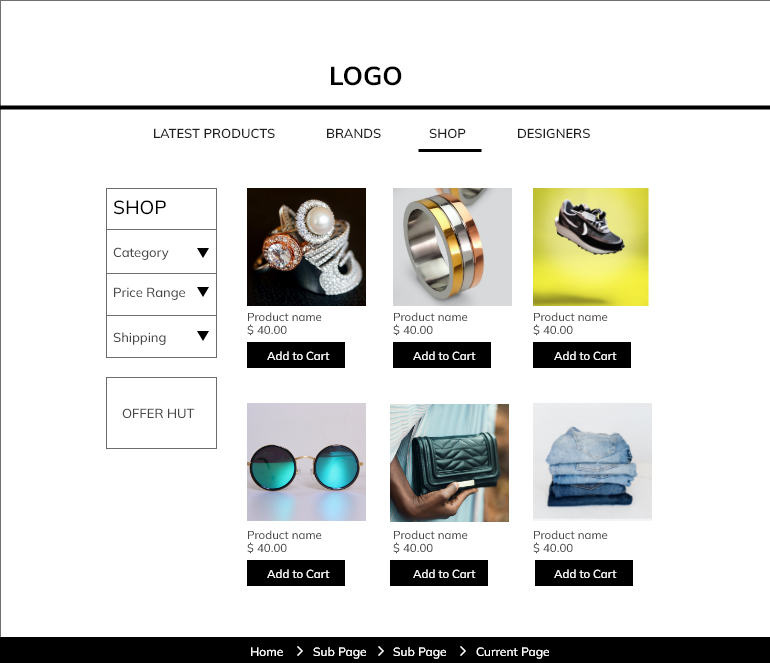
Step 7: Add Products to your Store
Adding a product to your Shopify store is a fairly simple process. If you are used to uploading images or media on any social media channel, you will get used to this easily.
Follow this checklist to ensure that you add products the right way to your Shopify store:
- Title of the product – less than 70 characters
- Description of the product – less than 320 characters
- Product images, videos, or 3D models
- Pricing
- Tax
- Inventory
- Barcode (ISBN, UPC, GTIN, etc.)
- Weight, if a physical product
- Physical/digital product
- Country of origin
- Harmonized System code
- Product attributes
- Size
- Color
To keep all products organized, add details like type, vendor, collections, and tags.
You can also select through which channels the product has to be sold, like online store, Facebook, Google, POS, buy button on the blog, etc.
Step 8: Create Discounts
Let’s face it. More and more customers flock to online shopping websites, drawn by their discounts. So, it is inevitable that your store has some discounts and offers ready before the store launch.
Shopify has a dedicated section where you can create custom discounts, promo codes, and much more.
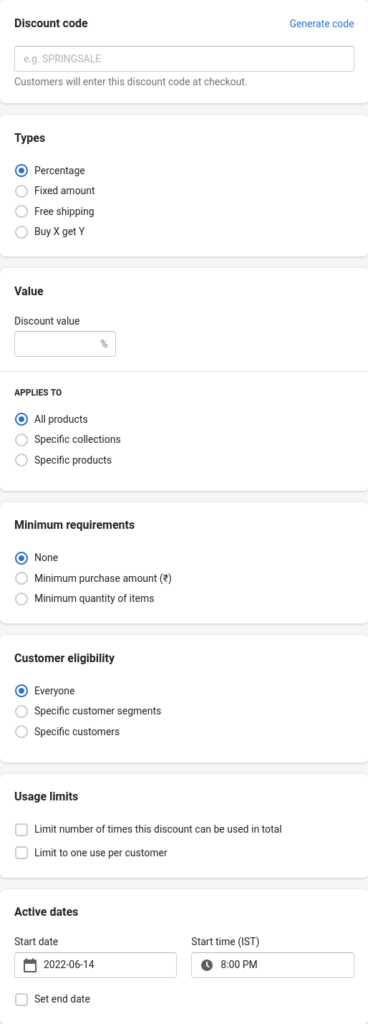
To create a discount offer, follow the below-mentioned process:
- Click on the Discount tab on the left tab
- Click on the ‘Create discount code’ CTA
- Add the following details:
- Discount code. Example: SPRINGSALE
- Determine discount type as a percentage, fixed amount, free shipping, or buy X get Y
- Set minimum requirements, if any
- Configure customer eligibility
- Set how many times the offer can be used
- Set start dates and end date
- Save discount code
Step 9: Add apps to your Shopify store
Apps make it easy to run your Shopify store. They give extended facilities that Shopify, by default, may not be providing. With apps, you are spared the need to build features from scratch that your store might need to run smoothly. In fact, these apps are built to forecast the needs of online shop owners.
Some such apps that can make your Shopify store run smoothly include:
An easy-to-use Shopify app that will maximize your store’s search engine ranking. It comes with a built-in keyword tool and offers suggestions apt for each product. You can also conduct periodic SEO health checks, bulk edit meta titles and descriptions, find 404 broken link redirects, and much more.
Even if you are someone new to the world of SEO, Plug-In SEO offers training videos that will help you get used to the tool easily.
Free shipping is one of the prerequisites most customers look for while trying to make a purchase. With the free shipping bar app, you can easily promote free shipping offers across products, increase cart value, and target customers based on their location, age, and other parameters.
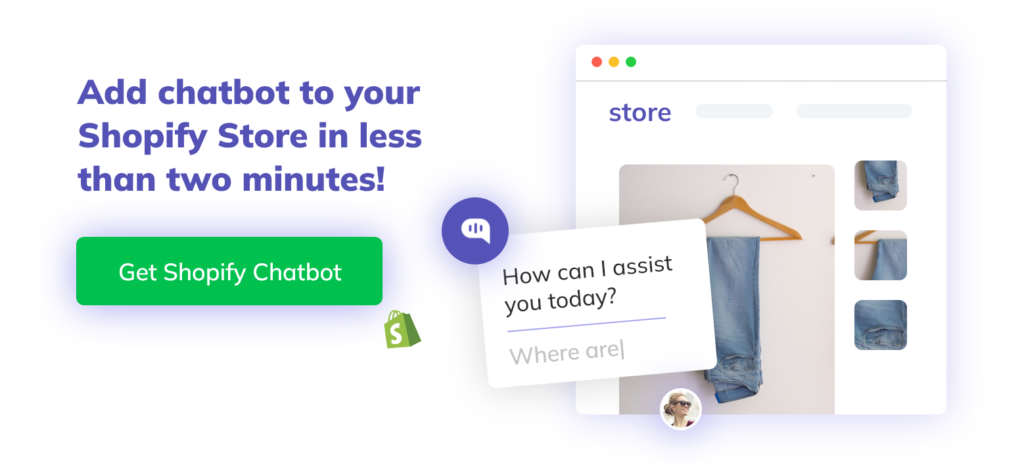
As an online store owner, you will not have the liberty of time to attend to all website visitors and their queries. With E-commerce chatbots and live chat software like Kommunicate, you can easily converse with customers and resolve their queries.
It will also simplify your eCommerce support operations which otherwise will be slowed down due to the limitations of human agents. An ecommerce chatbot guide can help you choose and implement the right chatbot for your business, streamlining customer interactions and improving overall efficiency.
As the name suggests, the sales countdown timer is a Shopify app that will let you insert a sales Countdown Timer, Bar, Clock, or Counter to your special sales or offers.
They help in creating an urgency that will motivate more sales and will also help show available stock for sale.
Dropshipping is a common practice in the eCommerce industry. There are countless Shopify stores that act as the virtual storefront for dropshipping businesses. With AliExpress Dropshipping Shopify app makes it easy to find and import new products easily while coordinating with new vendors seamlessly. Further, it allows for processing hundreds of orders at once.
If you wish to know more about the top 7 apps you need to have in your ECommerce store, check out our blog here.
Step 10: Create standard pages
Standard pages are those pages that customers and almost everyone would expect to find on a website.
For example, About us, Contact us, Support, Frequently asked questions, etc.
About us:
This page is a wonderful opportunity to showcase your store’s story. Instead of writing a generic copy of what the business is doing, do include a small story of what led to the creation of the online store, its purpose, mission, and vision.
Contact us:
One thing that instills confidence and trust in the minds of online shoppers is getting access to the contact information of the seller. Most e-retailers, including Amazon, purposefully hide their contact information in an attempt to make it difficult for customers to reach them with trivial queries.
While a brand like Amazon could afford to do it, small businesses must include detailed contact information like phone numbers, email, social media channels, etc., which will make it easy for customers to reach out for anything and everything.
Customer support/FAQs
No matter how transparent your shipping policy is and how intuitive your product is, customers would still want to reach out to the business and find information.
Hence, it is ideal to have a sub-page for customer support where all information, including user guides, solution articles, FAQs, and so on, are compiled and housed for easy access.
Suggested Read: Shopify Pricing in 2022: You can’t miss this Guide
Rome was not built in a day, but a Shopify store can be
That’s the thing about Shopify stores. It can be built in a day without much hassle. You don’t need a developer or a designer to design and launch a world-class online store. It has abundant features and apps that can maximize your productivity as an online store owner.
If you are in the works of launching a Shopify store, this guide will make it easy for you to launch it without breaking into a sweat.
At Kommunicate, we are envisioning a world-beating customer support solution to empower the new era of customer support. We would love to have you onboard to have a first-hand experience of Kommunicate. You can signup here and start delighting your customers right away.


